13 Tips for a Better Oil-Based Varnish Finish
For several thousand years, flax has been grown so that its supple fibers can be woven into linen cloth and its bitter seeds pressed into a slow-drying oil—linseed oil—that has proved perfect for mixing with “earth colors.” This is traditional oil-based paint: just oil and pigment.
Later on, some alchemists began blending in ground-up resins (dried tree sap) like amber, frankincense, and copal to fortify the linseed oil and create the film-forming coatings we call varnish. Formulas were created for finishing everything from sailing ships to violins. In the late 1800s, the coal and oil industries developed new chemicals that gave rise to synthetic resins, including aliphatic, phenolic, and eventually urethane.
For the last 100 years or so, oil-based varnish has been a standard coating for most furniture and woodwork. Modern oil-based polyurethanes are a blend of several different resins mixed with the same type of oil, typically pressed flaxseed or linseed oil.
I have gathered tips from friends and colleagues in the conservation and restoration trades and from my own experience to help you get the best results with this easy-to-use and versatile varnish.
Mike Mascelli teaches finishing and upholstery all over the United States.
The right brush makes a difference.
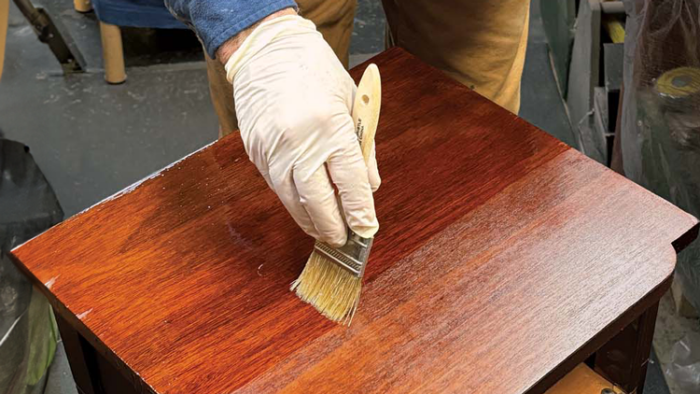
Oil-based varnish is best applied with a top-quality natural-bristle brush with flagged tips (bristles that are split at the tip). Alternatively, you can use less expensive chip brushes, which also have natural bristles and flagged ends but are not as uniformly made and don’t hold as much varnish.
Varnish is slow drying, and once applied, it can be tipped off using light pressure with the very end of the brush in long strokes along the grain. This will even out the brush marks and ensure even coverage.
Good surface prep is essential.
 |
 |
Traditional guidance is to sand to 220 grit before applying varnish. This advice is based on the fact that most oil-based varnishes will fill in 220-grit scratches.
That is less true of most of the waterborne varnishes, which build a thinner film with each application. If you sand to 220 grit with a random-orbit sander, it is almost impossible to get rid of the little swirly circles, especially in the harder, less porous woods like maple and cherry. It may seem counterintuitive, but the way to perfect prep is taking a step back in grit.
Sneak preview
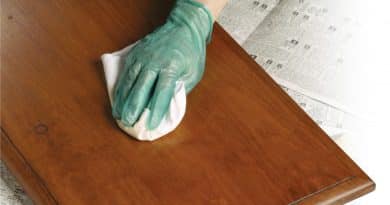
Alcohol reveals all. Great finishes start with careful selection of the wood and careful preparation of the surfaces to be finished. An easy way to preview your finish is to wipe the bare wood surface with a cloth dampened with denatured alcohol.
This will show any sanding scratches, will reveal blotching—especially on cherry and birch—and will give a sense of how much darker the end grain will be than the flatsawn surfaces. Alcohol evaporates quickly and will not raise the grain.
Satin, gloss, or both
For a high-use area like a tabletop, it is best to build several layers of finish for maximum protection. If the goal is a satin or semigloss look, one option is to build coats with a gloss varnish such as Minwax Oil-Based Poly and then use a Minwax satin or semigloss for only the last coat. This will get you both the clarity and the sheen that you like.
Reconsider using Spar
Spar varnish was originally formulated for the masts and spars of sailing ships and therefore had to be elastic enough to endure the expansion and contraction of the wood parts. This elasticity was achieved by using considerably more linseed oil, and perhaps other oils, to make a long-oil varnish.
Spar varnish works well for exterior doors, as it often has some UV blockers added. However, the popular home-brew oil-based wiping varnish recipe is to add even more boiled linseed oil to spar varnish, which makes for a very slow-drying, very soft, and very thin film finish. It is simple to apply and wipe off, and it gives a soft glow, but it does not offer nearly as much protection as a good-quality interior varnish.
Work with gravity
When finishing a complex project like a table, it is important to plan and rehearse the steps you will use for each area. Both oil-based varnish and wiping varnish tend to run or sag on vertical surfaces.
Whenever possible, orient the piece so that the surface you’re coating is horizontal, even if that means flipping the piece around several times and letting each section dry. Generally, legs and aprons do not need as much film finish as tabletops and can often be done first, leaving the most-seen and most-used parts to be done last.
Between coats
Oil-based varnish dries slowly, and it is difficult to keep dust off during that time, so it helps to lightly sand between coats. Here are a few things to keep in mind.
|
Finishing the finish
Often in the finishing process, there tends to be very little finish film on the edges, and it is easy to simply rub right through to the bare wood. You can use tape to protect the edges.
When rubbing out a film finish on something like a tabletop, it is a good practice to place some blue masking tape so that it covers the last 1/8 in. of the edge of a surface. When the rest of the top is rubbed out, pull the tape and gently run a bit of 0000 steel wool on the edge to harmonize the gloss.
Wax gets the final word.
Fill and shine with wax. It is possible to build layers with gloss varnish and then gently abrade or rub the cured film with a fine abrasive (320 or 400 grit) to lower the sheen. Adding some paste wax will fill in some of the scratches and raise the sheen.
Brush care
With proper cleanup and care, good brushes can last a lifetime. I still regularly use my father’s brushes from the 1950s. My brush cleanup is a two-step process with mineral spirits and lacquer thinner.
I use the same process on my father’s brushes as I do on the chip brushes I recommend my students start with, so that they aren’t spending $75 to $100 on a brush right away. Wear rubber gloves, work in a well-ventilated area, and clean brushes right after using them.
Pour enough mineral spirits to cover the bristles in a container. Dunk and press the brush in the mineral spirits to get out as much finish as you can. Then wipe off any excess mineral spirits. Give the brush a final dip in lacquer thinner to get it squeaky clean, then brush out the lacquer thinner onto an absorbent surface or a rag.
 |
 |
How to ditch dirty rags
An important but often overlooked practice is how to carefully handle and dispose of any rags, especially paper towels, used with linseed-oil products. As oil-based products dry, they give off heat and can spontaneously combust. Never throw oily rags into a pile, as that concentrates and increases the heat.
The layers will dry at different rates, creating a situation where the rags can automatically ignite. Instead, dry the rags separately or use water for safety.
Small rags can be dunked temporarily into a secure metal can full of water and covered with a lid. Ideally, all rags should be set apart outside to fully dry for several days, at which point they can be placed in the trash.
Oxygen and contaminants are the enemies.
You’ll rarely go through an entire container of finish in one session. Once the container is open, there are a few steps you can take to extend the life of the unused finish. The biggest hurdle you’ll face is that when you pour out the finish to apply it, you create space in the can.
To preserve the remaining varnish, you must battle the oxygen that causes it to dry. There are a few ways to do that and keep the finish free of contaminants.
 Do not work out of the can. Pour out enough for the task into a clean cup or jar, and never put any unused varnish back in the original container, as it is very likely full of dust and will contaminate the new finish. |
 Displace the air in the can. You can use a product called Bloxygen, which is simply argon gas, to displace the air on top of the can and form a barrier on top of the liquid varnish. Tip up the lid just enough to insert the nozzle, spray in the gas, and quickly close the lid. |
 Wipe the rim of the jar with Vaseline, then place the plastic cover over the opening before screwing on the top. You can take up space with clean glass marbles or golf balls. |
 Collapsible bags like those from StopLossBags are another option, but they can be messy to fill. |
Be safe out there
All commercially sold finishes are required to post safety information in an MSDS (material safety data sheet), which can be found with a simple Google search for each product.
Most finishes, even waterborne and environmentally friendly products, contain solvents that should not be inhaled or allowed to seep into your skin. Good airflow, disposable gloves, and a decent cartridge-type respirator should be part of all finishing jobs. v
Fine Woodworking Recommended Products
Odie’s Oil
Ease of Use = Very Good
Sheen = Excellent
Appearance = Very good
Non-Yellowing = Very good
Water/Stain Resistance = Excellent
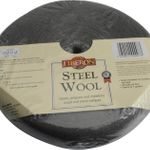
Liberon Steel Wool
Perfect for rubbing out a finish for a low-luster sheen.
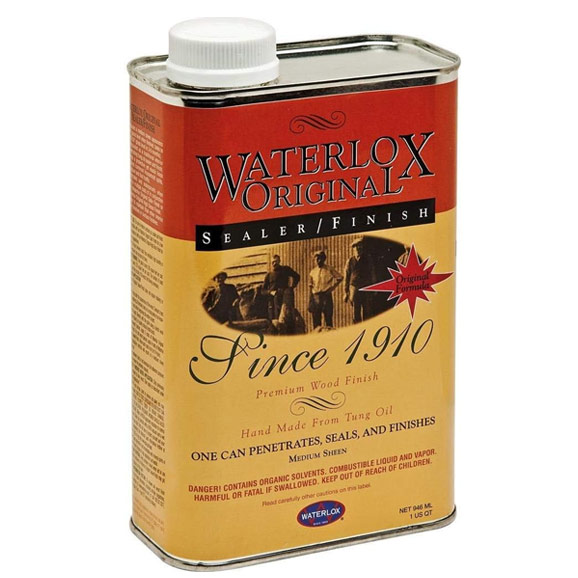
Waterlox Original
Versatile wiping varnish is easy to apply and great for both satin and gloss finishes.
Sign up for eletters today and get the latest techniques and how-tos from Fine Woodworking, plus special offers.


