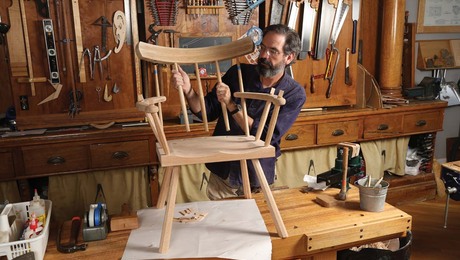
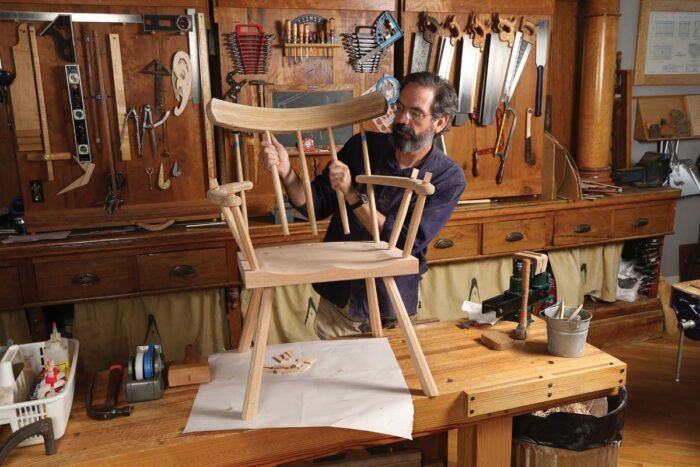
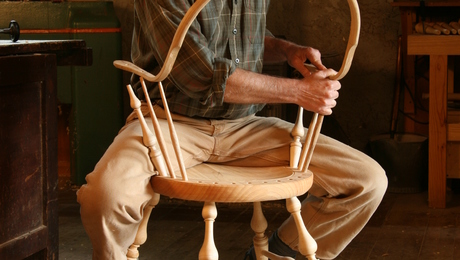
Chris Schwarz’s Irish stick chair
Many woodworkers avoid chairmaking because it requires so many specialty tools and exotic techniques that it seems to be an entirely separate craft, such as leatherworking. To make a Windsor chair you might need a lathe, steambox, shaving horse, drawknife, adze, scorp, travisher, and froe—plus a bunch of specialty boring tools. And you need to learn to split and season green wood.
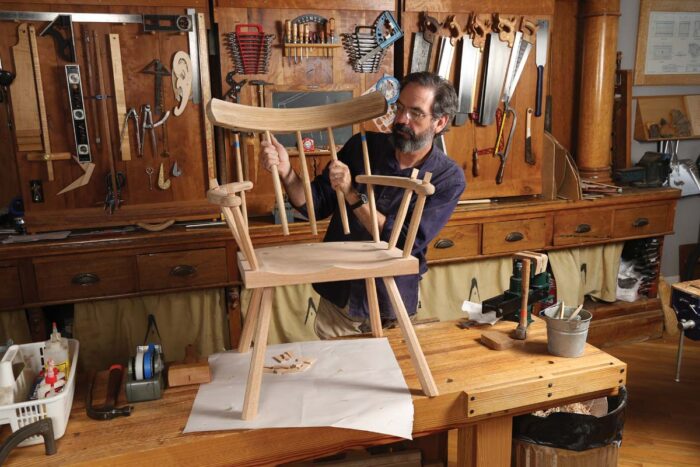
There is a simpler way. For the last 20 years I have studied and built vernacular stick chairs. These robust, angular, and comfortable chairs were historically made by part-time woodworkers in Wales, Scotland, and the Scandinavian countries who needed chairs to go by the hearth. The makers used common woodworking tools and whatever wood was on hand—sometimes even a branch from the hedge, which is one of the reasons they are called stick chairs and the parts are referred to as sticks. And though the joinery was simple, the chairs have survived for hundreds of years and today are prized by collectors.
Here are some ways these long-forgotten woodworkers built chairs without special tools.
Wood selection
I usually use kiln-dried wood from the lumberyard for my stick chairs. You need straight-grain stuff for the legs and sticks. Once you find a board with straight grain, split or saw out your parts so the grain runs continuously from one end of the part to the other.
Ring-porous species, such as oak, ash, and hickory, are easy to split. Avoid boards with pronounced cathedral grain patterns. The grain in those boards is never straight.
After studying and building hundreds of stick chairs, I have learned to set my expectations. Small inaccuracies in angles are found on all handmade chairs. In fact, ones that have been made with jigs look lifeless to me. I never try to make mistakes or drill off-angle. But when it happens, I am more forgiving with myself and allow the chair to express itself. And that is one of the most important lessons these chairs have taught me.
Legs, no stretchers
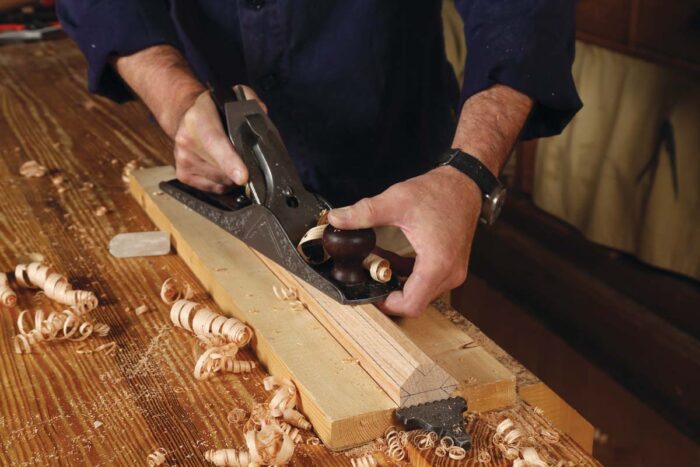
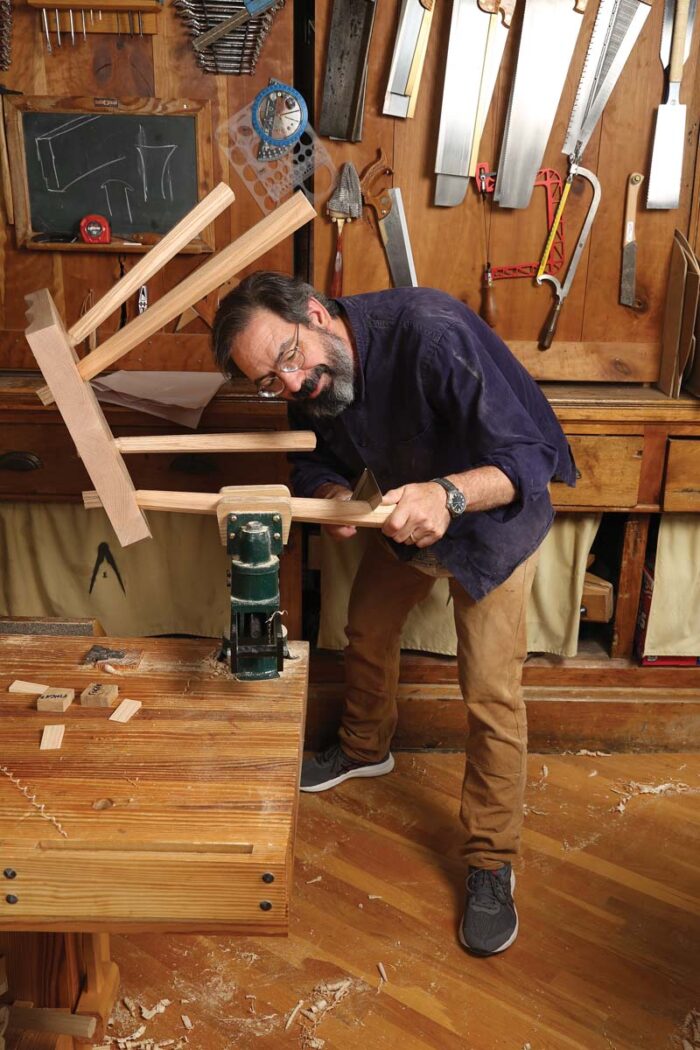
Instead of turning the legs, stick-chair makers would plane or shave them to a hexagon or octagon. If they wanted a round leg, they would continue planing the octagon until it looked turned. I make legs and sticks by shaping them to octagons either at the bench with a hand plane, at the bandsaw with a jig, or at a table saw. Half of the antique stick chairs I’ve encountered over the years have no stretchers. And they have survived centuries just fine.
No-measure octagon layout
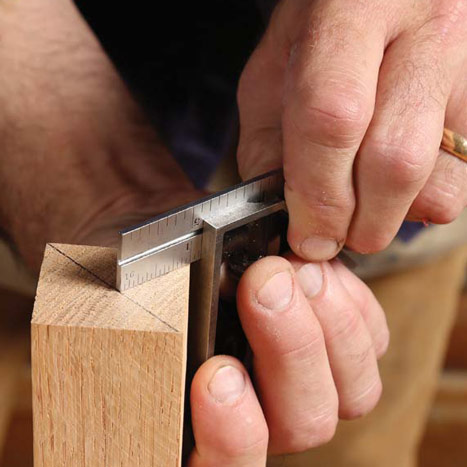
One diagonal line will give you everything you need to lay out the octagon on the legs.
 |
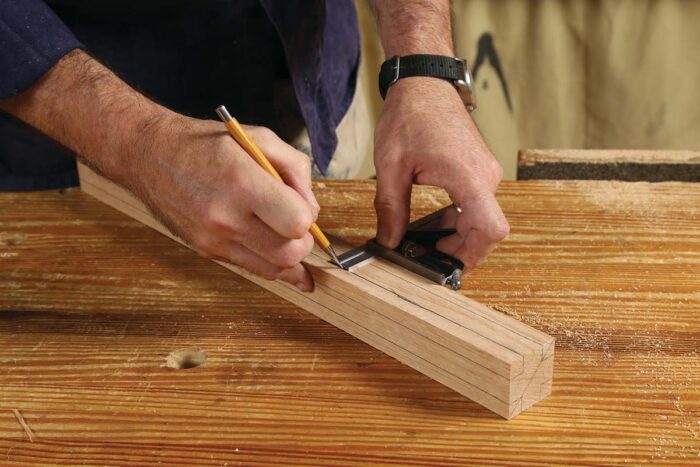 |
First, draw a diagonal line between two opposing corners. Then set a ruler from one of the remaining corners to that line. Use that setting to draw two lines on each face of the leg.
Set the leg blank in a simple holding jig, and hand plane the corners, stopping when the facet meets both lines on either side of the corner.
Tapered legs
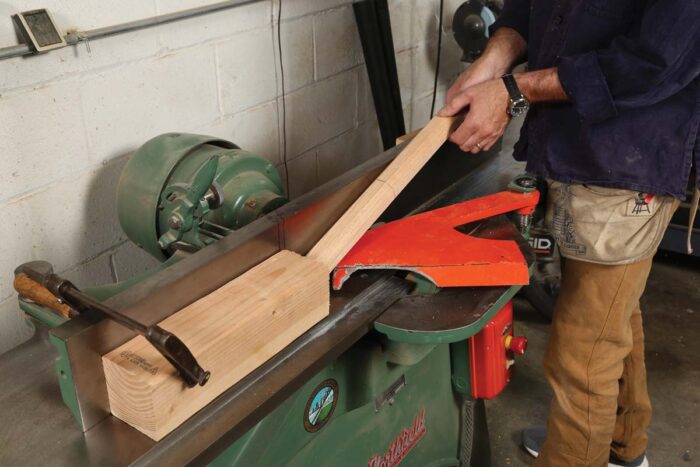
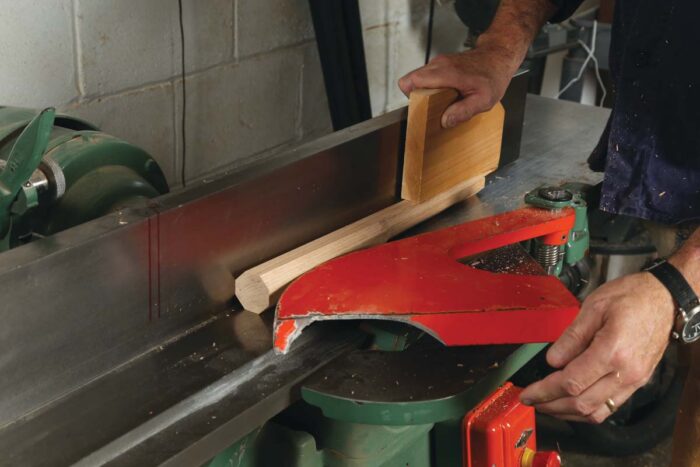
You can taper the legs with a jack plane at the bench. If you have a lot of legs to do, the jointer is a fast alternative. The goal is to taper one end down to a 1-in. octagon. Clamp a stop block to the jointer fence 10 in. from the center of the cutterhead.
On one facet after another, make each pass until the leg hits the stop block, then lift the back end of the leg. Remove the stop block and turn the leg end for end. For the next passes, use a push block to “pop a wheelie” with the leg—creating the taper.
Stop short. Set the jointer to cut 3⁄16 in. deep. Clamp a stop to the outfeed table, 10 in. from the center of the cutterhead. Joint each facet of the octagon; when it hits the stop block, lift the back end.
Joinery that lasts
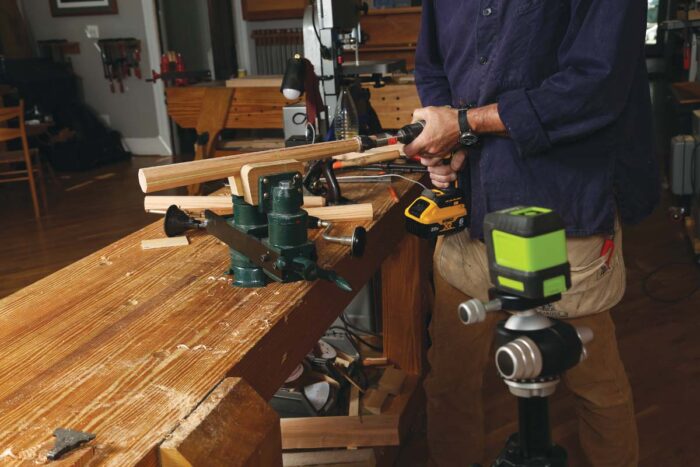
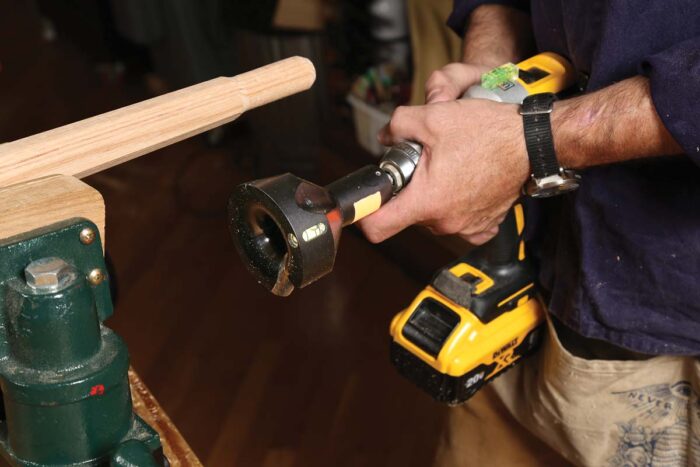
The mortises in the chair seat are made with an auger bit. I make the tenons with an inexpensive tenon/plug cutter. This tooling is designed for the drill press, but I have found it works well in a handheld drill. The only trick you need is to first taper the tip of the leg so it enters the mouth of the tenon/plug cutter.
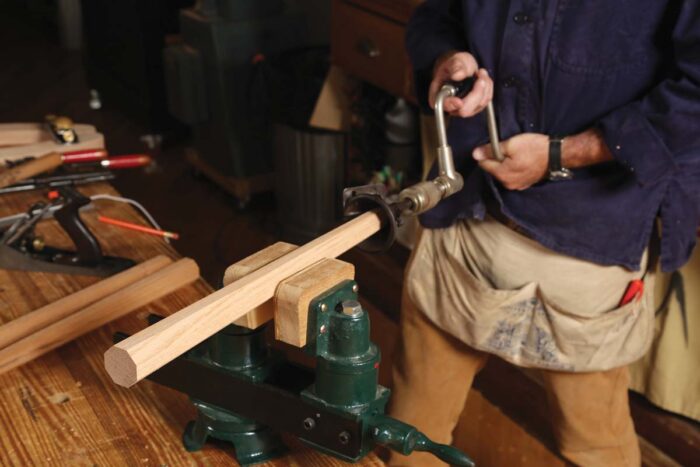
With a spoke-pointer, cut a chamfer on the end of the leg to prepare it for the tenon cutter. Smooth it out with a block plane. You can buy spoke pointers new, but vintage ones are significantly less expensive. Another alternative is to create the taper using a chisel or a rasp.
Score the shoulder of the tenon with a marking gauge. Create the tenon with the plug cutter, making adjustments to center the tenon. A laser level on a tripod helps you to level the leg in a vise. If the laser line is splitting a facet in two, you are in good shape.
If you want to buy a high tech, modern tool you can also use a Veritas power tenon cutter and do the whole tenoning operation in one fell swoop. The cutter has a built in level and eliminates the need to chamfer, plane, and mark as you must with a plug cutter.
If you have a chair with stretchers, you can use these same methods to make the tenons for them. Most stick chairs use 3⁄4-in. or 5⁄8-in.-diameter tenons for the stretchers and sticks.
Seat logistics
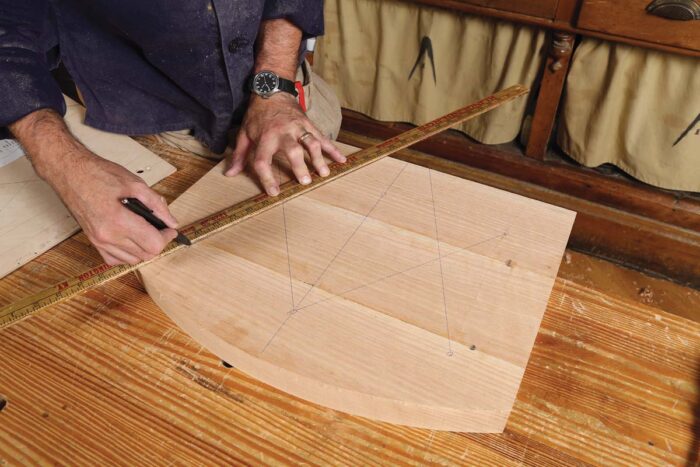 |
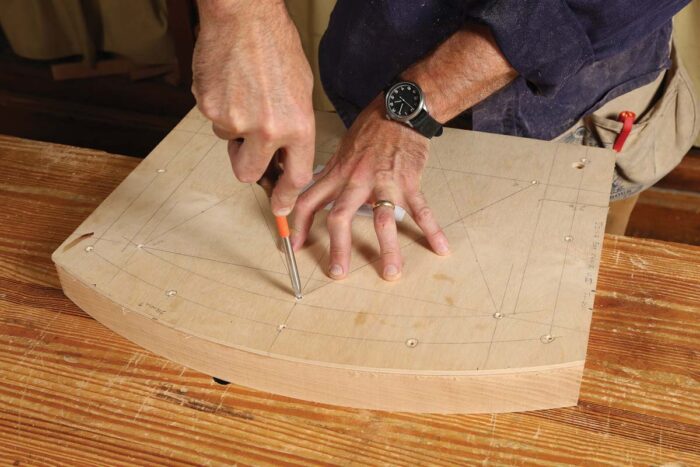 |
Lay out the locations of the mortises for the legs and armrest sticks and the sightlines that guide your drilling. Keeping all this information on a template speeds the process. Transfer and mark through the holes in the template onto the seat.
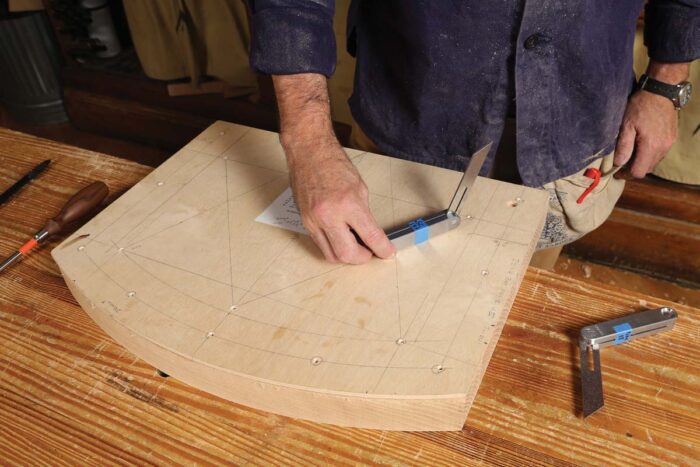 |
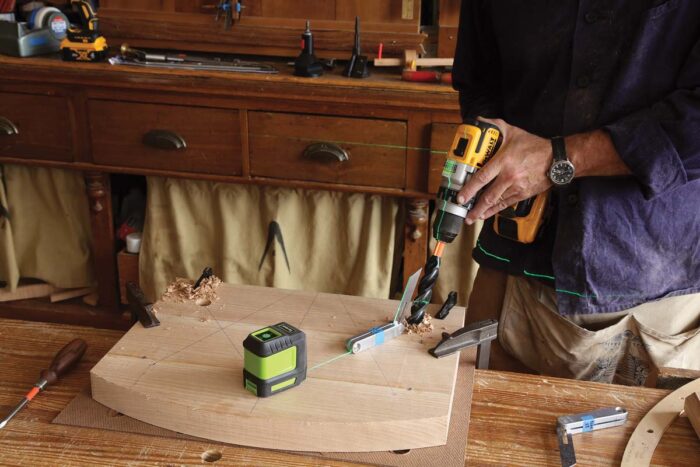 |
Set a sliding bevel to the drilling angle (sometimes called the resultant angle) and center the bevel on the sightline. To drill the mortises, line up the bit with the sliding bevel. You can put a construction laser on your sightline to help guide you.
The seat
You can use any wood for the seat and can glue up two or three boards to get to the desired width. The grain in the seat typically runs from right to left (instead of front to back). This allows you to use narrower stock. It’s easier to find a 16-in.-wide board than a 20-in.-wide board. And if you want to glue up the seat, it’s easier to find two 8-in.-wide boards than two 10-in.-wide boards.
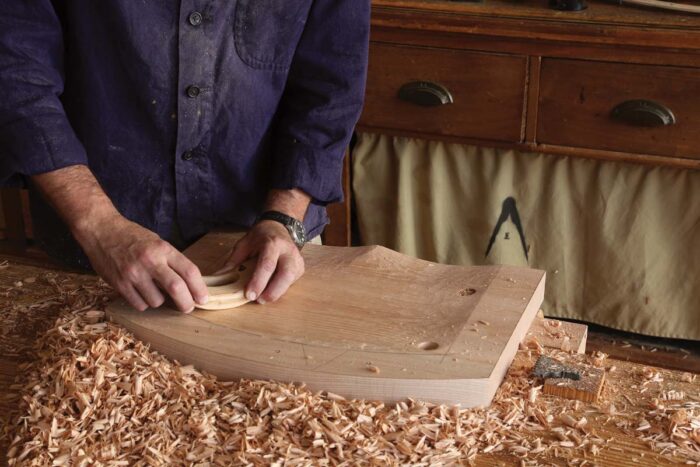
Many vernacular chairs use a flat seat and sit just fine. If the chair was saddled, it typically had a shallow saddle. I saddle all my seats because my customers like it. But you can skip the saddle and put a sheepskin on the seat, which is traditional.
If you want to saddle your seats, I recommend purchasing just one specialty tool: a travisher from Windsor Workshops. With their travisher, you can get the seat to shape and then finish the job with an orbital sander and a scraper.
Leg-to-seat assembly
 |
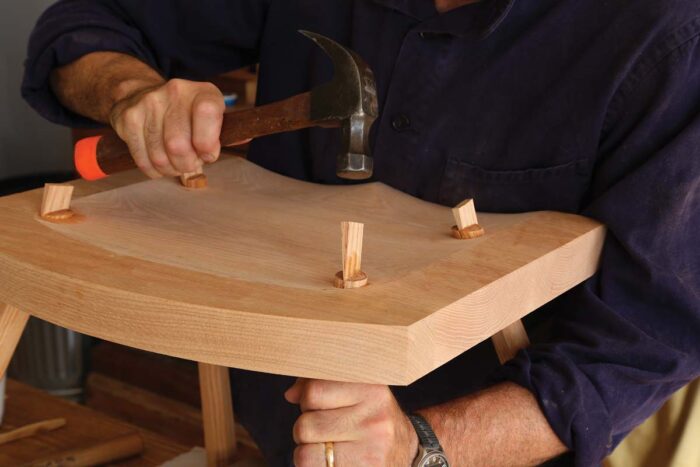 |
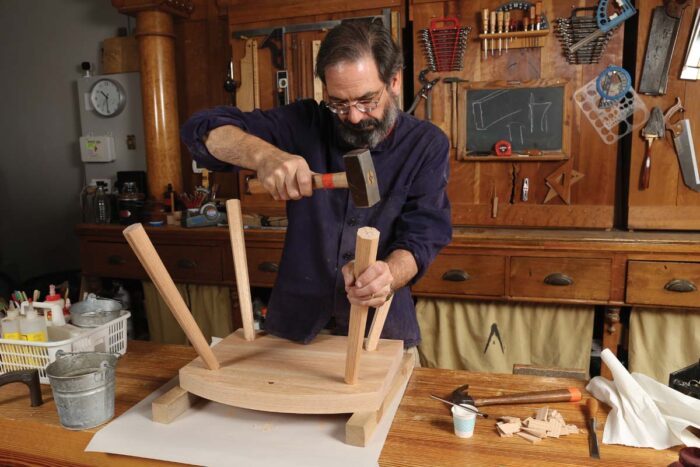
Once the seat is shaped and sanded it is time to glue the legs into the chair seat. This is the first part of the chair assembly. Glue and wedge the legs into the seat. After the glue cures, trim the tenons flush.
 |
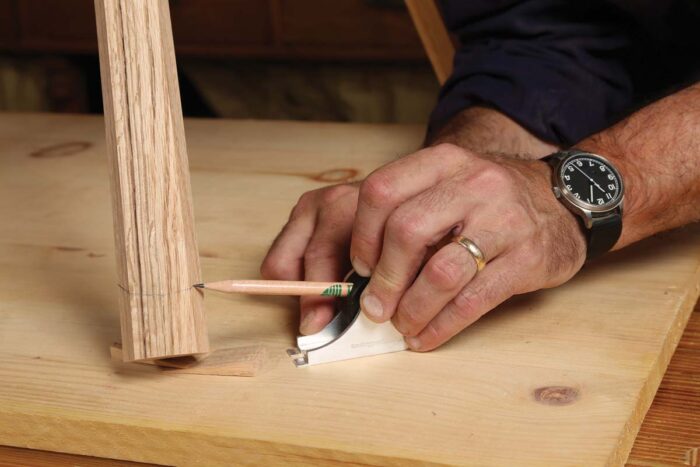 |
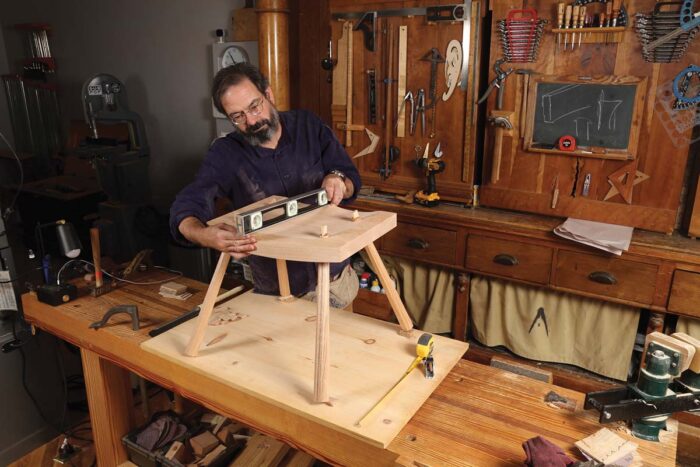
Level the chair side to side on a true surface using wedges under the feet. Prop the front legs up on blocks and wedges until your bubble level is true when its back edge is 3⁄4 in. above the rear of the seat. The measurement at the front of the seat, from the top of the seat to the bottom of the leg, should be 143⁄4 in. Schwarz drops a tape measure from the top of the seat and sets a pencil in a scribing tool to the correct height. Then he takes the scribing tool and draws around each leg.
With the partial chair in a vise use a handsaw to cut the legs to each scribe mark.
Easy arms
Stick-chair makers didn’t do much steam-bending. Instead they would either look in the woods for a branch that was the right curvature or they would create a “pieced” arm bow made up of three or four laminated pieces of wood to create a curved arm.
The pieces could be simply stacked and glued. Or they could be joined with a dowel or fancy joinery, such as a keyed miter or a half-lap. But the simplest arms on stick chairs like this one are straight boards, or boards cut with a slight curve for a little style.
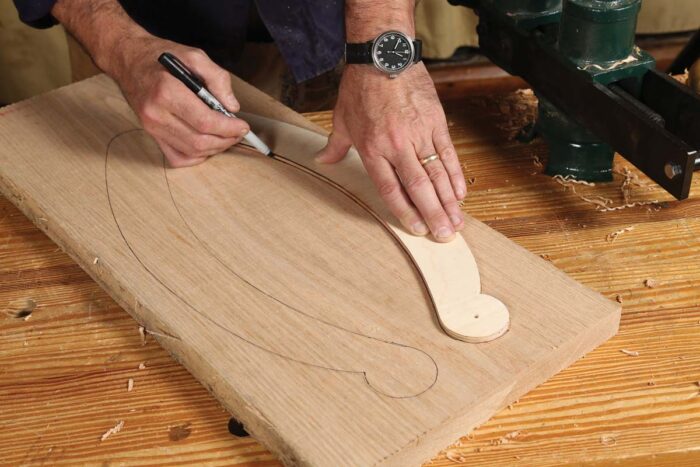
Trace the shape of the armrests, ideally onto one wide piece of stock. Cut out the shape on the bandsaw.
Laser-like accuracy to locate arms to seat
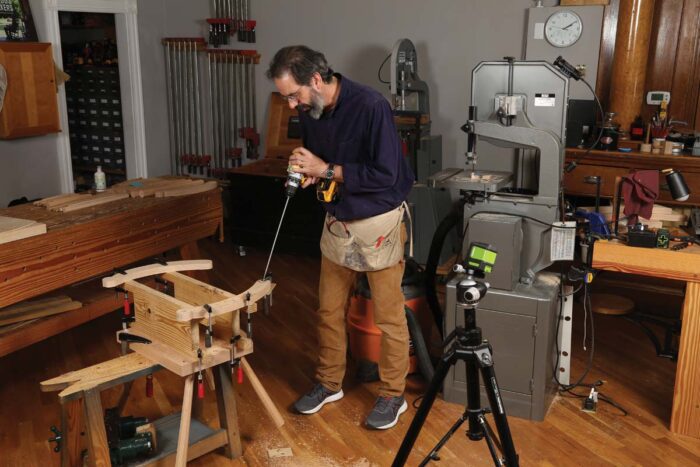
A simple jig holds the seat assembly to the armrests while you drill the mortises through the armrest into the seat. A laser level helps keep the hand drill at the right angle.
I use spade bits to drill the mortises in the arm and seat, and a construction laser to guide me. First clamp the arm above the seat using some wooden blocks; 8 in. is typical. Line up the spade bit with the mortise location in both the arm and seat. The laser shows me how far back to tilt the bit.
Before I owned a laser, I would sometimes use a human spotter instead. They would hold up a straight stick to visually line up the mortises and then tell me how far back to tilt.
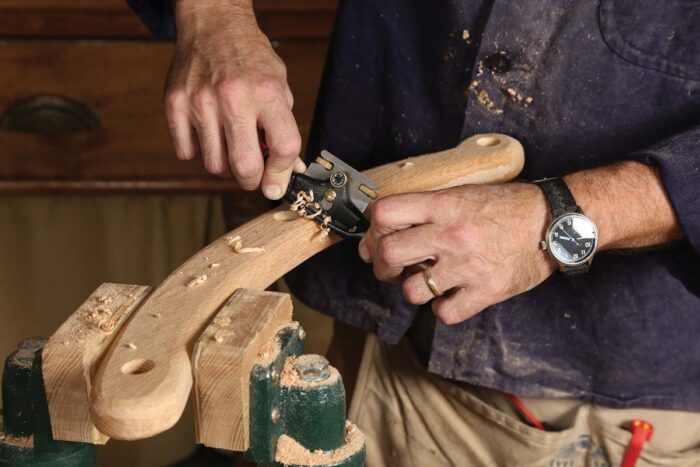
The arms will receive a lot of attention from the sitter, so use a spokeshave to shape and soften the arms, particularly where the user’s hand might wrap around the front or where an elbow might rest.
Store-bought or shopmade sticks
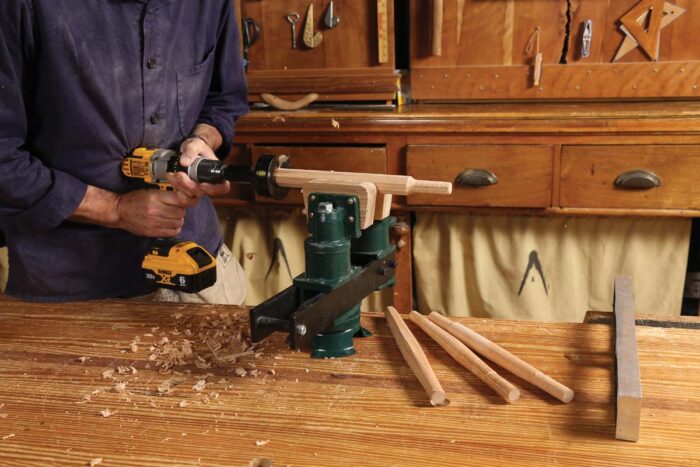
The sticks that connect the seat, arm, and comb have to have straight grain so they don’t snap. I make mine from lumberyard wood that I have split and sawn straight. Then I shave them to shape and size with a block plane. Clamp a small block of wood in a vise, brace the tip of the stick against the block, and shave.
Dowels look and work great as a finished stick, but are more expensive than making sticks from flat stock, so I make my own. But straight-grain dowels do work. I use red oak dowels, but the bin at the home center typically contains two or three different species of oak. So choose dowels that have the same hue of red.
 |
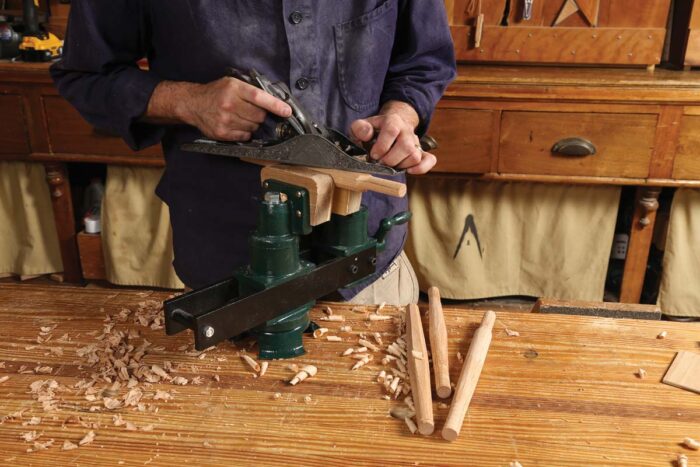 |
Mills the stock, cut the octagons, use a tenon cutter to cut the tenons, and then shape the sticks with a hand plane.
Second assembly, arms to seat
 |
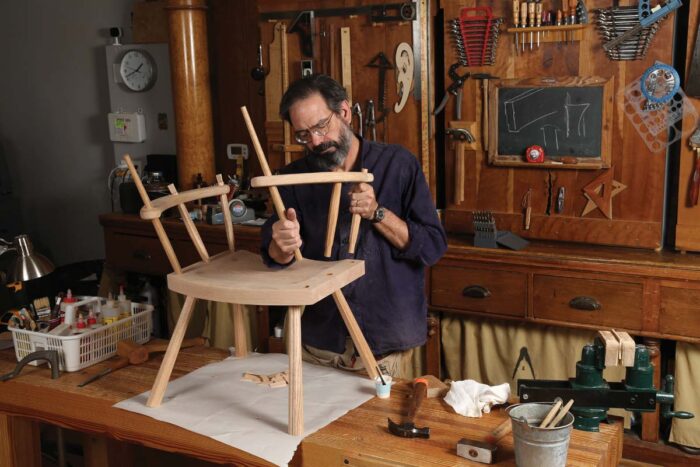 |
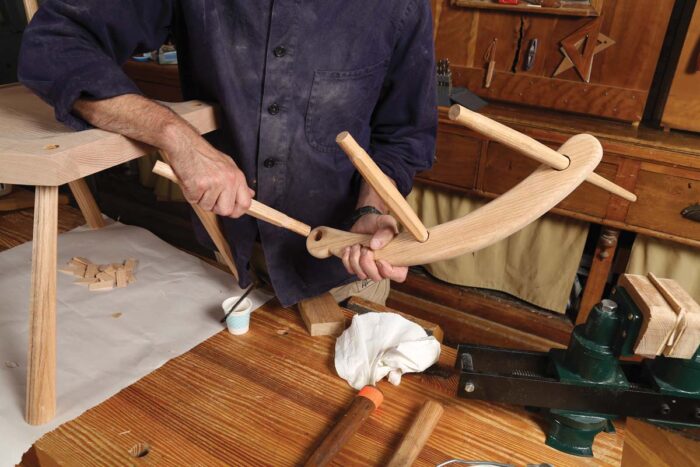
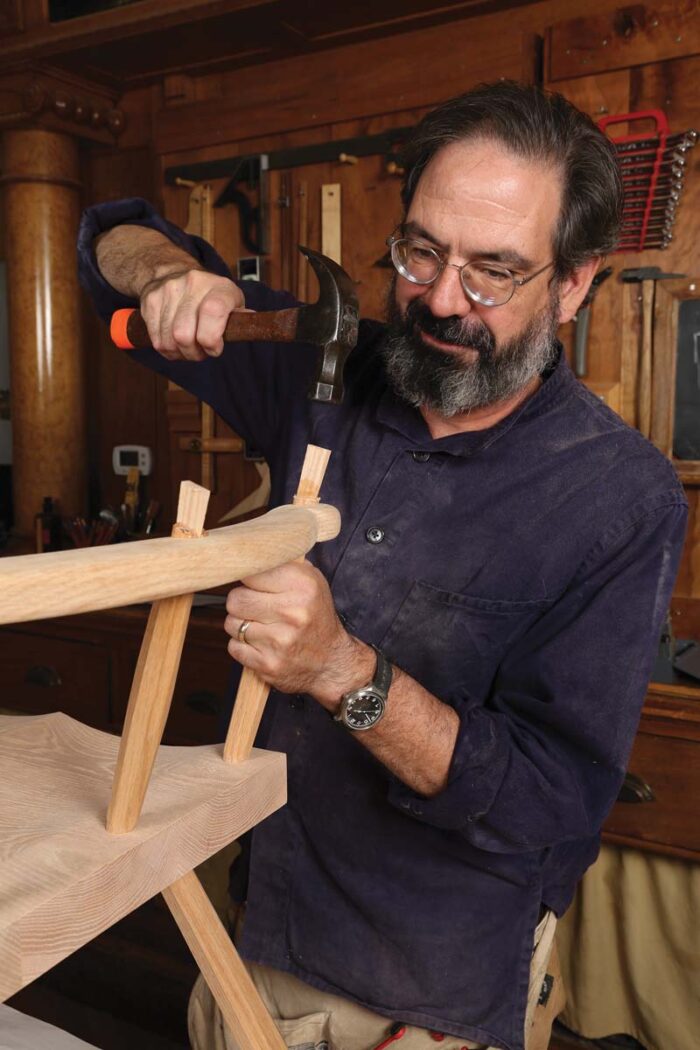
I assemble the arms and their sticks, one side at a time. Glue the short sticks into one arm, with the longer, back stick in place in the arm. Glue the short sticks and the back stick into their mortises in the seat. Wedge the through-tenons in the arms. Then assemble the other side of the chair.
 |
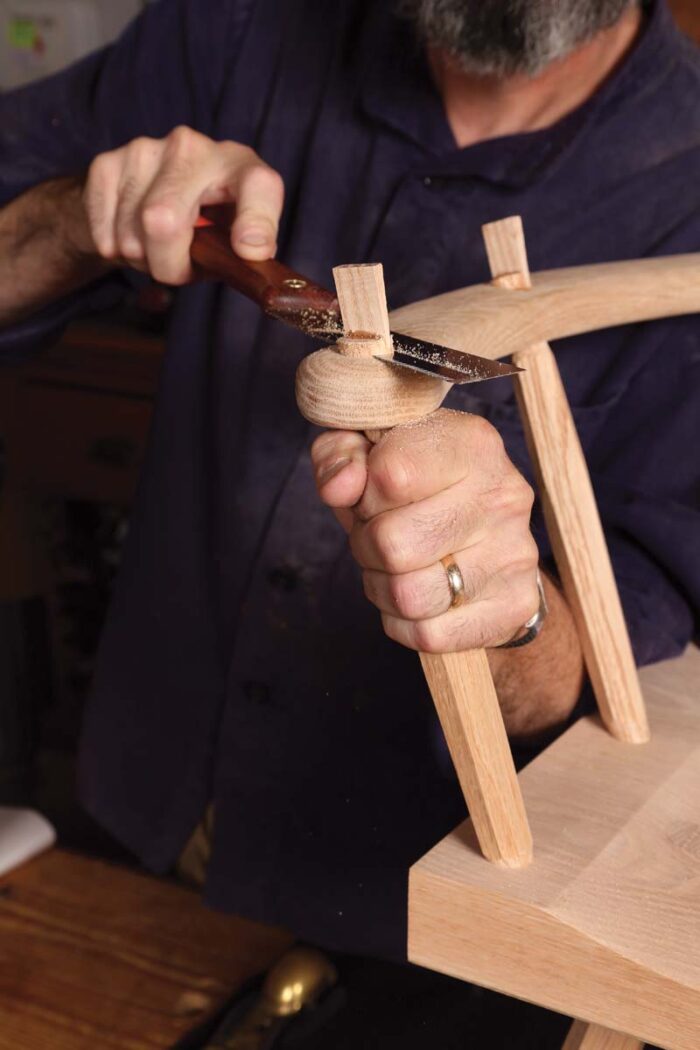 |
Kerf the tenons of the short sticks and glue in wedges. When the glue dries, cut the tenons flush to the arm.
Backing it up
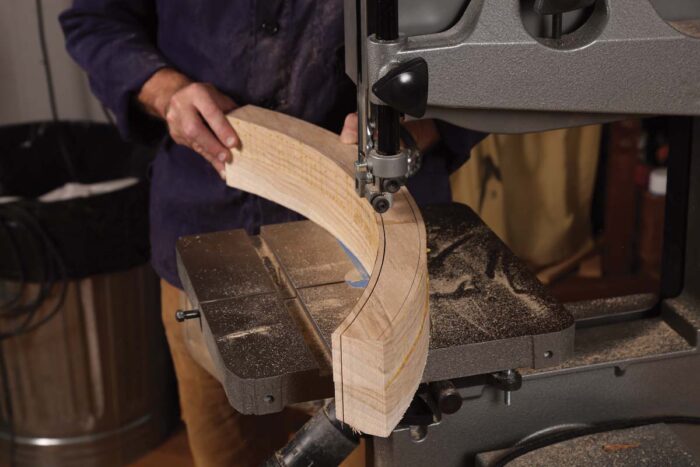
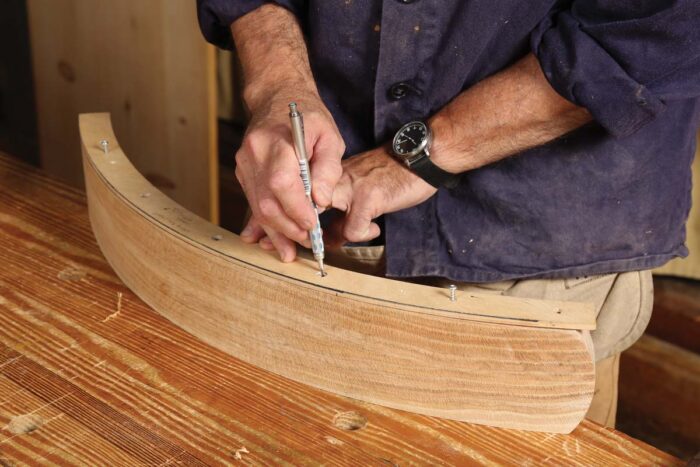
The backrest of a stick chair typically has a shallow curve. So most stick-chair makers would saw the comb out of a piece of solid stock. No steam-bending required. Laminate two curved pieces to create the blank for the backrest. On two wide pieces of 8/4 stock, trace the template and bandsaw out the shapes, leaving extra room to cut to exact size later. After laminating, carefully bandsaw to the line, then sand and shape. Use the template again to lay out the holes in the bottom of the backrest for the back stick mortises.
 |
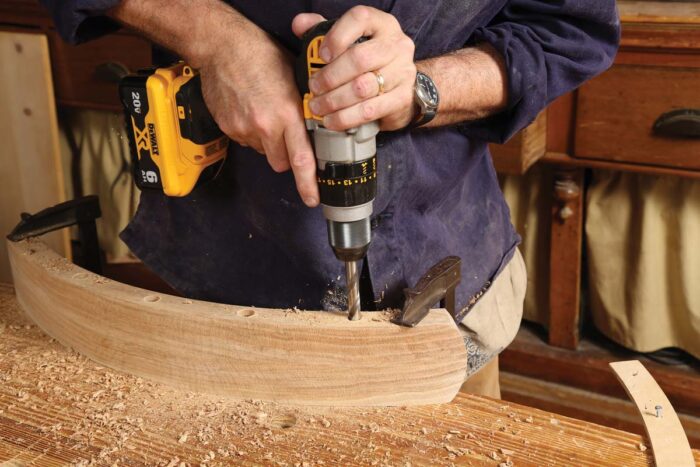 |
Use a hand drill to drill the five mortises into the backrest, being careful to hold your drill at 90°.
Final assembly, backrest to seat
 |
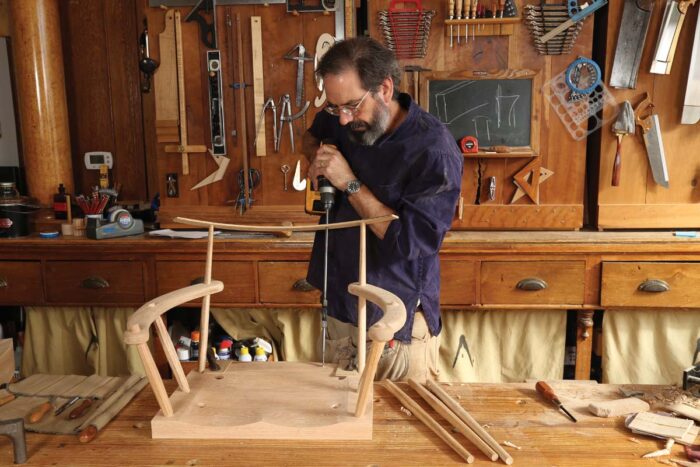 |
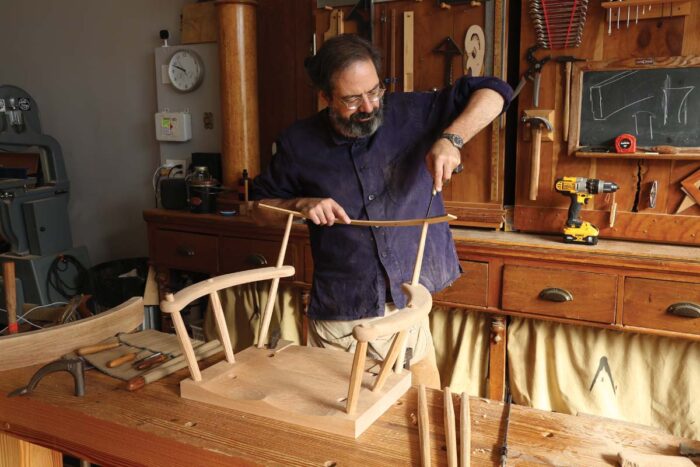
The thin plywood pattern for the backrest is also the drilling template for boring the mortises in the seat at the proper angle. To do the drilling, temporarily screw the pattern to the chair’s back posts. Then use the holes in the pattern to guide your spade bit. Drill through the template into the seat to cut the mortises for the final three back sticks. I use a 16-in. spade bit plus a bit extender that Lost Art Press makes called the GoDrilla. Another option is the Bosch extender.
If the fit is a little loose, the backrest is easier to drive onto the sticks. After gluing the three back sticks into their mortises in the backrest, glue that assembly to the restof the chair. Blue tape on the outside sticks serves as a depth guide.
 |
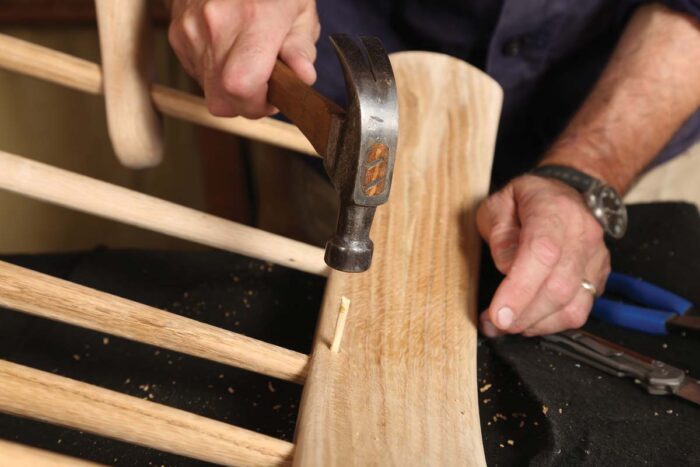 |
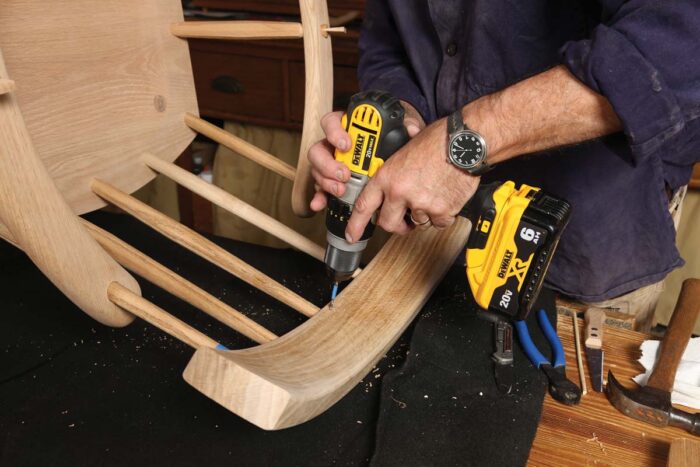
Drill and tap in bamboo skewers to strengthen the connection between the back sticks and the backrest.
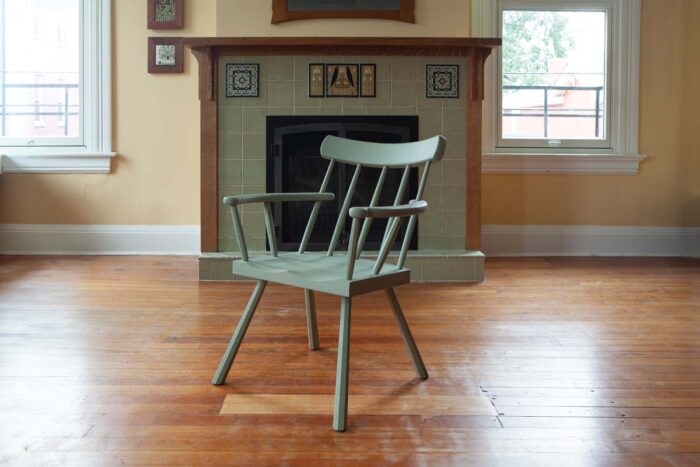
This chair was painted with a green acrylic. Historical examples were painted, oiled, or left bare to darken from the wood smoke in the cottages.
-Christopher Schwarz is a furniture maker and writer in Covington, Ky.
Sign up for eletters today and get the latest techniques and how-to from Fine Woodworking, plus special offers.
Download FREE PDF
when you enter your email address below.

