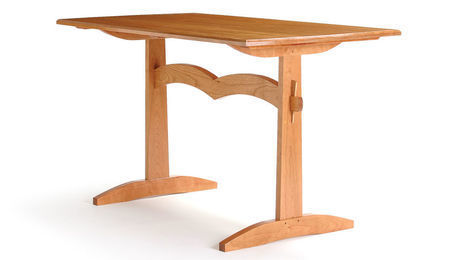
Knockdown Arts and Crafts bookcase
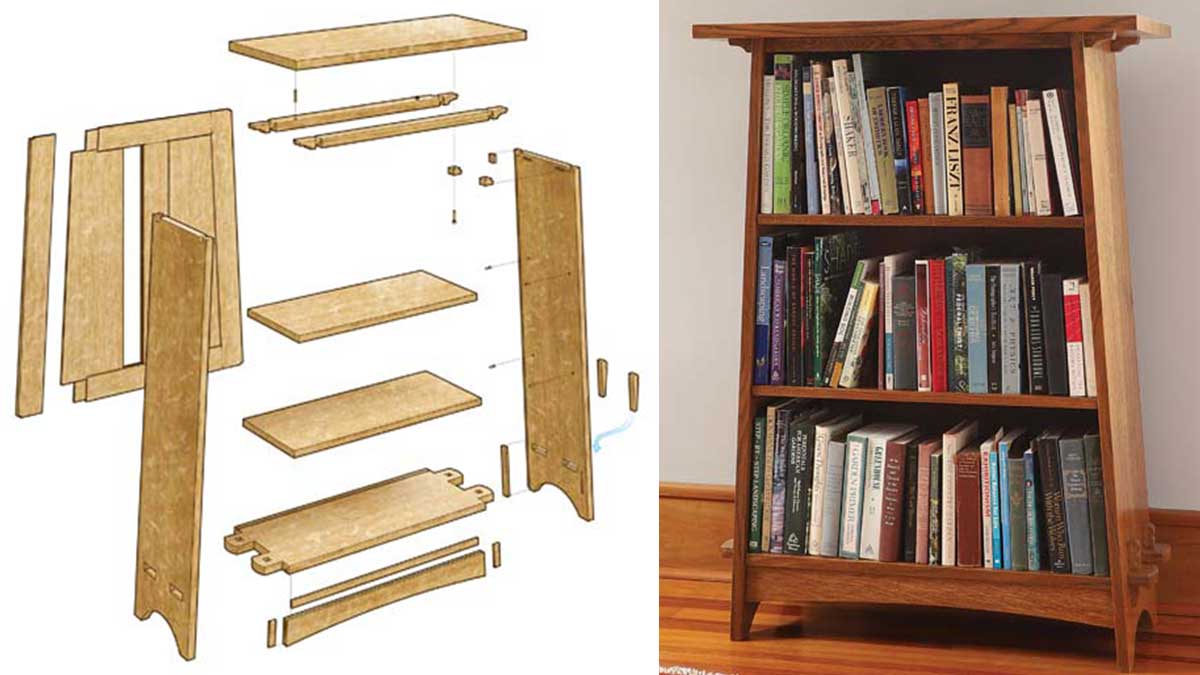
Arts and Crafts styling with tusk tenons, corbeled stretchers, and solid white oak combine for a bookcase that is easy to assemble and disassemble for moving. The most challenging part of the project is the through-mortise-and-tenons that join the bottom shelf to the angled sides, but two ramped template-routing jigs make the process manageable. All the curves are cut after the joinery is completed.
I designed this bookshelf toward the end of a school year, and I was thinking about what might make a good gift for a graduate. I wanted it to be a substantial piece, so Arts and Crafts styling with tusk tenons, corbeled stretchers, and solid white oak made sense. I tilted the sides to create an attractive stance, and I designed the whole piece so it would be easy to disassemble. The frame-and-panel back is the only component that is glued. Tusk tenons down below and bridle joints and buttons up top keep the case rigid yet make it simple to take apart and transport as a stack of flat parts.
To disassemble the bookcase, just loosen the buttons under the top and turn them 90°. Lift off the top. Remove the upper stretchers. Loosen the tusks and spread the sides a little. Then pull the back up and out. Remove the tusks, and then the bottom shelf and the kick can be removed. Reassembly is just as simple.
Tackling the tusk tenons

The jigs have three components: a template, wedges to generate the angle of cut, and fences to locate the jig on the workpiece. I made the templates from 1/4-in. MDF to maximize the reach of the router bits, which have to make through-cuts. When I did the routing I set a sacrificial scrap of MDF beneath the work to protect my bench and get a clean cut on the exit side.

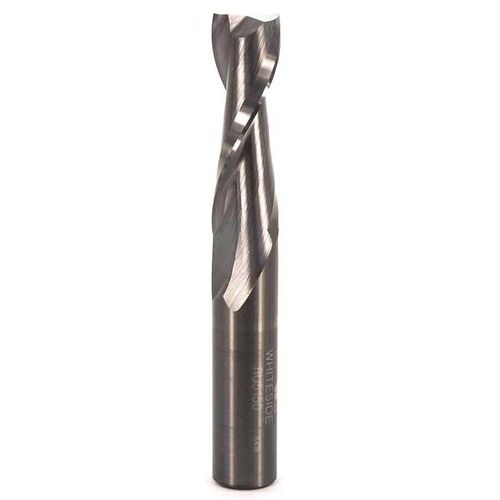
I made the openings in the templates 1/16 in. larger than I needed the routed areas on the workpiece to be, because I would be using straight bits with router bushings and the combination would make cuts 1/16 in. from the template. When cutting the mortises in the case sides, I first used a large plunge router with a 1/2-in.-dia., 3-1/2-in.-long upcut spiral bit (Whiteside #RU5150) to waste most of the wood. I followed that with a finishing pass using a smaller plunge router with a 1/4-in. by 3-in. upcut spiral bit (Amana #46577). With both routers I made the cuts in three passes of increasing depth.
Author reccomended
Whiteside RU5150 1/2-in. Up-Cut Spiral Bit
1/2-Inch Cutting Diameter
1-1/2-Inch Cutting Length
Price: $59.70 at the time of writing
For the tenons I did the rough wasting at the bandsaw. Then, using the ramped jig for the tenons, I went directly to the smaller router for the finishing passes. After that, I rounded over the edges of the tenons with a 1/8-in.-radius router bit to match the rounded corners of the mortises.
Author recommended
Amana 46577 1/4-in. Up-Cut Spiral Bit
Diameter: 1/4
Cutting Height: 1-1/2
Overall Length (L): 3
Surface Coating: Spektra
Price: $68.14 at the time of writing


Make way for the tusks
|
|
|
With the through-mortise-and-tenon joints cut and fitted, the tenons get through-mortised themselves to accommodate the tusks. First, I make the tusk blanks, tapering them at the tablesaw in a jig with a 7° notch.
Then, with the case sides and bottom shelf dry-fitted and clamped, I draw a line on the tenons where they protrude from the sides. (After disassembly, I’ll move this mark back 1/8 in. for clearance.)
To locate the outer face of the mortise, I lay a tusk on its side and make a mark corresponding to the thickness of the tusk when it is halfway home.
I start the tusk mortises on my hollow-chisel mortiser, using four overlapping passes with a 1/2-in. chisel to chop a hole 3/4 in. square. Next, to cut the angled outer face of the mortise, I move to my workbench and use a chisel with a 4° guide block.

Stretcher session

The stretchers, with their tightly fitting housed bridle joints, hold the top of the bookcase together. To lay out the bridles, I fit the bottom shelf and the sides together, tighten the tusks, and clamp in a pair of triangular braces with a 3° tilt to firm up the case.
Then I place the stretchers upside down across the tops of the case sides and mark them with a pencil where they cross the sides.
The notches in the stretcher need to match the slope of the case sides, so I use a 3° wedge as I make the cuts on the table saw.
Then the notch on the underside of the stretcher is cut with the bandsaw and trimmed to fit with a chisel.
With those cuts made, I place the stretchers in position on top of the sides and mark the sides for their notches. I use a handsaw and chisel to cut these.
|
|
|
|
|
|
Fitting the kick
|
|
|
|
|
|
The kick, which is strictly for show and not needed to support the beefy bottom shelf, will be joined to the case with splines that get glued into the kick but are left dry in the case sides and shelf. Before adding the splines, I cut the kick to fit the assembled case. Next, at the table saw, I cut grooves in the kick’s ends and along its top edge, and then glue oak splines into the grooves.
Then I rip the bottom shelf to final width, trimming off the front edge so it will be inset from the case sides. Now I can cut the groove for the kick spline along the underside of the bottom shelf’s front edge. To cut the short stopped grooves in the case sides for the kick splines, I use the hollow-chisel mortiser.
Machine the curves
I like to make all the curved cuts after completing the joinery. I made full-size digital drawings for this project and had them printed on 36-in. by 48-in. paper at Staples. I cut out the curved details from the drawings and used these paper patterns to lay out the arches at the bottom of the sides and the kick, and the decorative shapes on the tusks and the ends of the stretchers. Depending on the piece, I roughed out the curves close to the lines with a jigsaw, bandsaw, or scrollsaw. Then I smoothed them with a spokeshave or sander.
Frame-and-Panel Back using his 3° wedge against the miter gauge, Hartman cuts the rail tenon at the table saw with a dado blade. The rip fence acts as a stop for the shoulder cut.
|
Special fitting for the frame-and-panel back

Because the frame-and-panel back is trapezoidal and sits in rabbets in the case sides and grooves top and bottom, it’s tricky to fit. To solve that problem, I built the back 1⁄4 in. oversize in height and width and used a template to trim it to fit. I made the template using 3-in.-wide strips of 1/4-in. MDF. I fit the strips into the rabbets and grooves and joined them at the corners with hot-melt glue. I then removed the template and attached it to the assembled back with double-stick tape. Riding the template against an L-fence on the table saw, I trimmed all four sides to shape.

Once the back was cut to size, I milled tongues along its top and bottom edges with a dado blade. This worked well, but because of clearance issues you can expect that you’ll need to adjust the fit with hand tools.
Assemble, Very Dry
I made buttons that twist into slots cut into the case sides to attach the top. Bolts with knurled knobs fit into threaded inserts to secure the buttons and make the case easy to knock down and reassemble. |
 |
Topping
To make the bookcase easy to disassemble and reassemble, I put locating dowels in the back stretcher and secured the top to the sides with buttons and thumbscrews. The buttons attach the top but also keep the bridle joints locked together. After installing the buttons and thumbscrews, I cut the adjustable shelves to fit and the bookcase was complete.
—Longtime FWW illustrator John Hartman takes a breather from his drawing table by spending time in his woodshop in West Springfield, Mass.
Sign up for eletters today and get the latest techniques and how-to from Fine Woodworking, plus special offers.

