Turning a Southwestern Bowl – FineWoodworking
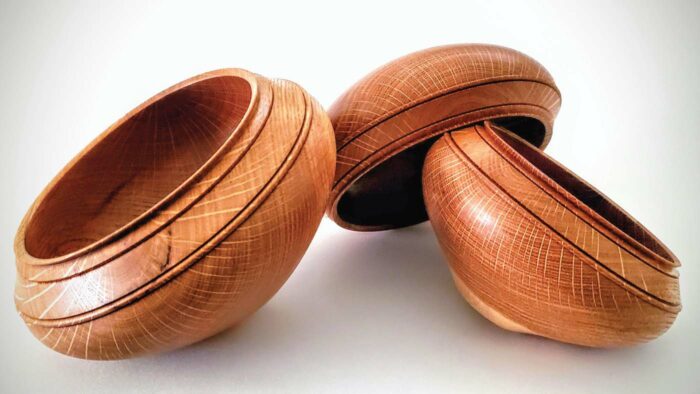
Synopsis: With influences from his childhood in the American Southwest and later exposure to master potters, Matt Monaco has created a bowl with a clean, classical simplicity of shape that he sees as wooden pottery. After bandsawing a blank, he does the rough shaping with the piece mounted on a wormscrew chuck. At this stage, he also creates a mounting tenon that will later become the bowl’s foot. He then turns the piece around, mounts it in a four-jaw chuck, and refines the shape and adds details. He completes the turning at the base of the bowl by making a jam chuck to fit inside the rim.
I see this bowl as wooden pottery. I’ve made scores of iterations of it, and I think of it as my signature piece. Growing up in the American Southwest, I came to love the ceramic vessels made by indigenous potters there. And later, when I was working as an in-house production turner at ShackletonThomas Furniture and Pottery in Vermont, I was lucky enough to work in proximity to master potters. From those two sources I developed a deep appreciation for vessels with a clean, classical simplicity of shape. I also learned that fine detail, if properly handled, won’t distract from an overall form but instead will provide punctuation in the flow of the piece’s silhouette, helping to clarify and complete the visual statement.
 |
Roughing down and shaping outside
I begin the bowl by bandsawing a blank, drilling a centered pilot hole in its rim face, and then mounting it on a wormscrew chuck. After truing up the exterior of the bandsawn cylinder, I true both flat faces.
I’ll do most of the roughing and shaping of the bowl’s exterior with the blank mounted on the wormscrew chuck. But before that, I set a pair of calipers to the inside span of a four-jaw chuck and transfer the measurement to the foot of the bowl blank. After roughly shaping the lower curve of the bowl, I cut a tenon to the caliper marks. I give the tenon slightly dovetailed sides, which will let me mount the bowl firmly in the four-jaw chuck when I reverse the blank to hollow the inside. (Eventually, the tenon will be reshaped and become the foot of the bowl.) Next, I get the bowl’s outer curve close to where I want it. I also establish the width of the margin at the top of the bowl that will encompass the fine detail from the main bead to the rim.
Detail work outside and hollowing inside
To refine the rough shape of the outside of the bowl and add detail, I remove it from the wormscrew chuck, turn it around, and mount it in the four-jaw chuck. I true up the bowl’s profile below the top margin and add the bead details and the beveled bands.
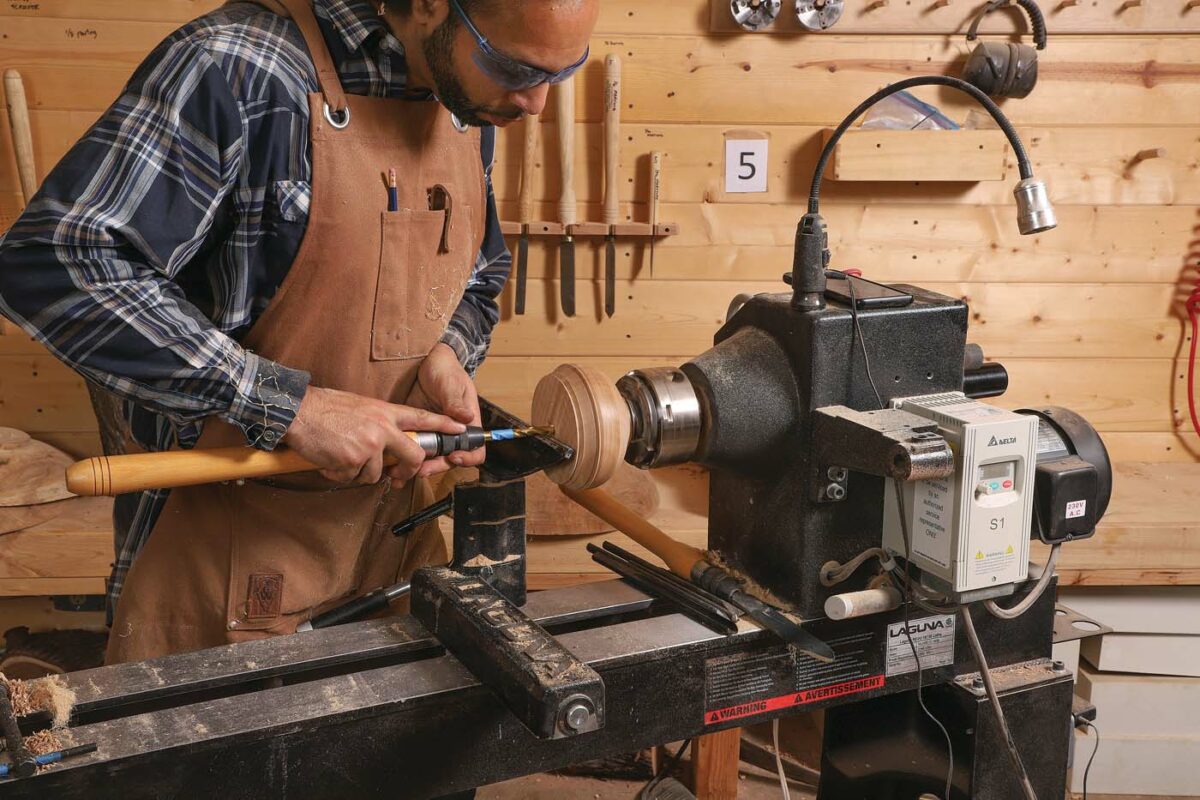
With those complete, I use a drill bit fitted in a long handle to enlarge and deepen the hole left by the wormscrew chuck. I wrap tape on the bit as a depth gauge and drill to within about 3/8 in. of the shoulder of the tenon. This will be my rough depth guide as I hollow the bowl. I start hollowing at the center and progress outward, cutting downward roughly midway into the bowl. After excavating inside the incurving upper walls of the bowl, I continue with deeper hollowing, again beginning at the center and working outward.

Once the interior is finish-turned, I dry-sand inside and out with 220-grit paper, and then wet-sand with food-safe oil, beginning with 220 and going up to 600. I follow that with carnauba wax and give the bowl a buffing inside and out.
 The third mounting
To complete the turning at the base of the bowl, I make a jam chuck to fit inside the rim. After mounting a circular scrap on the headstock, I scribe a circle with calipers just shy of the interior diameter of the rim. I create a flange to that diameter and about 1/4 in. deep. Once the bowl is fitted snugly to the jam chuck, I slide the tailstock into place with a live center for additional support while I blend the lower curve of the bowl into the tenon.
For the last bit of turning, I slide the tailstock away and rely on the jam chuck alone to hold the bowl. Working gingerly, I sweep across the bottom of the foot to be sure it is just slightly concave, so the bowl won’t wobble. Then I carefully cut the small detail beads that decorate the underside of the foot. Last, I repeat my finishing regimen.
-Matt Monaco calls Kansas City, Mo., home, but he turns in shops and schools all across the country.
To view the entire article, please click the View PDF button below.
Fine Woodworking Recommended Products

CrushGrind Pepper Mill Mechanism
Matt Monaco designs his pepper mills to accept the CrushGrind mill mechanism, which he likes because it doesn’t require drilling through the top of the mill’s cap and having hardware exposed on top.

Suizan Japanese Pull Saw
A versatile saw that can be used for anything from kumiko to dovetails. Mike Pekovich recommends them as a woodworker’s first handsaw.
Sign up for eletters today and get the latest techniques and how-to from Fine Woodworking, plus special offers.
Download FREE PDF
when you enter your email address below.


