Three Ways to Glue Up Miters
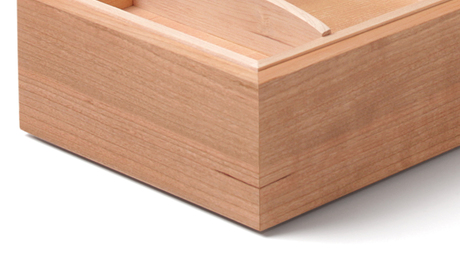
Miters may be among the simplest of joints, but making them perfectly is an exercise in patience and care from beginning to end. Cutting the miters is just part of the task. Gluing them up cleanly is its hurdle since the joint is prone to slipping and sliding under clamps, and getting clamping pressure square across the joint isn’t as simple as just tightening a clamp.
The key to success in gluing up the joint is to apply pressure directly across the miter without letting it move out of place. I glue up mitered boxes and casework using three approaches: tape, band clamps, or glued-on clamping blocks. Which one I pick depends on the size of the workpiece and on whether there are four miter joints, as in a box, or fewer, as on a waterfall table.
Tape for small parts

Let’s start with tape, the simplest method. I prefer blue tape; others use packing tape. Both work beautifully on small boxes. I start by lining up all four sides of the box, outside face up, along a straightedge.
Working from one end to the other, I apply blue tape to three of the miter joints. I use two fingers to pull the joint together while stretching tape across the seam. I can then flip the entire assembly over and run a bead of glue near the tip of each of the miters.
 Tape three of the miters. Orient the workpieces with their outside faces up. Then hold the pieces against a straightedge for alignment while stretching tape across three of the four miters. |
 Add glue, then close the hinge. After flipping the parts, apply a bead of glue at the base of each miter. Fold the parts closed to distribute the glue evenly across the joint. |
 Add a little more glue. Layer on a bit more glue at the base of the miters so the end grain doesn’t completely absorb the glue and leave the joint starved. |
The blue tape acts as a hinge and a clamp when gluing up. When I fold the box up and pull tape across the last corner, all the miters stay closed as the glue dries. I try to apply enough clamping pressure to get a bit of glue squeezed out. This ensures a nice, tight joint.
Band clamps

The only issue with blue tape is that it may not be strong enough by itself for midsize and large applications, like cabinetwork. For heavier material at a larger scale, more clamping pressure is needed.
This is where band clamps are useful. A band clamp acts as a giant rubber band that puts equal pressure on all four corners. Its steel or plastic corners distribute pressure evenly around the case and close larger miters.
 |
 |
I set up my miters using the same blue tape method, this time to align the parts and hold them in place while I applied the band clamps. Once the band clamps are in place, I ratchet them enough to see glue squeeze out. You may be able to get away with using one band clamp for narrow boxes, but I find that if a project is big enough to require band clamps, I usually need more than one.

Clamping blocks
A clamping block is nothing more than a piece of wood temporarily glued onto the workpiece that allows me to get perpendicular clamping pressure across the miter joint. The stock for the block is ripped with the blade at 45º, complementary to the miter’s 45º, to allow for square clamping pressure. Size the blocks to give your clamps enough room to grab.
I glue a piece of paper between the clamping block and the workpiece. This paper joint provides the shear strength necessary for tightening the clamps, but it will break free with a few light taps of a chisel. The paper left on the workpiece is easily removed afterward.
 |
 |
| Tape the joint. Use strips of blue tape to align the miter for clamping. Apply glue and close the joint to spread it. It’s the same method as with smaller miters, just with more glue. | |
Handy L-bracket
For larger mitered assemblies where ensuring squareness is difficult, I make L-shaped brackets out of MDF to hold parts at 90º. These useful brackets can be clamped on once the joints are closed and left on until the glue is dry. I create a little relief at the outside corner of the L to avoid gluing it to my piece.

 |
 |
| Remove the cauls and paper. A couple of light taps with a chisel should be enough to pry loose and split away the clamping caul. After that, you can quickly plane, scrape, or sand away the paper. | |
—FWW ambassador Erik Curtis makes furniture in Philadelphia.
Master the Miter
Not all miters need reinforcement
Add Muscle To Your Miters
Sign up for eletters today and get the latest techniques and how-to from Fine Woodworking, plus special offers.
Download FREE PDF
when you enter your email address below.


