Arts and Crafts Umbrella Stand

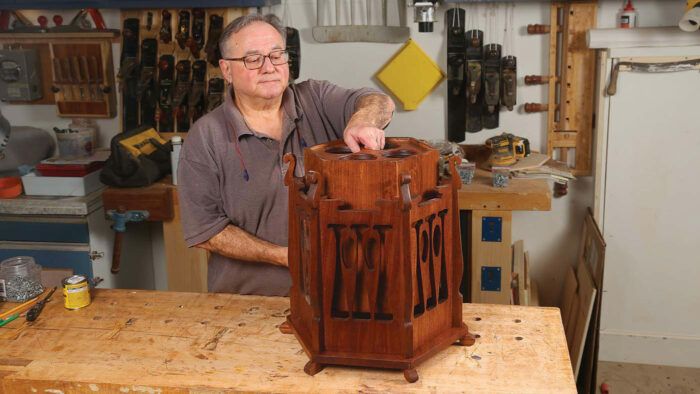
Synopsis: Charles Rohlfs made furniture in the Arts and Crafts era that is notable for its unique structures, shapes, ornamentation, and carving details. Peter Marcucci has reproduced several Rohlfs pieces, including the waste container featured here, which Marcucci decided to turn into an umbrella stand by adding an insert.
The container has a hexagonal base that rests on six feet. Six panels and six uprights are attached to the base to form the structure. The insert is made up of six sides mitered together and a bottom and a top with holes cut out for umbrellas.
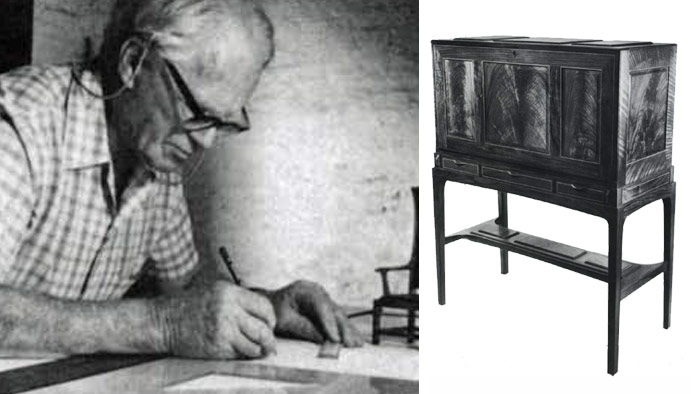
I have spent much time over the last few years researching and re-creating Charles Rohlfs’s furniture. Most woodworkers are familiar with Arts and Crafts makers such as William Morris, Greene and Greene, and Stickley. Charles Rohlfs, while popular among art history and decorative arts scholars, has not received the same attention from woodworkers.
His work contains many elements of Arts and Crafts furniture but is set apart by its unique structures, shapes, ornamentation, and carving details.
I recently completed a re-creation of Rohlfs’s circa 1900 “Graceful Writing Set,” which included a desk, chair, and waste container. To make it easier to empty the container, I built an insert that can be lifted out. It occurred to me that if the insert were modified, the container could be used as a plant stand or an umbrella stand.
The umbrella stand I made can serve as an introduction to Rohlfs’s unique style, and I hope it will inspire you to take on the re-creation of some of Rohlfs’s other works or to incorporate the style into your designs.
I’ll warn you now that Rohlfs used screws in the construction of his furniture, so I did the same. However, if using screws in furniture does not sit right with you, feel free to remove each screw, drill a larger hole, and replace the screw with a glued-in dowel.
Start with the base blank
The container consists of a base, six uprights, six fretwork panels, and six feet. Start by gluing up two boards to form a slightly oversized, square blank for the base. You can lay out the hexagon using a compass.
First, set the radius of the compass to 9 in. and draw an 18-in.-dia. circle. Then draw a straight line through the center point of the circle. Where the straight line intersects the top of the circle, insert the point of the compass—still set at 9 in.—and draw an arc that spans the circle.
Repeat this process from the point where the vertical line intersects the bottom of the circle. You should now have four points where the arcs intersect the circle and two points where the vertical line intersects the circle. With a straightedge, join the intersection points to create six sides, each 9 in. long.
Continue with the base layout
To establish the location of the parts on the base and the pilot holes you’ll drill through it, draw a series of five concentric circles within the large one. You can draw these as full circles or just as hash marks across radius lines aimed at each point of the hexagon.
The innermost circle marks the inner edge of the feet. The second circle marks the inner edge of the uprights. The third and fourth circles mark the pilot holes for the screws that connect the uprights to the base. The fifth circle marks the outer edge of the uprights.
With the layout complete, cut out the hexagon on the bandsaw. It’s necessary to disassemble and reassemble the piece a few times before completion, and with six uprights attached to the points of the hexagonal base, it can be hard to keep track of what goes where.
So I number each point of the hexagon, 1 through 6, with a small metal number punch. The punched numbers survive moderate sanding. Later, I number the uprights to match. To complete work on the base, drill and countersink the pilot holes for the screws that will connect the uprights and the panels.
Click here to download the layout pattern for the base
A set of six uprights
There are many methods for shaping the uprights. I don’t have a CNC machine, and the router is one of my least favorite woodworking tools, so I used a drill press and bandsaw.

To lay out pilot holes for the screws into the bottom of the uprights, make a centerline along the bottom of each upright with a marking gauge. Transfer the spacing of the pilot holes on the base onto one upright. With dividers, transfer the location of the pilot holes from the first upright to the other five. Drill the holes and temporarily screw each upright to the base.
-To view the entire article, please click the View PDF button below.

Capturing Charles Rohlf’s Arts and Crafts Style

Webinar: Uncommon Arts and Crafts with Jon Binzen

Quintessential Arts and Crafts
Fine Woodworking Recommended Products

Suizan Japanese Pull Saw
A versatile saw that can be used for anything from Kumiko to dovetails. Mike Pekovich recommends them as a woodworker’s first handsaw.
Sign up for eletters today and get the latest techniques and how-to from Fine Woodworking, plus special offers.
Download FREE PDF
when you enter your email address below.


