Graceful Little Boxes – FineWoodworking
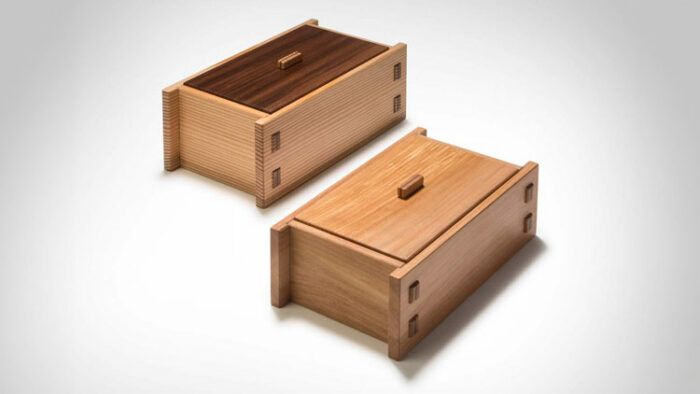
These boxes are very loosely based on the form of a traditional Japanese toolbox. However, while those toolboxes are a utilitarian triumph of form meeting function, nailed together and sized to perfectly hold the required tools, these little boxes were designed to be built with offcuts and to practice an exacting joint, the wedged through-tenon.
The joinery is certainly overkill for a box of this size, but it is satisfying to execute well and pleasing to look at. I use a mixture of handwork and machines, but this project could also be done entirely by hand for an additional challenge.
Milling material
 |
 |
| Prep the sides of the box. The long sides of the box get dadoed and mortised, while the short sides get tenons that will be wedged in place. | Cut the dadoes. Sterns cut the dadoes in the long sides of the table saw with a dado blade. Then he cleans up the cuts with a router plane and test-fits the short sides into the dadoes. |
The dimensions of the box should be determined by the size of the pieces available, as it is intended to be built from interesting scraps.
While the length and height of your available wood may vary, I do find 3/8 in. to be a good thickness for the sides of a box shorter than about 1 ft. in its longest dimension, which is what I will focus on here. Begin by milling your stock slightly over thickness and letting it rest for a day or two to acclimate if a lot of material was removed.
Wedged through-tenon joinery
Next, lay out the mortises. The sides of the mortises are flush with the sides of the dadoes, so a marking gauge set to the edges of the dado can be used to lay out the mortises on the outside of the box. Once the mortise layout is completed, drill out most of the waste and pare the sides square with a chisel.
 |
 |

Now the tenons can be laid out. Insert the short ends into the dadoes, making sure the top and bottom edges are flush. Use a very sharp pencil or a knife pressed to the inside walls of the mortise to mark the end grain of the sides. Mark the depth of the tenons around the ends of the sides with a marking gauge. Setting the gauge to the thickness of the sides will allow the tenons to protrude 1/16 in. when the joint comes together.
Carry the marks delineating the tenons around the sides with a square, then cut the tenons at the table saw on a crosscut sled. First, see the top and bottom of each tenon, then remove the waste between the tenons with multiple passes. Next, turn the piece 90° and cut the waste at the shoulders. I leave the knife line and then take the last slice of wood with a sharp chisel.
 Cut the outside cheeks. With one-stop setting, make both outside cheeks cuts on one end, then flip the part to make the same cuts on the other end. |
 Cut the inside cheeks. Reposition the stop block and then make four cuts on each workpiece as you did in the last step. |
 Between the tenons. Remove the stop block and make multiple passes to clean out the waste between the two tenons. |

Rabbets and grooves
 |
 |
Once the mortises and tenons are cut, mill the rabbets to hold the lid and the grooves to accept the bottom. These are done at the router table with a straight bit. Both the top rabbets and bottom grooves can be run through on the short sides, but they must stop at the dadoes on the long sides.
The router table can also be used at this time to chamfer the top and bottom edges of the sides. On the long side, the chamfers must not run into the dadoes. Stop them short now, and complete them with a chisel with the box dry-assembled. For chamfering the ends of the sides and the top, I prefer to use a block plane.
| Assembly
This box’s diminutive size and straightforward joinery make glue-up a breeze. Still, for extra security, Sterns makes custom clamping cauls with cutouts for the through-tenons and wedges. Their contact points are cushioned with thick card stock. |
||
 |
 |
 |
Detailing the joinery
Among the main visual features of this box are the proud tenons. They protrude past the sides of the box, but not far enough to easily work on after glue-up. Use a chisel to cut small, crisp chamfers on the edges of each tenon. Next, cut kerfs in each tenon for the wedges. Use a small handsaw, cutting the kerfs vertically or diagonally through the tenons.
The wedges can be cut by hand, but when making many for a batch of boxes I prefer to use a simple jig on the bandsaw. The jig consists of a piece of wood with a notch the same shape and size as the wedges you need to cut. The notched side is lined up with the bandsaw blade, with the other side of the jig running on the fence.
The most appropriate woods for wedges are hard, long-grained species such as oak or hard maple. A piece of the correct width and thickness is fit into the notch and run through the saw, leaving a perfect wedge in the jig. Flip the wedge blank with each pass to ensure the grain keeps running parallel to the face of the wedge. A zero-clearance throat plate keeps the wedges from falling into the saw.
Raising the bottom
The bottom of the box is solid wood. To determine its length and width, assemble the box sides, then set them on the bottom piece and trace the inside dimension of the box onto the bottom. Add the depth of the bottom grooves to this and trim the bottom to size.
Plane and sand the bottom to produce a finished surface, then with a straight bit at the router table, raise the panel to fit in the groove. Finally, use a hand plane to trim a bit more than 1/32 in. from each long grain side to allow for wood movement.
Prefinish and glue up
Almost none of the surfaces are accessible once the box is assembled, so the final step before gluing up is to sand to 400 grit and finish with shellac. Once the finish has dried, dry-fit the box one final time and lightly apply wax to the ends of the tenons and sides around the mortises, as well as any inside corners. Be careful not to wax any glue surfaces.
This precaution will ease squeeze-out cleanup and help protect the finished surfaces. Glue up the box with the bottom installed. Clamp the box to seat all the parts, remove the clamps to insert the wedges, trim them enough to get the cauls on, and reclamp the box. After the glue is dry, remove the clamps and carefully trim the wedges flush with a sharp chisel.
A lid with a laminated handle

The lid, made from the wood of a color complementary to the boxwood, drops into the top rabbet. Mill it slightly oversized, then fit it to the rabbet with a hand plane. The box may not be perfectly square, so start by fitting adjacent sides, then complete the fit on the remaining two sides.
Once the lid is fitted, the handle can be made and installed. Start by resawing the material 3/32 in. thick. It’s easier and safer to mill these small handles from a large blank, so begin with oversize pieces. Clean up the resawn surfaces and glue them together. Once the sandwich has dried, true up the end grain on one end with a block plane.
 |
 |
Mill a tenon at the table saw by cutting grooves on both sides of the material. Separate the oversize handle with a handsaw and trim to the desired length. At the router table, cut a mortise in the center of the top of the lid with a 1/8-inch. Router bit, making it 1/8 in. shorter than the final length of the handle. Use a file to round the ends of the handle tenon, and fit it to the lid mortise. Sand and finish both pieces before gluing the handle on.

—Joshua Sterns is a woodworker and instructor in Fort Bragg, Calif.
Bandsawn Beauty
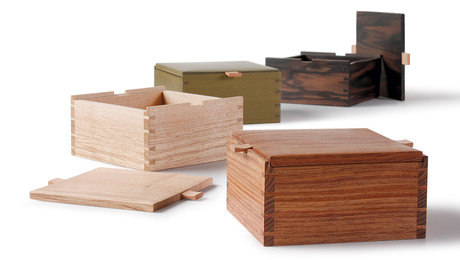
A Box Worth Repeating
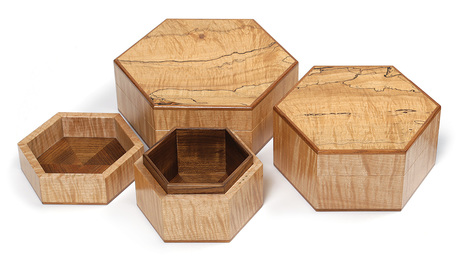
How to make hexagonal boxes
Fine Woodworking Recommended Products

Suizan Japanese Pull Saw
A versatile saw that can be used for anything from Kumiko to dovetails. Mike Pekovich recommends them as a woodworker’s first handsaw.
Sign up for eletters today and get the latest techniques and how-to from Fine Woodworking, plus special offers.


