General

Knife Hinges Made Easy – FineWoodworking


Knife Hinges Made Easy - FineWoodworking

Revealing just a small brass knuckle to the viewer, the knife hinge is the least obtrusive type of hinge hardware for fine furniture. It’s also the most durable type.

Knife hinges allow a door to open fully, whether it overlays the sides of the cabinet or is inset between them. To allow that functionality, there are two types of knife hinges: straight and offset. I’ll show you here how to install the straight type, for overlay doors. For installing the offset knife hinge, which is used with inset doors.

ST-18 Pivot Hinge $52 (package of two) brusso.com
ST-18 Pivot Hinge
$52 (package of two) brusso.com

Kinfe hinges in cabinet
Each knife hinge reveals only a small, elegant knuckle on the outside of the cabinet. The hinges sit above and below the door, which helps to keep them firmly in their mortises. The stability and precision of knife hinges means that you can fit doors with very fine gaps and expect them to stay that way without sagging.

Router template makes installation easyrouter template diagram

routing
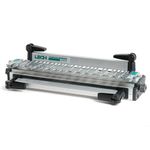
Router template delivers fast, accurate mortises. Knife hinges can be tricky to install, and mistakes can be hard to fix. But this precise, versatile template makes it easy. The fence comes off for routing the case mortises, and goes back on for routing matching mortises in the door.
Mortise-location trick. Because the case top and bottom overhang the door, the fence must come off the jig for routing the hinge mortises in the case. To locate those, Gochnour mortises a setup block, sticks the hinge into the mortise with double-stick tape on top, and slides the block down into the door position, leaving the hinge in just the right spot. Then he pencils around it to guide the template location for routing.

You might be wondering, “If knife hinges are so great, why aren’t they used more often?” The answer is that layout and installation can be tricky. The solution is to make a router template that is the exact size of the hinge leaves, and use it with a bearing-guided bit.

Dry-fit the case before installing the hinges

To make layout and routing easier, you’ll need to have the case made and dry-fit, but not yet glued together. That way you’ll know exactly where to locate the hinges. You’ll use the same hinge template on the door that you use on the case, guaranteeing matching mortises. Once the mortises are cut, you can glue up the case and easily install the door and its hinges.

Leave the door a little oversized

You can make the door now too, but leave it 1/8 in. oversize in height and width to allow some room for precise fitting once the case is glued up.

Making the template

Knife Hinges Made Easy - FineWoodworking
Start by measuring the width of the hinge

Knife Hinges Made Easy - FineWoodworking
Then measure the diameter of both the bit and its guide bearing

Knife Hinges Made Easy - FineWoodworking
If there is any variation between the two, you’ll need to take that into account when sizing the strip. Start by ripping the strip slightly over-size, and then adjust the table saw fence until you reach your desired width.

To ensure a perfect opening in the center of the template, I make it from a piece of hardwood that I cut into pieces and glue back together (see the drawings and photos on the opposite page). The template has a removable fence that is used when routing the door. Because the bottom and top of the case overhang the sides and door in this cabinet—a popular approach—the fence has to come off when routing the mortises in the case, and the template is aligned with pencil marks instead.

I use the template with Amana’s No. 45475 3/8-in.-dia. flush-trim bit. As with many bearing-guided bits, there is a slight offset between the bearing diameters and cutting diameters. It is just 0.007 in., but that’s enough to produce an undersize mortise. So you should factor in that offset when making the template. After gluing up the template, run it through the planer to flatten both faces.

Build the Template in Piecesrouter template diagram

Start with a 1111⁄1616-in.-thick board, milled flat and straight, roughly 8 in. wide by 1211⁄22 in. long. Rip it in half, and then rip a strip off one half. The fence will register the template on the door for routing its hinge mortises.

Make the spacer and glue up the template. Cut the spacer long, and then trim it until it’s the length you need

Wax the spacer’s edges so it won’t get glued in place.

Then cut a piece of melamine a bit smaller than the assembly, and press the pieces against it as you clamp them together tightly. Knock out the spacer block after the glue has dried.

Make a test cut

Before you install its fence, clamp the template to a piece of scrap, load your pattern bit in your plunge router, and make a test cut to see if the jig cuts an accurate hinge mortise with no gaps. If there is a problem at this stage, it’s easy to make another template. This is also the best time to dial in the depth of the mortise and set the plunge stop on your router.

Sawdust can pile up inside the mortise as you cut it, preventing the router bearing from registering properly against the template opening. So make one pass at full depth, vacuum out the chips, and then make a second pass.

You’ll need to chisel one end of the mortise square to fit the square end of the hinge leaf. Then the hinge should push in easily without any significant gaps.

Make a test cut. Clamp the template to some scrap, and rout a mortise. Vacuum out the dust, and make one last pass to be sure to get a full cut.

Square one end of the mortise and test the fit. The hinge should end up flush with the surface, without any significant gaps.

Add the fence

You want the hinge to end up centered on the thickness of the door, so you need to do a bit of math to decide where the fence needs to be positioned. To align the fence and make it easy to attach and detach accurately, cut a groove in the template and a tongue on the fence to fit. Position the groove so the fence face ends up a bit too close to the hinge opening in the template, and then plane the fence until the offset is exactly right.

Add the fence. The fence is tenoned to fit a groove in the template. Attached with screws, it can be removed and replaced accurately.

Just one layout mark needed. Mark a line where the square end of the hinge will land—in this case, 199⁄1616 in. from the edge of the door strip.

Mortise both ends of the block. Align the opening in the template with your layout mark, clamp the fence to the setup block, and rout a mortise. Then do the same thing at the other end of the setup block.

Mortise the case before assembly

Prep the case. To create the right clearance behind the door (11⁄6464 in.), Gochnour taped cardboard to the front edges of the case. To make the door flush with the hinge side of the case, he clamped on a block there.

Tape trick. Insert a hinge leaf into the setup block, and apply double-stick tape to it. If the hinge is a bit loose, put just a dot of tape under it as well.

Presto. Push the setup block against the case and the end block, then slide it down firmly against the case bottom

Lift the block and the hinge leaf will be in the right location

After cutting the cabinet joinery, dry-fit the case, and lay out the hinge locations using a setup block like the one shown in the photos. The block is made from a strip of wood that’s equal to the thickness of the door, with hinge mortises cut into it.

Use your routing template to cut hinge mortises in the setup block. Then use the setup block and some double-stick tape, as shown in the photos, to place a hinge leaf on the bottom of the case. Tape a shim to the front edge of the case, identical in thickness to the desired gap behind the door, and position the setup block against it to locate the hinges. Once the hinge leaf is taped in place, trace around it with a sharp pencil, and then remove it.

To mark the hinge location on the top of the case, use the mortise you cut in the opposite end of the setup block. Be sure to orient the same side of the block toward the front of the case so the hinges will be set back the same amount.

Disassemble the case, and use your layout lines to align the router template on the bottom and top of the cabinet. After routing the mortises, square one end of each with a chisel, test the fit of the hinges, and drill pilot holes for the screws.

Locate the template. After disassembling the case, trace around the hinge with a sharp pencil and remove it. The fine pencil lines make it easy to align the template precisely. Shift the hinge opening until all four pencil lines disappear, and it will be in the perfect spot.

clamp door

setup the route
Rout with confidence. Keep the same depth setting, and rout at full depth. Vacuum out the opening and make one more pass.

Square the corners with a chisel, check the fit, and use a self-centering bit to drill pilot holes. Then repeat all of these steps on the case top.

Glue up the case and fit the door to it (partially)

Assemble the case. With the hinge mortises cut in the top and bottom of the case, you can finally glue it up. To make it easier to fit the door, keep the case as square as possible as you clamp it.

When you are happy with how the case leaves fit into their mortises, glue up the case. We are shooting for tight gaps around the finished door, so you want the case to be assembled as squarely as possible. With the case glued together, you can fit the door to it, at least along three edges. Ultimately you want this overlay door’s sides to be flush with the outside faces of the cabinet, and you want 1/32-in. gaps between the door and the case top and bottom.

Note that the hinges have a small washer of sorts incorporated in them, which determines the gap between the bottom of the door and the case. Because this lower gap is predetermined, you want to match the gap above the door to it.

Start the fitting process at the top and bottom edge of the door, working toward that tight, even 1/32-in. gap above and below. I use a crosscut sled on the table saw to get the door close to final size, and then fine-tune it with a hand plane.

Fit the door. Using a crosscut sled, trim the lower edge of the door so it just fits between the case top and bottom and the hinge edge aligns with the side of the case. Then with the door resting on the bottom of the case, use a 11⁄1616-in. spacer to mark the trim line on the top edge of the door, as shown. This will give you a 11⁄3232-in. gap at the top and bottom edge. Leave the latch side of the door a bit overlong at this point.

Now sit the door on its bottom edge in the case opening. Mark and then trim/plane the hinge edge until it lines up with the outside of the case. The door should still be a tad wide along the latch side, which you can tune up after the hinges are fully installed.

Rout the door mortises

Knife Hinges Made Easy - FineWoodworking Knife Hinges Made Easy - FineWoodworking

Blowout block. Clamp on a backer block to prevent chipout where the bit will exit the edge of the door.

The fence goes back on the hinge template for this step, to align it front to back on the edge of the door. That leaves just a small layout step to do—positioning the hinge correctly side to side. On the top and bottom edges of the door, knife a small mark 1-9/16 in. from the end. That’s where the end of the template opening goes when you clamp it to the door.

Now you can rout the mortises in the top and bottom edges, using the same depth setting on your router that you’ve used this whole time. Square up the mortise ends as before, check the fit and placement of the hinge leaves, and drill pilot holes.

The Brusso hinges come with one steel screw for cutting threads in the pilot holes, which makes it easier to drive the soft brass screws without deforming their heads or breaking the screws entirely. Waxing the screws before driving them also helps.

Door goes on in minutes

Install the case hinges. Along with brass finish screws, the hinges come with steel screws for cutting threads in the wood so you don’t mar the heads of the brass screws when you install them. Wax the screws to further ease the way.

Slide the door onto its hinges.

Install the hinge leaf in the bottom of the door, and then drop the door onto the pivot pin of the lower case hinge. Now hold the upper door leaf in place on the case leaf’s pivot as you tilt the door and slide the leaf into its mortise. Then drive the last two screws.

Begin by screwing the case parts of the hinges into their mortises. Now you should be able to tilt the door onto the bottom hinge post, push the top door hinge onto its post, and then pivot the door to push its mortise onto the upper hinge. Alternately, you can leave both door leaves unattached, place them over the posts in the case parts of the hinges, and then slide the door onto both of its hinges at once.

To screw the last door hinge leaf in place (or both door leaves), all you have to do is open the door to access the screws.

Once you understand how easy it is to install straight hinges for overlay doors, you’ll have no problem installing the offset version, used on inset doors.

Trim the last door edge. Working from the back of the cabinet, with the door closed, use a sharp pencil to mark where to trim the latch side of the door. Then remove the door, trim that last edge, reinstall the door one last time, and admire a job well done.

Download FREE PDF

when you enter your email address below.

View PDF


Source link