Carved Entryway Mirror – FineWoodworking
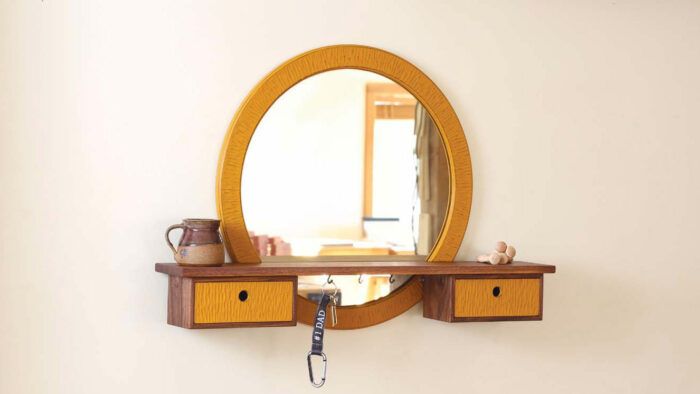
Synopsis: Rob Spiece teaches woodworking at Berea College and has found this mirror, which includes a shelf and two drawers in addition to the frame, to be a great way to give students experience in using a number of key skills: cutting miters for frames; making templates, fixtures, and jigs; using a handheld router to its best advantage; hand-carving; making boxes; and fitting those boxes with drawers.
At Berea College where I work, students don’t pay tuition, but they work somewhere on campus to offset the cost of their education. As the director of woodcraft, I oversee a staff of about 25 students. My crew is involved in every point of the process—from concept and design, to milling and joinery, to handwork and finishing. Sales of our work support our program.
We make each piece as a production item, not just a one-off. My goal is to teach processes that build skills, teach safe practices, and create high-level craft that is unique to us.
This entryway mirror hits all of those marks and builds these skills: cutting miters for frames; making templates, fixtures, and jigs; using a handheld router to best advantage; hand-carving; making boxes, and fitting the boxes with drawers.
Create the master circle template
I confess that we make the circular template for the mirror frame with a laser engraver. Without that luxury, however, there are several ways to make the template. For this article, I used a router and trammel. Alternatively, a bandsaw followed by a spindle sander and/or a disk sander could get you there as well.
Eight frame pieces
The mirror frame is composed of eight segments that are mitered and joined with slip tenons. I mill two 40-in. lengths of stock to 3/4 in. by 2-3/4 in., then cut the segments to length. At the table saw, I set my miter gauge to 22.5° and use a stop block to ensure the segments are of equal length. I don’t do a bunch of test cuts or fuss about getting it right to the highest level, because I can correct for an imperfect fit before the last of three glue-ups.
I use Dominos at the segment joints. Because the shelf and drawers will be hanging from the mirror frame, I wouldn’t skip some sort of reinforcement of these joints, which have poor end-grain glue surface. If you don’t have a Domino, splines are a great alternative.
Once the segments are cut, I lay out each end for a Domino mortise. A simple work-holding jig secures the parts and lets me quickly cut the mortises and switch to the next piece.
Two halves of an octagon
After the mortises are cut, I glue up two separate assemblies, each with four segments, leaving me with two semi-circular halves of the frame. Gluing up the frame in two halves is what gives me the opportunity to correct the angle if it has gone off slightly. I do this without math using a table-saw jig that cradles the half-frame sub-assembly. The jig holds each workpiece so its ends hang just over the edge of the base, and I slightly trim both ends in one pass. This creates two perfectly matched halves.
Before gluing the halves together, I have access to cut the inside shape on the bandsaw, so I’ll have less material to rout away later. I dry-fit the halves to each other, trace the circle pattern onto them, and bandsaw the inside shape roughly to size.
Once that step is completed, I apply glue to the ends of both halves and to their mortises and tenons. A rub joint helps to suction the pieces together, and some tape pulled with tension adds a little bit of clamping force.
I cut the Domino slots wide in order to allow for the lateral rub movement. After the glue sets, I sand to level any imperfect seams, trace my template again, and bandsaw away the excess on the outside edge. From here I can move to the router and use a template to cut the frame to its final shape.
Turn an octagon into a circle
I attach the circle template to the frame with double-sided tape and rout the frame flush to it with a pattern bit and a handheld router. I do not ever do this on the router table.
The advantage to routing this by hand vs. using a router table is that, provided you are careful, you can climb cut with a handheld router. Cutting straight pieces into a circle creates a lot of grain runout, and the climb cut helps to avoid tearout that could spoil the piece. Climb cutting is never OK on the router table, where you would be moving the workpiece over a stationary tool. Think of ripping backward on the table saw. You would never do that, right? It’s a similar proposition. The workpiece can be ripped from your grip and shot off into the distance.
When routing by hand, you are moving the tool over the stationary workpiece, and you can control the depth of the cut. If you take too deep a cut, the router will climb into the wood and move much faster than you intended. Many have likely done this by accident, which is why the router gets a bad rap. It’s important to understand the clockwise rotation of the bit and when to use it to your advantage.
To safely make a climb cut, take many light passes. I don’t engage the bearing of the router bit until I’ve made three or four light passes. The wood should be secured to the bench with either clamps or double-sided tape. I position myself behind the router so that my physical presence is there to stop the router from making a run down the edge. Listening to and feeling the router will tell you if you are being too aggressive. An aggressive cut will have a markedly higher pitch, and you’ll feel a lot more vibration.
In addition to template-routing the frame to shape, you must cut a rabbet for the mirror in the frame’s back face with a rabbeting bit. Here again, the climb cut is useful to eliminate tearout. On the front face, use a 45° chamfer bit to put a bevel on the inside and outside edges of the frame.
The shelf is located in dadoes
The shelf sits in dadoes cut in the frame. I use a shopmade fixture to cradle the frame while I cut the dadoes using a jig and a router fitted with a straight bit and a guide bushing.
Layout lines on the fixture help orient the frame so the dadoes are cut at right angles to the frame’s central vertical seam. Before putting the frame aside, I use a shopmade jig to cut keyhole slots in the back for mounting the piece to the wall.
Drawers and drawer boxes
Before making the drawers, I make the two mitered boxes that will hold them. I start by milling two 30-in.-long pieces of wood to width and thickness, one for each box. Next, before cutting those parts to length, I create a groove for the back panel, ease one edge with a roundover bit in a trim router, and then sand the inside surface.
I cut the pieces to length at the table saw, and then I tilt my blade to 45° and use a miter sled with a stop to cut the miters. A toggle clamp holds the small pieces firmly to the sled so that my hands can remain clear of the blade. A simple tape glue-up brings the boxes together. Once the boxes are glued up, I measure off them for the drawer dimensions.
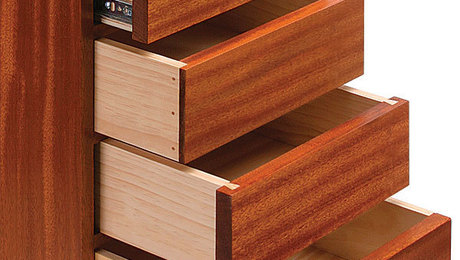
Starting with long lengths of drawer stock, I cut a 1/4-in. groove for a drawer bottom and sand the inside face. I aim for a 1/32-in. gap in the width for clearance in the drawer box and cut the length to fit in the opening. The drawers are joined with a simple rabbet, which will be pinned with dowels. I often use a single blade on the table saw and the miter gauge to nibble material away.
Carving and painting
I carve the surface of the drawer fronts before gluing up the drawers so I can hold the work more effectively. But first I drill a hole for the pull slightly above center in each drawer front and soften the edges of the hole with a roundover bit.
I do the carving with a gouge, making cross-grain scallops. Shallow cuts are enough to impart a dramatic texture. I’m careful at the ends with the rabbets, where the thickness is only about 1/8 in.
To carve the frame, I use double-stick tape or clamp the frame to the bench. Again, light cross-grain scallops add texture. I aim to carve within the lines of the two bevel cuts.
When the carving is finished, I mix up some milk paint and coat the front and back of the frame and the drawer fronts. Using a combination of 220-grit sandpaper and 0000 steel wool, I sand through the paint in order to bring out the carved texture.
The drawers are also glued up with tape. Some slight hand pressure and tension from the tape is all they need. Once the tape is on, I slide the drawers into their drawer boxes so they dry square. When the glue dries, I lay out the position of the pins on the drawer sides, then drill holes on the drill press and glue in the dowels.
Assemble the parts
Main assembly begins with attaching the drawer boxes to the shelf. I draw layout lines on the bottom of the shelf to locate the drawer boxes. Then I apply glue to the top of a drawer box and shoot two pin nails into the front edge to secure the position. After I glue and tack both boxes in place with the pin nailer, I clamp them tightly to the shelf until the glue sets.
The shelf is attached to the mirror frame with four screws. I drill through the front of the dado to clear the screw threads, then countersink from the back.
Final steps and mounting
Any finish will work with this project, but I prefer a low-sheen oil finish. Here I’m using Osmo.
After the finish is cured, I set the mirror in the frame and secure it with brass escutcheon pins driven into the rabbet with framer’s pliers. It’s important to have enough room to drive these pins in. Because the 1/4-in.-thick mirror glass is sitting in a 3/8-in. rabbet, there’s 1/8 in. of space to set the pins into the edge. Walnut and cherry are both soft enough to accept these pins, but avoid areas of dense grain.
Wall mounting is simple: Mark the position of the keyhole slots, and use appropriate wall anchors and screws to mount.
-Rob Spiece, a furniture maker and teacher in Berea, Ky., is director of woodcraft at Berea College Student Craft and the Woodworking School at Pine Croft.
To view the entire article, please click the View PDF button below.
Fine Woodworking Recommended Products

Suizan Japanese Pull Saw
A versatile saw that can be used for anything from kumiko to dovetails. Mike Pekovich recommends them as a woodworker’s first handsaw.
Sign up for eletters today and get the latest techniques and how-to from Fine Woodworking, plus special offers.
Download FREE PDF
when you enter your email address below.


