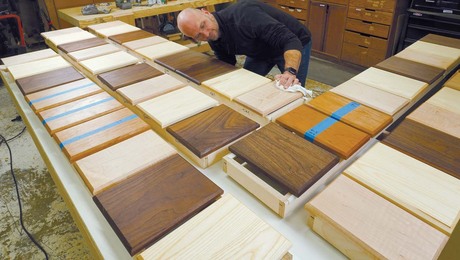
Tapered Legs on the Lathe
When I was studying design at San Diego State University, I saw a grad student using a router on the lathe to make perfect cylinders for a sculpture of a giant coat hanger. He built a simple box out of scraps and clamped it to the lathe, with the router riding on top. I saw the jig just for a moment in passing, but it stuck with me.
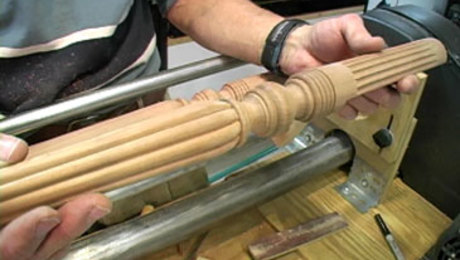
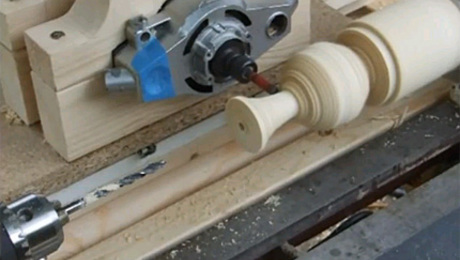
Later on I built one of my own, refining it for shaping furniture legs, both straight and tapered. Compared to using traditional turning tools, the jig makes it easier to create straight, uniform cylinders. Taking advantage of the indexing function in the lathe’s headstock, I also use the jig to rout the mortises needed to join those legs to rails. Tenon the rails, add a top, and you’ve got a gorgeous table.
I’ll focus here on the jig I use to make and mortise table legs. Simply by using different router bits, the same jig can be used to make sliding dovetail joints in legs, or to add decorative fluting or beading along their length. I also have a version of the jig that makes a big, round base for a stool. To take advantage of the jig’s joinery-cutting abilities, you’ll need an indexing feature on your lathe, but most lathes have them.
The jig shown here was made to fit my lathe, router, and the 29-in.-long legs I was making. Because of the way the tailstock of a lathe can slide into the jig box an additional 4 in. or 5 in., you’ll be able to use the same jig to make somewhat shorter legs than it was designed for. You can also slide the jig back and forth along the lathe bed to access different parts of a leg, which comes in handy at times. That said, to jump down from dining table–size to end table–size legs, for example, you’ll need to build a different jig.
Simple anatomy

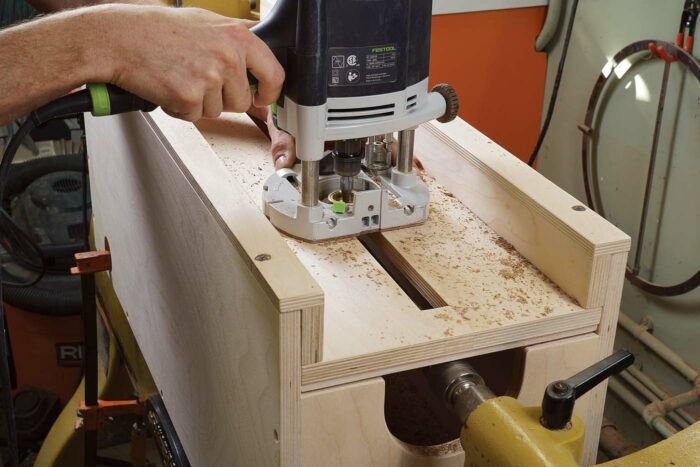
The jig is really just a large box that is clamped to the lathe, with a removable top plate that guides the router. The box has a long cleat at the bottom that fits between the ways of the lathe bed, centering it and allowing it to slide side to side if needed, and holes in its sides for clamping it to the bed.
|
|
|
The top plate attaches to the jig with straight or tapered brackets—tapered ones for shaping the main part of the leg, and straight ones for turning the straight top section of the leg and for routing the mortises. If don’t want your legs to have a straight section at the top, run the taper all the way up. The joinery will still work fine.
By the way, the jig box catches almost all of the chips from turning and mortising, leaving you minimal cleanup.
The length of the jig is determined by the length of the legs you need (and limited of course by the maximum distance between your headstock and tailstock). Start with the leg length and then add 4 in. to get the length of your jig box.
The sides of the box need to be high enough to accommodate the largest spindle turnings you plan to make. I didn’t think I would want to make spindles any larger than 4 in. dia., so I added 3 in. to the height of the lathe’s centers (from lathe bed to lathe centers) to accommodate a 2-in. spindle radius plus the top plate. The front and back panels must be shorter than the side panels to allow the top plate to drop down into the jig box.
The inside of the jig should be wide enough to accommodate the router you’ll be using, including its handles, if they are low enough to get in the way. You could turn the handles sideways to fit the router in the box, but that can be problematic for two reasons: First, the handles will run into the headstock, limiting the router’s travel. Second, you don’t really want to rotate the router when mortising; if the bushing isn’t perfectly centered, rotating the router will create inaccurate mortises.
The L-shaped brackets, both tapered and straight, attach to the top edges of the box to hold the top plate. Size the straight brackets so the router can get as close as possible to the work. This will help you maximize the depth of the mortises. To figure out the taper angle and plan the joinery, I make full-size leg drawings for each project I do.
The jig can be saved and used for many future sets of legs. So rather than just driving screws to hold the brackets on the top edges of the box and the top plate to the brackets, I use threaded inserts and flat-head machine screws, creating a much more durable attachment system.

Turning the legs

Cut the leg blanks at least 1/2 in. extralong. When mounting them on the lathe, put what you would like to be the top end of each blank closest to the headstock, where the spur center will keep it extrasecure for mortising. Then attach the tapered brackets to the top plate of the jig so the heaviest cut will be near the tailstock.
After trying a variety of straight bits for turning the legs, I’ve found that technique matters more than the bit you use, as long as it’s sharp. I use the same 3/8-in.-dia. spiral bit for shaping the legs and cutting the deep mortises.
 |
 |
Slow and steady wins the race—Set the lathe to roughly 400 rpm, move the router slowly and steadily from left to right to be sure you aren’t climb-cutting, and don’t plunge more than 1/8 in. at a time.
If you go too fast or cut too deep, the leg will vibrate and you’ll get deep chatter marks. You can remove those with subsequent passes if you slow the lathe and the feed rate.
When you get close to the final diameter at the tip of the leg, make a light final pass, 1/32 in. deep or so. Then make another slow pass at the same depth to help remove additional milling marks. Now set the depth stop on your plunge router so you can return to the same depth on subsequent legs.
 |
 |
Taper all of the legs before moving on to mortising. If you want a straight section at the top of each leg (as I usually do), trade the tapered brackets for the straight ones and mill those sections now.
Sand with a block—The router will leave milling marks on the legs no matter how careful you are, but these sand away easily.
I use spray adhesive to attach 80-grit paper to a long MDF block. The block ensures that the legs stay straight as I sand them. Once the router marks are gone, I hold strips of sandpaper in my fingers to smooth the surface further, sanding lightly up through 220 grit.
Mortising with the jig
One of the great things about this jig-and-router setup is how it also cuts the mortises you’ll need for joining legs to rails.
 |
 |
When sizing and positioning stops to limit the length of the mortises, you’ll need to account for the bushing offset. Only one stop is required for the shallow mortises, which are open at the top of the leg, but I leave at least 9/16 in. of solid wood above the deep mortise to be sure the leg doesn’t crack under pressure.
Since I use the same 3/8-in. up-spiral bit for turning the legs and cutting the deep mortises, the bit/bushing setup is the same for those steps. Make sure the leg is secure on the drive center before mortising; tighten the tailstock if it isn’t. You can also use a four-jaw lathe chuck for more security.
Each leg gets two mortises, 90° apart, and I like to sneak up on the depth so the mortises meet at a sharp corner inside the leg. Lock the indexing pin for each mortise, and make a series of light passes, roughly 1/8 in. each time.
To cut the shallow pockets that house the full thickness of the rails, I exchange the 3/8-in. bit for a 3/4-in.-dia. straight bit.
Fitting rails to the legs
The first step is to mill the rails to fit snugly in the shallow part of the mortises. Creep up on the exact thickness, test-fitting the rails in the shallow pockets as you go.
The bottom end of the pockets will be rounded from the router bit, so I just round the bottoms of my rails on the router table to fit the rounded pockets. But you could also leave the rails square-edged and then square the bottom ends of the pockets with some quick chisel work. The top of the rails reaches right to the top of the legs.
 |
 |
Cut the tenons using whatever method you prefer, but make sure they are centered on the thickness of the rails. Finally, you’ll need to round the top and bottom of the tenons to fit into the routed mortises. I do this with a rasp.
Chance Coalter is a woodworking instructor at Palomar College in San Marcos, Calif.
Fine Woodworking Recommended Products
Incra Miter 1000HD
One of many extremely accurate Incra miter gauges, this model offers 180-degree adjustment to 1/10 of a degree, and a long, straight fence with a telescoping stop system.
Milescraft 4007 6in Bench Clamp
These 6 inch clamps slide into a T-track, making an excellent solution for quick and repeatable workholding.
Hedgehog featherboards
The Hedgehog’s unique spiral shape and single knob make it easy to set up and fast to adjust.
Sign up for eletters today and get the latest techniques and how-to from Fine Woodworking, plus special offers.


