

Making a Panel with Shop-Sawn Veneers
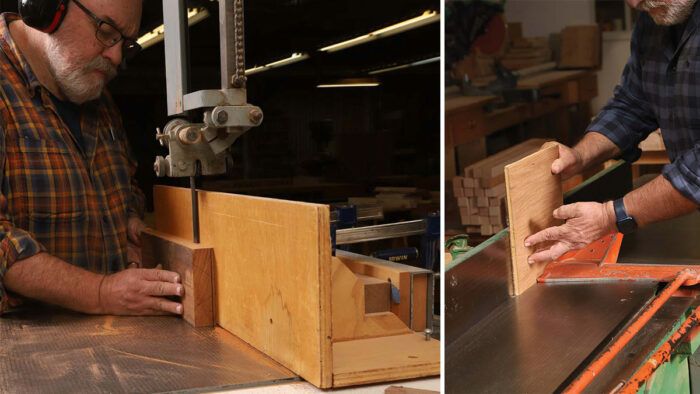
Perhaps you’ve heard about other furniture makers sawing their own veneers and pressing them onto panels. It may sound tricky, but shop-sawn veneers are easily sliced on a bandsaw, and because they’re cut much thicker than commercial veneers, they can be worked with hand tools like solid wood; yet once they’re glued to a stable substrate, they don’t pose any wood-movement issues. Since the panel’s not expanding and contracting like solid wood, the design door opens wide, multiplying a woodworker’s options. If you haven’t tried these techniques, I think you’ll be surprised to discover just how approachable they are. Making a small panel like the one I used for the top of my plant stand is a great place to try them out.
For the panel in my plant stand, I chose narra, a spicy-smelling Southeast Asian species that complements the color and texture of the stand’s black walnut base and frame. After selecting a section of the narra plank that had nice grain and a subtle bee’s-wing figure, I jointed one face and one edge and resawed four veneers, each a little less than 1/8 in. thick. This gave me enough leaves for a book-matched layer on both the top and bottom surfaces of the panel. It’s important that veneer be applied to both sides of the plywood or MDF core so the panel is balanced and remains flat.
I do the resawing at the bandsaw and use a shopmade fence that is about 10 in. tall. The fence can be clamped to the bandsaw table or to the bandsaw’s factory fence.
Set the resawing fence so that it’s a shy 1/8 in. from the left-side bandsaw teeth. Once the fence is secured, there’s a simple way to verify that it’s parallel to the blade.
 |
 |
Using a flat scrap of wood held against the fence and bandsaw table, make a 1/2-in.-long cut. Then move the scrap up to near the top of the fence and make a shorter cut, checking that the sawblade has cut perfectly in the kerf created by the first cut. If the second cut created a little step on either side of the original kerf, relocate the clamps or add shims to tweak the fence until it’s parallel to the bandsaw blade.

To cut the veneers, use a steady feed rate. A pause tends to leave a little bump on the surface of the blank you’re slicing, and that can impact the quality of the next veneer you cut. If you do pause, check to see if a bump can be felt on the blank’s surface; if it can, use a block plane across the grain to lightly shave it away. You can do that right at the bandsaw. After a couple of cross-grain block-plane strokes, resaw the next veneer.
If your bandsaw cuts relatively smoothly, the surface left by its blade will be perfectly fine as a glue surface when you’re adhering the veneers to a core, so it’s not necessary to rejoint the blank after each veneer pass. But after four or five veneers have been sawn, you will probably want to rejoint the blank’s face and edge to restraighten them. You can also leave the bandsawn surface on the show face of the veneers when you press the panel; it will be easier to smooth afterward.

When you’ve sawn your veneers, use a hand plane to edge-joint the ones that will be glued edge-to-edge. I do this at the workbench, elevating the veneer an inch or so on a flat scrap and laying the plane on its side. I place the veneer so its long edge extends 1⁄4 in. or so from the scrap, then I take a few swipes with the plane.
 |
 |
Blue painter’s tape works well for clamping the edge joint. Stretch a few pieces of tape tight across one side of the dry-fitted pair of veneers.
 |
 |
Then fold the pair open, exposing the edges of both pieces. Apply a thin bead of glue along the edges, then unfold the veneers to adhere the edges. Stretch more blue tape across the top face of the joint, and leave the glued-up leaves on the bench or another flat surface to dry.
After about 30 minutes, the tape can be removed and the veneers glued to a core. The core can be either Baltic-birch plywood, which is high quality and free of voids, or MDF, which is usually very flat, although less pleasant to work with. When you’re using Baltic birch, you can glue thin layers together to build up to a required thickness rather than starting with the actual thickness. That results in a flatter plywood core. For example, if you are aiming for a 1/2-in.-thick core, rather than buying 1/2-in. plywood, try making it by gluing up four pieces of 1/8-in. plywood. This requires a couple of simple steps, but the flatter results are worth it. I recommend gluing up the core first and gluing on the veneers afterward.
 |
 |
Spread glue on the substrate—in this case 1⁄4-in. MDF—and tape the veneers in place top and bottom. The tape will keep the veneers from shifting under clamp pressure.

I use pieces of 3⁄4-in. MDF as cauls; they protect the panel, keep it flat, and distribute clamp pressure. Sheets of kraft paper prevent the panel from sticking to the cauls.

I often use a vacuum bag when gluing up veneered panels, but on a small panel like this one, using clamps is just as effective and efficient. Be sure to use adequate cauls and plenty of clamps. For cauls, I stacked two 3/4-in.-thick MDF panels on the top and bottom of the glue-up.

After glue-up, flatten and smooth the show veneer faces with a hand plane, and follow up with sandpaper on a block. The panel could also be sent through a wide-belt sander.
 |
 |
At the jointer (or with a hand plane) joint one long-grain edge of the panel, then rip it to width at the table saw. That done, cut it to length using a crosscut sled.
Craig Vandall Stevens is director and lead teacher at the Philadelphia Furniture Workshop.
| From Fine Woodworking #323
To view the entire article, please click the View PDF button below. |
 |
Fine Woodworking Recommended Products
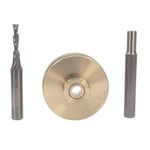
Whiteside 9500 Solid Brass Router Inlay Router Bit Set
Set includes solid carbide down-cut spiral bit (for chip-free cutting), quick-change bushing, template guide and complete instructions. Fits Porter-Cable, Black & Decker and any router with a Porter-Cable bushing adapter.

Bahco 6-Inch Card Scraper
The size and thickness are what matter here. A consistent performer, this Bahco scraper is found in many shops we visit.
Sign up for eletters today and get the latest techniques and how-to from Fine Woodworking, plus special offers.
Download FREE PDF
when you enter your email address below.


