Dentil Moldings for Fine Furniture
Lisa Raleigh and Video By: Gary Junken Editing By Cari Delahanty
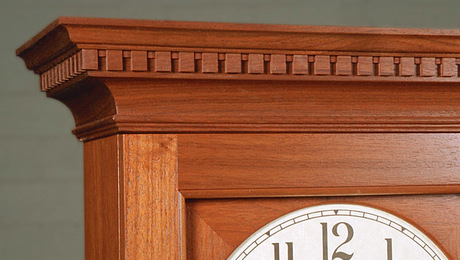
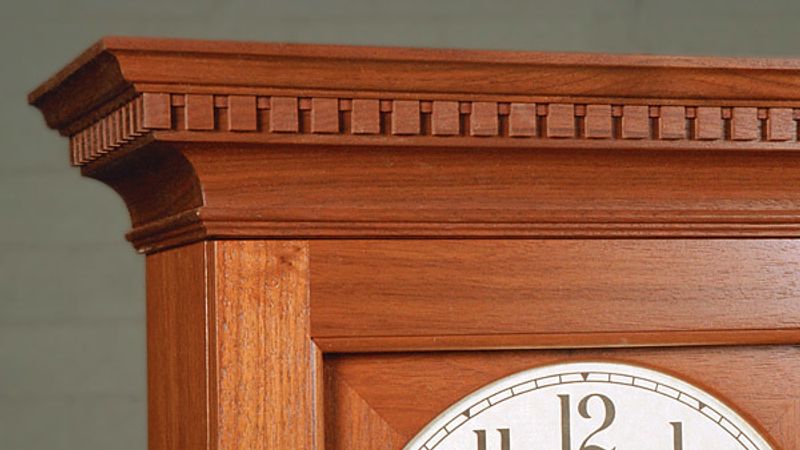
Dentil, or teeth-shaped, moldings have a long history. The Greeks placed dentils into the capital section at the top of their columns. Furniture makers have used them extensively to render a more classical flavor to a given piece. Thomas Chippendale incorporated the Greek key and block dentil into many of his designs.
In America, Thomas Elfe, a mid-18th century cabinetmaker from Charleston, S.C., was familiar with Chippendale’s work and used dentils quite effectively in his pieces. Outside of Philadelphia, the Pennsylvania Germans developed dentil motifs that reflected a more rural flavor appropriate for their bulkier, less sophisticated furniture.
In reproduction work, you must be careful to put the dentil in the right place. That’s not as silly a warning as you might think. A lot of factory “period” furniture gets this detail wrong, placing the dentil as the first element of a cornice. By contrast, most American furniture from the English tradition has the dentil located above the frieze or in the upper section of the crown. Here I’ll cover two common types of dentils: block and Greek key.
Block dentils are the most common
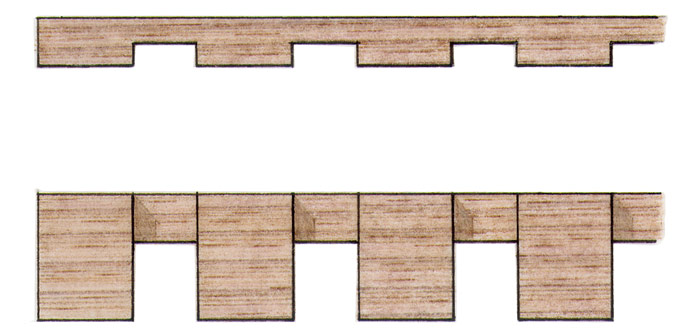
For a refined look, block dentil moldings should begin and end on a full tooth, although you can find pieces where this rule hasn’t been followed. A few basic calculations, combined with a little fudging during milling, make ending the dentil on a full tooth easy to accomplish. The process may seem a little complicated the first time you do it, but it’s quite simple.
Take the length of the molding, figure out the size of each unit ( a void and a tooth), and divide the length by the unit size to get the divisions. The only wrinkles are adding the overhang and making sure that you end up on a full tooth. The same process is used for the front as the sides.
The dentil should end on a full tooth, and each unit is a tooth plus a void. So to do the layout, subtract the last tooth from the overall length of the molding to figure out the number of full units that will fit across the case. You will rarely end up with a whole number but don’t worry about that.
Now it’s time to see whether the dividers are set properly. Using a piece of scrap, mark out 24 divisions with the dividers. Tweak them until you come out right on the money, or within a hair.
Next, using a piece of milled stock several inches longer than the dentil needed, draw a centerline down the piece (if making two rows at a time). Then, beginning a few inches from one end, mark out the number of divisions. (The extra stock on each end allows you to cut the first and last teeth to fit the piece. Here’s where you fudge a little if the layout isn’t exact.)
You could proceed from here right to the table saw, but to avoid confusion, it doesn’t hurt to make another set of marks that clearly define each void and tooth. To do that, set the dividers to the width of the void, and walk off another 24 divisions, which represent the voids. Using a square, extend all of the marks, edge to edge. Last, mark the areas to be cut. Before going to the saw, hold up the marked-off stock against the case to double-check your layout.
Machine the voids using a Dado blade
To safely control the movement of the thin stock across the saw and avoid a blowout, I make a carriage using two pieces of 3/4-in. thick medium-density fiberboard (MDF) screwed together at right angles and attached to a pair of miter gauges.
With the carriage in place, raise a 1/4-in. dado set until it cuts a 5/16-in.-high notch. Use the kerf in the carriage to register the layout marks. Next, cut all of the 5/16-in. deep notches along one edge of the strip. Then reset the dado height for a little less than a 1/4-in.-deep cut. Lay the strip on its face and cut the shallow grooves.
Return the dado to the 5/16-in. setting and cut the voids along the other side (if making two sets at once). To rip the stock into two sets, use a zero-clearance insert plate and a long push stick. Even though the strips are stronger than they look, treat them gingerly.
The Greek key
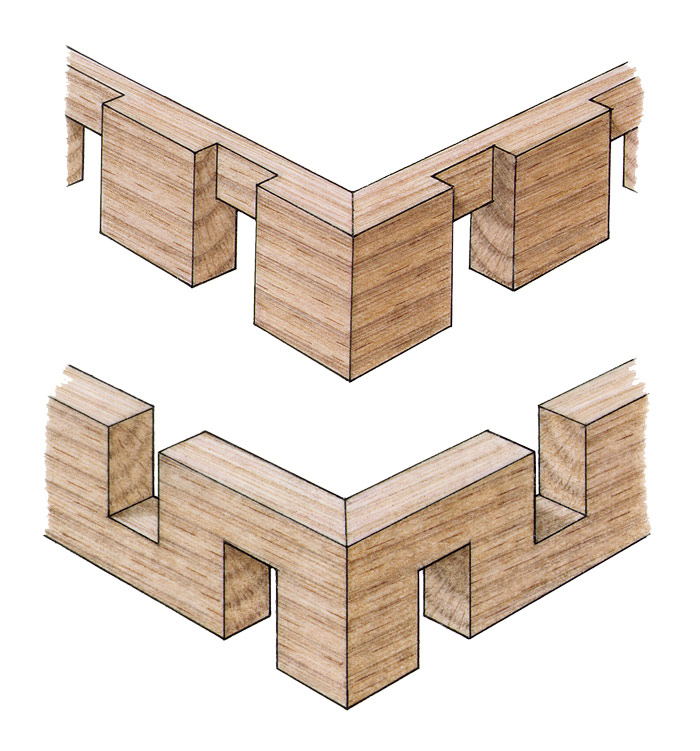
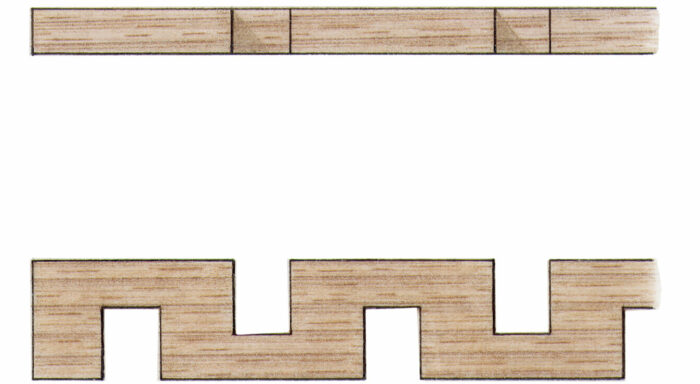
The cornice with the Greek key shown on the clock was taken from a piece made by Thomas Elfe In 1765. For symmetry, the molding should end In vertical members at the corners, and the adjoining voids should either be at the top or bottom.
Unlike on the block dentil, cuts must be made on both sides of the stock, so you can’t mill two sets at once. But like the block dentil, the molding is cut on the table saw using the same type of carriage. As with the block dentil, figure out a unit, then make the necessary calculations to do the layout.
Mount the dentil to the crown
The best way to ensure that the dentil fits your piece exactly is to lay the strip atop the frieze, mark the length, and then cut it. I use a miter saw to cut the dentil to length as well as to miter the corners. When doing this, it’s important to support the molding on all sides. Otherwise, you may find little teeth flying all over the shop. I make a holder that attaches to the miter saw fence.
It’s nothing more than a straight block of wood with a rabbet cut into it. The rabbet acts as a fence to support tl1e molding. Before cutting the dentil, make two cuts into the block, one at 90° and another at 45 0. The clean kerfs will prevent blowout and act as registration marks when cutting the dentils.
Once cut to fit, apply a dab of glue to the teeth and then clamp the molding in place with masking tape.
—Originally published in 2013. Text is excerpted from Steve’s article “Two types of dentil moldings” in Fine Woodworking #154—Feb/Mar 2002
Built-Up Moldings
How to Make a Federal Side Table
Basic Stringing Techniques
Sign up for eletters today and get the latest techniques and how-to from Fine Woodworking, plus special offers.

