Dovetailed Jewelry Chest – FineWoodworking
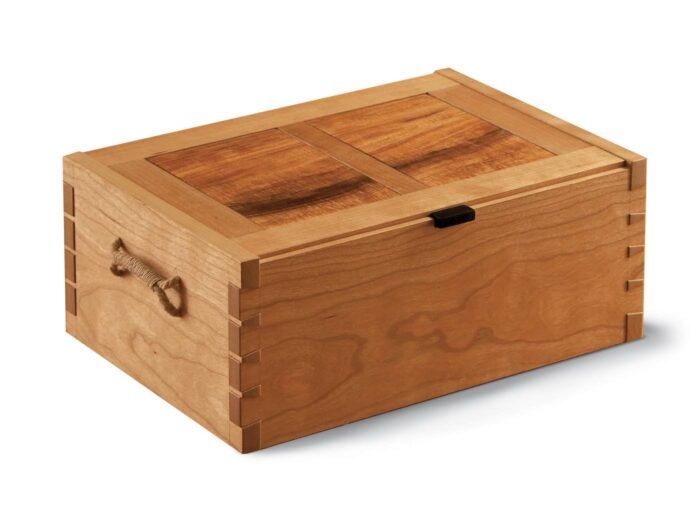
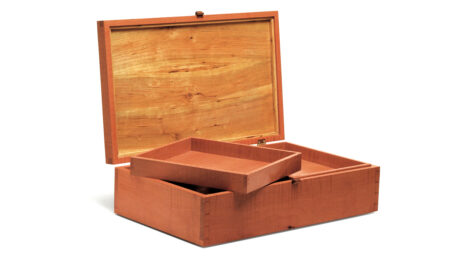
Synopsis: Michael Pekovich enjoys projects that allow him to incorporate fun details, and this jewelry case has several: joints with proud dovetails; frame-and-panel construction for the top and bottom; mitered trays, one of which features a divider with a handle wrapped in hemp twine; and a notch to accommodate the pull for the lid.
Lately, I’ve found myself drawn toward smaller projects that incorporate fun details, and a jewelry chest is the perfect place to get a little creative. This project combines a dovetailed case with mitered trays and a frame-and-panel lid. It’s a straightforward build with small touches that bring it to life.

Although it’s perhaps not evident at first glance, there is quite a bit happening at the top of the chest. Attaching a lid to a box is always an interesting challenge, and there are many ways to go about it. Rather than sitting on top of the case, the lid here is nested between the sides, overlapping the back of the box and partially inset into the front. And its pull sits just proud of the front lip of the box. While these features may escape notice at first, they combine for a cohesive look and something that is just a little unexpected. I’ve used kumiko panels in the lid in the past, this time I used solid panels for a more understated look. Wrapped cord handles on the sides of the case allow for easy lifting of the chest. The interior trays feature a wrapped pull as well.
Dovetail the chest sides
Construction begins by joining the case. The front and back have a group of centered tails with a heavy inset from each edge. The wide space at the top and bottom allows you to run the case grooves and rabbets the length of the parts. It also makes it easy to rip the back to final width, simplifying the joinery tremendously.
While the parts will end up at various widths, it’s more efficient to mill them to a consistent width and take them to final size after cutting the joinery. Start by cutting the dovetails on the front and back of the case, then cut the grooves for the bottom and the rabbet on the inside edge of the front for the lid. Scribe and cut the pins on the case sides. Once the joinery is complete, rip the back to its final height and trim the top edge of the front so the lid will sit proud. The final task is to cut a notch centered along the top edge of the front for the pull. I find it easiest to cut the notch first and then size the pull to the notch later.
Make the bottom
While I used a piece of birch plywood lined with handmade paper as a bottom for the trays, I believed that a frame-and-panel bottom for the chest would be a nice touch. The joinery for it is handled quickly at the table saw, and the final result is a stable and lightweight base for the chest. The parts are 33⁄88 in. thick and joined with 11⁄88-in.-wide grooves, tenons, and tongues, which provide plenty of strength. The bottom panels are the same thickness as the frame, so you can cut the tenons and rebate the panels with the same setting at the table saw. Build the bottom slightly oversize, and then trim it for a precise fit once it is assembled.
Assembling the case
A final task prior to gluing up the case is to cut the hinge mortises along the top edge of the rear of the case. The back is recessed below the sides, which would make mortising difficult after assembly. It’s also easier to drill the sides for the cord handles at this point.
When surfacing the case parts, add a light chamfer to the ends of the pins and tails to make them friendly to the touch. They won’t be planed flush after glue-up, so I try to minimize glue squeeze-out as much as possible. In addition, I like to pre-finish the parts with a coat of thinned shellac. This will allow for easier glue removal later and will prevent blotching should any glue contact the end grain of the pins or tails during assembly.
Finish the interior of the case parts as well, but leave a strip of bare wood along the bottom half of the front and back so that the upper tray supports can be glued to the inside faces once the case is together.
It takes just a few minutes to make a set of notched cauls for clamping. Taping the cauls in place along the dovetails will allow you to focus clamping pressure directly over the joint, preventing possible bowed sides and helping to ensure a square glue-up.
To view the entire article, please click the View PDF button below.
Sign up for eletters today and get the latest techniques and how-to from Fine Woodworking, plus special offers.
Download FREE PDF
when you enter your email address below.


