How to Turn a Serving Dish
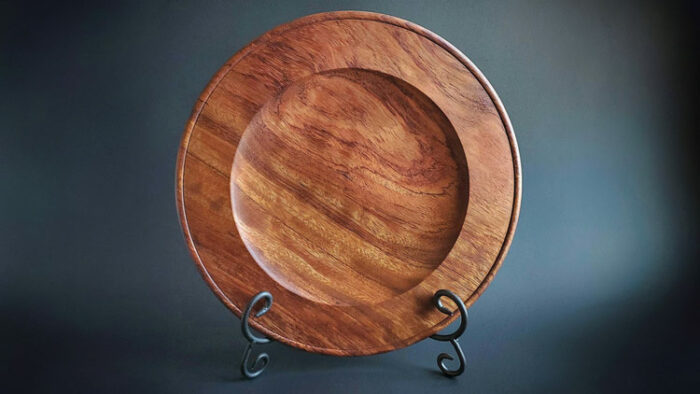
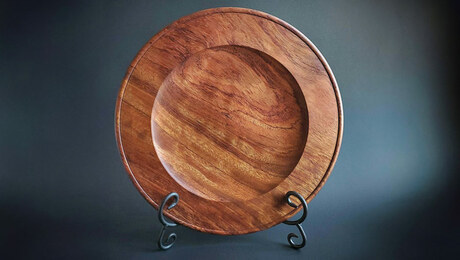
When I was working as an in-house turner for the Vermont woodworking and ceramic artisans Shackleton Thomas, I made scores of dishes and platters in cherry and walnut. They were simple forms with a single bead at the rim. I always admired the elegance and utility of those designs, and this serving dish is inspired by them.
Here I’ve used bubinga, choosing it for its hardness, durability, and—with this particular stock—for its marvelous quilting, chatoyant grain, and brilliant natural coloration. This isn’t a complex piece to turn, but to make it sing, the surfaces should be super clean and the transitions and details extremely crisp.
Side one
Begin by bandsawing a circular blank between 9 in. and 11 in. across. Then screw a faceplate to what will be the top of the dish. The screws should protrude from the faceplate at least 1/8 in. less than the depth of the dish’s hollow. Here I added a spacer beneath the faceplate to compensate for the length of the screws I had on hand. After mounting the blank on the lathe, true up the perimeter and flatten both faces.
 True the perimeter. A 5/8-in. Swept-back bowl gouge, making passes toward the headstock, quickly trues the perimeter of the blank. |
 Flatten the bottom face. Again using a 5/8-in. Swept-back bowl gouge, true the bottom face of the dish blank. |
 True the inside. Monaco uses a wing of the 5/8-in. Swept-back bowl gouge to shear scrape the other face of the blank. |
 Getting ready for a recess. With both faces flat, adjust a pair of dividers to the diameter of your four-jaw chuck, then transfer that measurement to the blank. You’ll turn a recess here to accept the chuck. |
With the bottom of the dish facing out, your next move will be to lay out the ring-shaped foot. Measure the span of your four-jaw chuck with dividers and transfer that dimension to the blank; it will be the inside diameter of the foot. Use a pencil to mark the outside diameter of the foot.
It should be 1/2 in. to 1 in. greater than the foot’s inside diameter. On the edge of the blank, make a pencil mark 1/4 in. from the front face; the material below this line will be removed as you turn the ogee-curved underside of the dish.
With a bowl gouge, roughly shape the bottom face of the dish, using push and pull cuts between the foot and the rim. Before making the finishing cuts on the softly sweeping ogee curve, use a square-end scraper to create the recess inside the foot for the four-jaw chuck.
A depth of 1/8 in. is adequate. Clean up the ogee curve and cut any fine detail you like on or inside the foot. Then apply the finish to the bottom face of the dish.
 Ogee layout. The underside of the dish will be cut to a shallow, sweeping ogee curve extending from the foot to the rim. In pencil, mark the outer diameter of the foot and then, right on the rim, make a pencil mark where the ogee will end. |
 Turn the S-curve. To begin shaping the gentle ogee curve, use the nose of a swept-back bowl gouge, cutting from the rim to the outer edge of the foot. |
 Make a foot to fit the chuck. The inside of the foot is defined by the scribe line for the four-jaw chuck. Starting at that line, use a square-end scraper to turn a 1/8-in.-Deep recess for the chuck. The walls should be 90° or slightly dovetailed. |
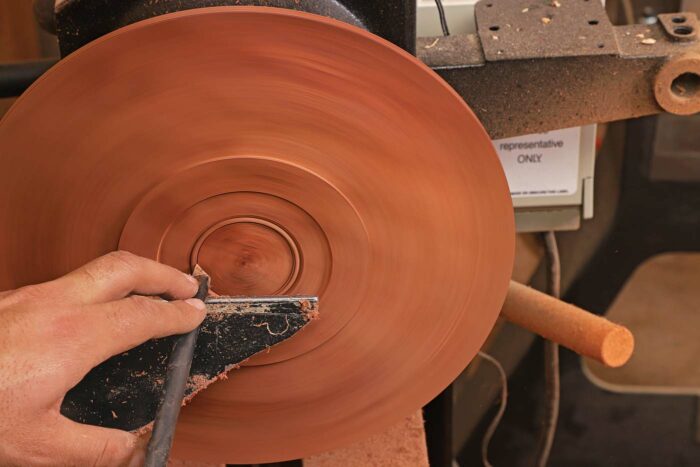
 A final pass. After completing the foot, make a finessing pass or two to give the ogee its final form. Monaco here uses a 1-in. spear point with convex wings. |
 Halfway finished. With the bottom of the dish complete, apply mineral oil, wet-sanding through the grits from 220 to 600. Buff on wax, but leave the chuck recess unwaxed for now. |
Side two
 Reverse and remount. Unscrew the faceplate and remount the dish, fitting your four-jaw chuck in expansion mode into the recess you turned inside the ring-shaped foot. |
 Flatten first. With the dish remounted, true its upper face. |
After unscrewing the faceplate, remount the workpiece on the four-jaw chuck. Begin work on the upper face of the serving dish by truing the whole surface again. Then make a push cut from the perimeter inward to establish the broad flat band just inside the rim. Roll a small bead right at the rim with a bowl gouge, then flatten the rim band with a convex square-end scraper.
 Relieve the rim band. Using the wing of a swept-back bowl gouge, true up the broad, flat rim band. |
 Turn the bead. With the rim band relieved, use a 1/2-in. Swept-back shallow detail gouge to turn the bead and define the outer edge of the rim. |
 The band gets flat. A 3/4-in. Convex, square-end scraper flattens the rim band and sharpens the corner between the bead and the band. |
 Excavating inside out. Using a 1/2-in. Flat-ground interior bowl gouge, begin the rough hollowing with cuts near the middle of the dish and move outward cut by cut. |
 Smoothing the cavity outside in. With the rough hollowing complete, use the interior bowl gouge to make sweeping shear cuts from the rim band toward the middle of the hollow. |
 Final finessing. With the last passes of the interior bowl gouge, ensure that the hollow is fully smooth and nearly flat-bottomed. |
Finally, using a 60° interior gouge, begin hollowing the dish. Start at the center and work your way outward, making your hollowing cuts just slightly deeper than the screw holes for the faceplate. After completing the hollow, wet-sand the upper face with mineral oil, run through the grits from 220 to 600, and then, lastly, buff with carnauba wax.
—Matt Monaco turns at home in Kansas City, Mo., and teaches turning all around the country.
Fine Woodworking Recommended Products
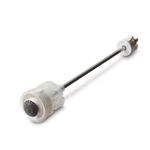
CrushGrind Pepper Mill Mechanism
Matt Monaco designs his pepper mills to accept the CrushGrind mill mechanism, which he likes because it doesn’t require drilling through the top of the mill’s cap and having hardware exposed on top.

Suizan Japanese Pull Saw
A versatile saw that can be used for anything from Kumiko to dovetails. Mike Pekovich recommends them as a woodworker’s first handsaw.
Sign up for eletters today and get the latest techniques and how-to from Fine Woodworking, plus special offers.
Download FREE PDF
when you enter your email address below.

