Create a big carving from smaller boards
Originally titled “Stacking” in Fine Woodworking #5—Winter 1976
The technique of stacking, by which layers of boards are glued together and carved to make furniture, was virtually unknown [decades] ago. Today it is part of the vocabulary of many professional furniture makers. Stacking makes possible the most arresting of contemporary designs. It is high technology work, depending upon modern adhesives, clamps, and power machinery.
Methods similar to stacking were used as early as medieval times, when sculptors occasionally glued baulks of wood together to build a block large enough to carve. Since carousel horses have been carved from laminated blocks of wood, with the legs and head attached by traditional joinery. Modern stacked furniture, however, relies on carefully preplanning the cross sections of the form at each elevation, and cutting the wood very near to the finished cross section before gluing it together. Wendell Castle of Scottsville, N.Y., believes he was the first to apply this technique to furniture, early in the 1960s. He has been doing it ever since, producing several dozen pieces a year, refining and developing his methods and forms.
Castle is trained as a sculptor and designer, but his interest in cross section goes back to his boyhood in Emporia, Kansas, during the 1930s. In the model airplane kits then popular, the fuselage was stacked balsa wood. The kit included a sheet of patterns and just enough 1/8-in. balsa to cut them all out. Then one would glue them together and sand smooth.
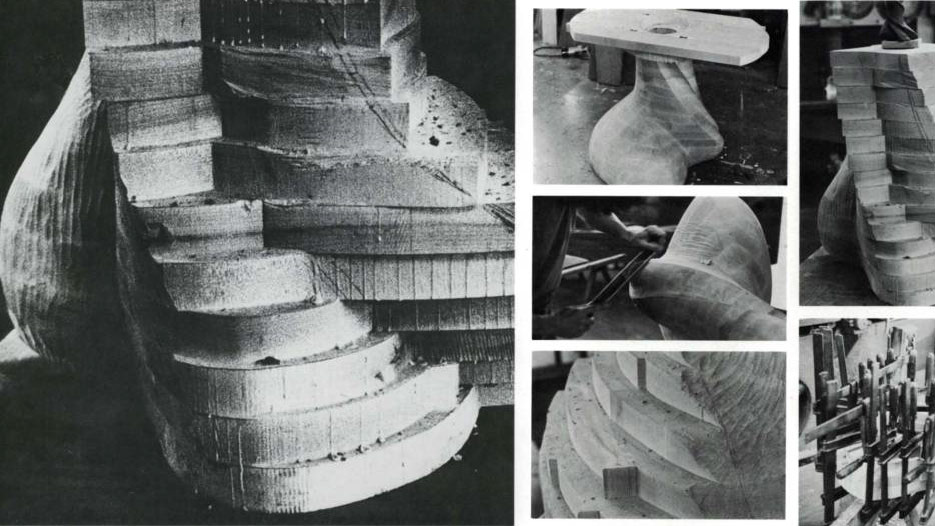
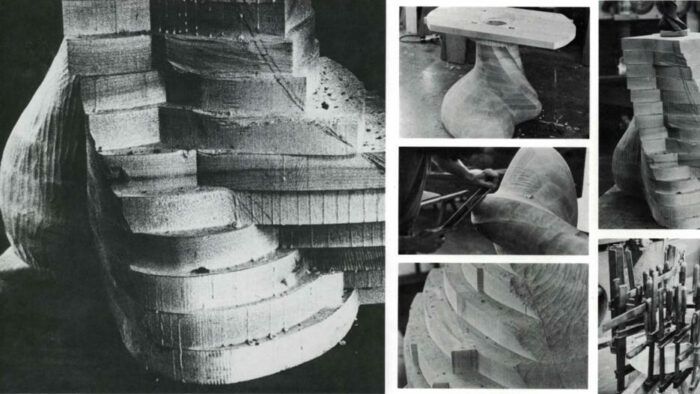
Most people, when first encountering Castles’s work, conclude that he must glue together a rectangular block and slowly carve away the excess wood, like a sculptor with a block of stone. In fact, he tries to bandsaw each piece of wood to within 1/8 in. of the finished surface before gluing it. He works one layer at a time: cut, glue, and clamp; cut, glue, and clamp. The form is blocked out, more than half revealed, before it has been touched by a single carving tool.
Besides being aesthetically satisfying, working this way is economical of time and material. Castle estimates his waste to be somewhat higher than that of a one-man cabinet shop, but lower than that of a furniture factory. In carving, he doesn’t have to bash away pounds of material; he merely removes the stair steps of the stacked boards and refines the surface. This is the result of accurately visualizing cross sections from the start.
I followed the development of a stack dining-room table from a small clay model. Says Castle, ” This form started from a conch shell, although it has gone through about 50 variations over the past five years. Some of them looked much more like a conch shell than this. Bones are also nice sources of design. It’s a mistake to try to interpret really literally, to make a big conch out of wood—you could have taken a photo. I use the conch as inspiration of form, to reinterpret and derive a new form. It ends up as a table base.”
As an aid to visualization, Castle often draws contour lines around his models. Throughout the work, the model is close at hand and he studies it frequently.
From the model, the first step is to draw a full-size plan of the bottom layer. He glues up a flat slab of wood, traces the pattern onto it and bandsaws. With a new design such as this one, he usually makes the bottom an inch larger than the desired size. This gives an inch of material to play around with while carving, and if he doesn’t need the inch, the base is just that much larger. No matter.
 1) The clay model sits on the first two stacked layers. |
 2) The shape for the next layer is traced. |
 3) Castle applies glue and scrapes off the excess. |
 4) He clamps across the work to prevent sliding. |
 5) Clamps are placed about every three inches for even pressure and tight glue joints. |
 6) The completed stack already resembles the model even before carving. |
The wood for this table is 8/4 maple, planed to a uniform 1-5/8 in. thickness. While it might seem logical to work with wide boards, Castle finds random widths ranging from 6 in. to 10 in. to be least wasteful. Kiln-dried lumber and careful moisture control are essential to avoid unequal stresses and consequent delamination.
The base and first stack are glued together, with the process the same for every layer. First, Castle scrapes off the excess glue and planes the top of the form to remove irregularities in thickness and ensure a flat surface. The first board needs only have one true edge—the other edge will be sawed away. With one eye on the model, Castle traces the outline of the stack on the underside of the board and then modifies the pencil line to account for the changes in the form at the new elevation. The more accurate the shape now, the less time it will take to carve the form later on. He goes to the bandsaw, cuts the board and tacks it in place with a clamp.
Now he selects a board with square, parallel edges; holds it in place; draws the inside cut on its top surface; and traces against the previous layer on its underside. Again, he adjusts this line in tune with the evolution of the form, and bandsaws. At this stage every piece looks alike and one bump would scramble them irretrievably, if each weren’t keyed to its correct location with pencil lines on its face.
As he works, Castle varies randomly the cup of the end grain both from layer to layer and from board to board and makes sure the glue lines don’t coincide. This tends to equalize stresses throughout the mass as the wood expands and contracts. And it avoids the regularity of a brick wall, which would introduce visual confusion-the predictability of the pattern would conflict with the perception of the form.
At this point, there are six pieces of wood in each layer. The table base is hollow to save weight and allow the moisture content to equalize. The bottom plate is solid now, but a hole will be drilled in it later on. And the underside will be routed out so the table rests on an edge, more stable than a slab.
A small ear left on the last board in the layer provides a parallel surface for a clamp to bite in, drawing the edges of the boards together. Now is the time to check back with the model and make sure there is enough wood for the changes in the form; occasionally, Castle discards a piece of wood and saws another.
As the stack climbs, each layer twists with respect to the one below. In each, the grain remains at right angles to the long, curved edge. Castle explains that in this case the grain twists about 2° per layer, to follow the twisting form and to allow carving downhill, with the grain, where there are grooves. The grain could twist as much as 5° from layer to layer without danger of delamination—in a board, the fibers vary that much from parallel as the grain curves. Without such preplanning, one would be left trying to carve uphill, against the grain, from the bottom of a groove to the top. And that wouldn’t be possible.
Castle uses both Titebond yellow glue and powdered plastic resin glue. The yellow glue comes ready-mixed and is convenient; powdered glue, while stronger, must be mixed anew for each job.
When the entire layer is cut, he carefully brushes the sawdust and chips from all the surfaces, lugs over a couple of dozen clamps from the rack in the middle of the shop, and begins to spread the glue. He uses a wooden shim for a spreader, starting on the stack and initially covering only the area of the first board. Then he coats the face and edge of that board and tacks it down with clamps, making
sure it is in exactly the right place. Some of the clamps reach to the bottom of the form, and some go only to the next layer down; it doesn’t matter.
Then he quickly spreads glue across the rest of the stack and the other five boards in the layer, and plants them in place.
Quickly now, before the glue can set, two horizontal clamps pull the edges together. Without that little ear on the outside board, the clamp would have nowhere to bite. Another pair of horizontal clamps, reaching across at various angles, draws the joints tightly together and the glue oozes out. One glue line is recalcitrant, and a vertical clamp, set to bite at an angle, draws it snug.
Now more vertical clamps: a clamp every three inches all around the form, a clamp directly on every glue line, clamps alternately at the outer edge and near the center. Each clamp is twisted one-hand tight. When he is done, and it doesn’t take long, there are 28 clamps. Any glue-squeeze wiped off now won’t have to be scraped off later.
On a good day, Castle will stack a layer first thing in the morning, another at lunch time, and a third at quitting time. The clamps stay on at least two hours with yellow glue, and overnight with powdered resin glue. Thus it will take about a week to build up the table base, although the total time each day isn’t more than two hours.
A large piece of furniture, festooned with clamps holding 30 or more pieces of wood in a layer, may weigh 600 pounds. The weight of the clamps may cause it to tip. Get quickly out of the way; it’s far too heavy to catch.
Some workers use a veneer press to stack. But while the press applies enormous pressure, it is uniform pressure and that’s not what is needed. Hand clamps follow the irregularities in the wood, the tiny differences in thickness, the vagaries of warp, twist and cup, and still squeeze hard enough to produce a good joint. They also can be adjusted to apply pressure at an angle, and ganged to apply extra pressure when necessary—in general, they’re a lot more flexible for this kind of work.
Wood coated with glue, especially yellow glue, is slippery. A combination of horizontal and vertical hand clamps controls slippage and keeps everything where it ought to be, but in a veneer press you’d have to use locating dowels. And then when you decided to change the form later on, to carve a little deeper, the dowel would surface.
When the entire base is stacked, it resembles a free-form staircase. If the pieces have been sawed accurately, what remains is to carve away the stair steps. Ideally, the desired surface lies just below the vee of each step. In practice, this is more true in some places than in others. A piece that has been made before can be stacked even more closely than a new one like this.
While it is possible to build a table from the top down, this one has to be done from the bottom up—otherwise, you’d need clamps with a three-foot throat. In general, Castle stacks as far as he can without impairing the carving, then carves as far as he can without making the rest of the clamping impossible. In this case, it is much easier to carve the base before adding the top. There is more room to work, more directions from which to work, and less mass to shift around.
The whole form could be carved by hand, with mallet and gouge, and smoothed with Surform, riffler, and sandpaper. Castle, however, uses an array of power tools, most of them air driven, to save time. He begins with the chainsaw, paring away the stair steps, moves to the ball mill and pneumatic chisel to refine the main forms and block out details, and the body grinder to remove tool marks from large surfaces. The details are worked with mallet and gouge, and refined with Surform and riffler. He keeps Surform tools in sets, some to cut on the push stroke and some reversed in the handles to cut pulling.
Throughout the carving, he keeps the whole piece at the same stage; when one area is about right he moves to another. Thus the whole piece is brought at once from stepped layers to the general rough form, then each plane and hollow is defined, the sweeps of line adjusted and their starting and stopping points feathered imperceptibly to nothing. What makes a line is the intersection of two curved surfaces ; what makes this form “read” is the lines. That means the surfaces have to be just right, so the lines will be just right. To change the curvature of a line, he has to change the surfaces that make it-he can’t just whack a corner off. Finally, Surform and scraper remove the minute hollows and bumps and the piece is ready to sand.
The base of the table nears completion. It is remarkably like the model. Says Castle, “It’s freeing for me to work in clay, and then figure out whether it’s possible to make the form in wood. But in fact I find I make decisions early on, from my experience, and shy away from forms that would be too difficult to make, or too heavy to be practical. The forms I draw and model fall into patterns that lend themselves to the things I know about doing; I don’t do radical experiments that risk disaster. That experience, those patterns become my vocabulary and I work within it.”
The base was made without a definite top in mind, with the idea that it might fit a round top left over from an earlier project. “I’ve never made a table this way before, with the top abruptly planted on the base. I’ve always said that was dumb. Tables should have an organic transition from base to top,” Castle remarks. Then he plops the round top onto the base and it’s clear he was right-it doesn’t work. So he makes a cardboard pattern, a three-sided lozenge, and trims it to shape. Much better.
From the base as it was, it will take three layers to make the vertical-to-horizontal transition and complete the table top. And at that height, the table would be too high. So he chain-saws off a couple of laminations and glues on a slightly larger layer to create a clamping surface. Then he cuts and clamps the center three boards of the layer that is just under the top.
This layer has to be done in two stages because the boards at the perimeter are edge-glued to those at the center. The center three boards glue to the table base, but there isn’t anything under the boards at the edge. In the end most of this layer will be carved away in the transition from vertical to horizontal, but there must be enough wood to feather out so it is made nearly as large as the top itself. Since most of it will disappear, it is a good place to use up low-grade wood.
When the glue has set on the center three boards, Castle removes the clamps and begins to work out to the edge. He holds each board in position to lay out the cuts, marking them carefully for repositioning. As each is bandsawed, he tacks it in place with a couple of clamps atop the joint. An ear must be left on every board for the horizontal clamps that draw them together. A thick, straight plank, plus clamps directly on each glue line, keep the boards aligned. He puts paper under the plank to keep from gluing it to the table.
When the clamps come off, the surface is scraped to remove glue-squeeze and planed. The hole at the center is widened with gouge and chain saw to remove weight and because no useful clamping gluing surface is available there—no way to clamp. He vacuums the cavity to remove chips.
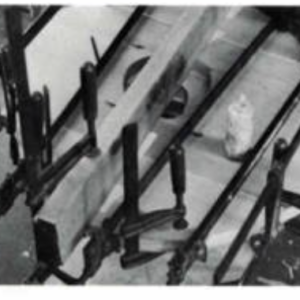 Then the top transition pieces are assembled and aligned. |
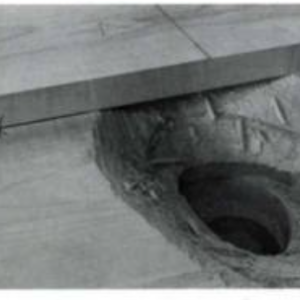 The cavity of the first top layer is carved to remove weight, as it adds no useful glue surface. |
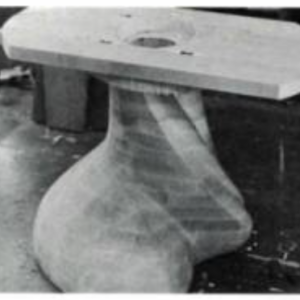 From the template, the wood for the top is cut and indexed. |
These boards are slightly thinner, about 1-1/4 in., to save a little weight and to achieve the correct table height. The long, tapered transition from base to top and the thin, rounded edge he plans make it impossible to detect the difference in thickness.

Castle next adjusts the placement of the top with reference to where the base provides support at the floor. The contour can still be changed later on, by chainsaw and saber saw. He traces the previous layer on the underside to show where to spread glue and draws a line along the edge of a center board, keying it for precise relocation.
He changes to plastic resin glue to fix the top, at first brushing it only where the center board goes. This type of glue, mixed from powder each time, is more resistant to heat and moisture than yellow glue. Tabletop conditions won’t cause yellow glue to fail, but may raise

the glue lines or cause the boards to creep a little. And powdered glue gives a longer open time to work.
The dust is carefully brushed from all the surfaces, the center board positioned and clamped at each end. Then he spreads glue on one side of it and on those boards, positions them, and continues on the other side. The outer boards on each side aren’t supported from underneath, so they wait on top until the horizontal clamps are applied. The first horizontal clamp goes from ear to ear across the whole top. A few vertical clamps go directly on the glue lines to tack the boards in place,
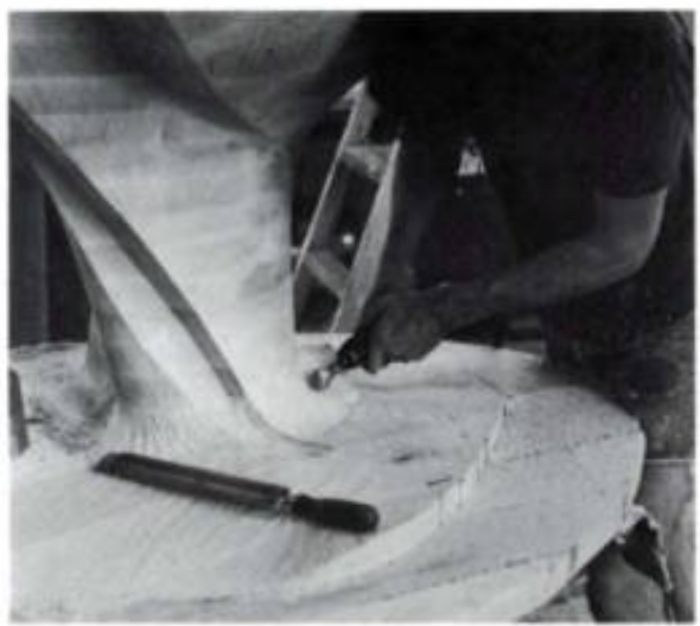
with paper to prevent staining. They will be supplemented and tightened later. The deepest clamps in th
e shop reach in a foot from the edge. Castle and an assistant put clamps everywhere they will fit, in the end about 60 of them.
The clamps come off, the excess glue is scraped away, and the edge saber-sawed close to size. Castle carves the transition between base and top the same way he carved the base itself, with chainsaw and ball mill, body grinder, Surform, and gouge. The piece is ready for sanding.
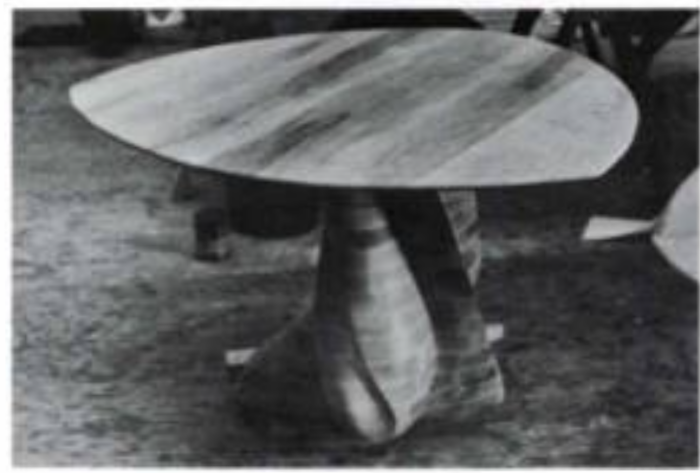
The usual sanding sequence in Castle’s shop begins with 32-grit rotary discs, then 80-grit discs, to remove digs and tears and bring the whole surface to the same degree of fineness. Then the whole form is carefully gone over with a sharp scraper to level the surfaces, remove bumps and hollows and minute irregularities. Then the wood is dampened to raise the grain, hand sanded at 150-grit, and finished off with 220-grit followed by six coats of Watco.
For the full article, download the PDF below:
Sign up for eletters today and get the latest techniques and how-to from Fine Woodworking, plus special offers.
Download FREE PDF
when you enter your email address below.

