Oland Tools – Make Them and Use Them For Woodturning Pleasure
Woodturners are compulsive tool buyers for the most part and tool suppliers are more than ready to cater to the impulse as evidenced by the vast arrays of tools in the catalogs. Some years ago, the late Knud Oland, a fine woodturner in his own right, developed a tool with the understanding that most turners would be able to make the tool for very little cost in the home shop. This would at least double the enjoyment of woodturning by allowing one to turn their work of art or craft with a personally made tool.
As you look at the myriad offerings of the tool suppliers one thing should eventually make itself known, all the tools follow along the style of carving chisels and gouges. After all, the wood rotates on the wood lathe and it is carved as it moves. The difference is, the wood is moving and provides the force for the cut while the tool is directed and makes the cuts. Cutting tools such as this are divided into chisels, both straight and skewed; scrapers including specialized ones such as parting tools; gouges with various curves and profiles; and specialty tools.
All such tools have a handle for control, a shaft for reach, and a cutting tip. To make your own, it is only necessary to decide on a use for the tool and have the means to make the handle, shaft, and cutting tip. The Oland tool is ideal for the woodturner to produce in a simple home woodworking shop.
Handles can be made of metal pipe or, certainly for the woodturner, out of wood. It is necessary to make the handle large enough to hold the shaft, give safe leverage for cuts, and be comfortable to hold. I like to choose a handle that is comfortable for me and copy it, however, there are lots of patterns for tool handles and they all seem to be popular for someone.
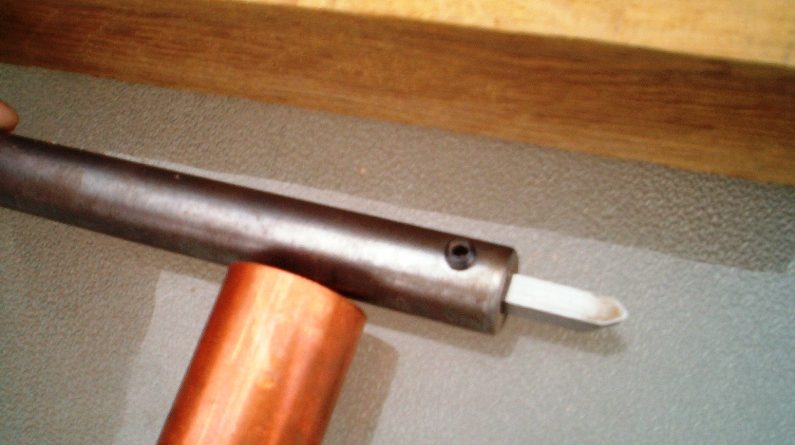
A shaft is easily cut from cold rolled steel with an angle grinder, cut-off wheel or hack saw. For a quarter-inch Oland tool, use five-eighths cold rolled steel and drill a three-eighths hole centered on one end. Just one-half inch back from the end and then one-half inch back from that drill two holes to be tapped for set screws. I like to use six mills by one set screws so a seven-thirty-second drill bit works here. Oland tools use an inserted bit.
In other words, a cutting tip is placed into the end of the shaft and held in place with the set screws. One of the hardest things to convince first-time makers of the tool is that a square bit will work in a round hole. Not only does the set screw hold it from moving into the shaft, but they also prevent rotation.
Now all that remains is to fasten the shaft in the handle which means drilling a five-eighth hole in the end and gluing the shaft in place with epoxy. The tip is sharpened to forty-five degrees and rounded on the end. The Oland tool is completed and ready for use.
The Oland is a versatile tool that the woodturner will find useful for all sorts of cuts on both spindles and bowls. Faceplate work is where it shines and Knud Oland was known for his bowls and vases. He has left a great legacy for the woodturner with his Oland tool to be made and used.


