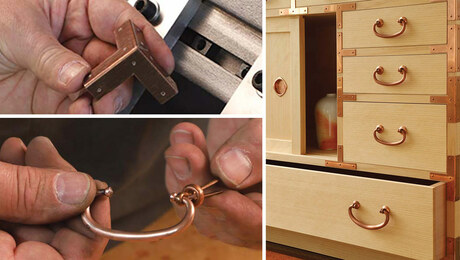
Shopmade tansu hardware – FineWoodworking
In this article:
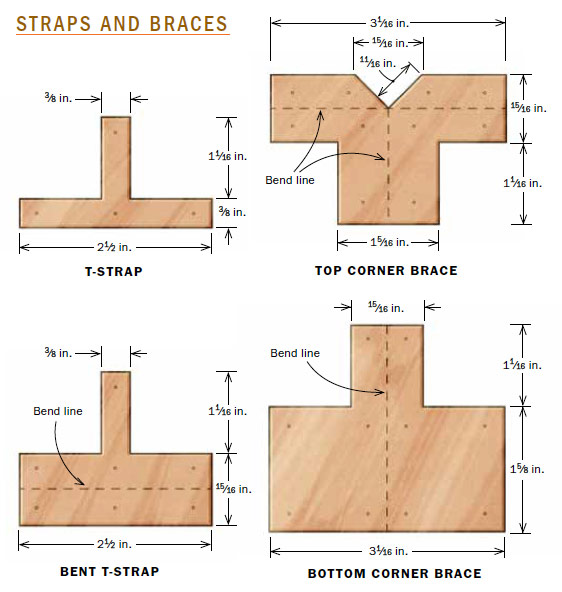
Len Cullum has the blanks for his Tansu hardware cut with a water jet.
Thankfully, he shared his files with us so you can send
them to a fabricator and do the same.
Right-click here to download the zip file containing DXF files
Which finish?
My early meetings with Tansu were with antiques, and to me, there was something just fantastic about their wear and damage and patina. It gave them a warmth and life that captivated me. Much later, on a trip to Japan, I saw a brand new tansu, and it left me a little cold.
While the craftsmanship was in every way exquisite, it just didn’t speak to me in the same way those old, well-used ones did, and it occurred to me that my love of tansu had just as much to do with their entropy as it did with their proportions and designs. That’s why I chose to use raw copper for the hardware on this piece.
Traditionally, it would be treated with a coat of urushi lacquer and then heated to produce a glossy brown finish. I left mine unfinished to allow the visual aging of the piece to proceed unabated. If my client hadn’t requested an oil finish, I would have left the wood on this piece untreated as well.
Strapwork
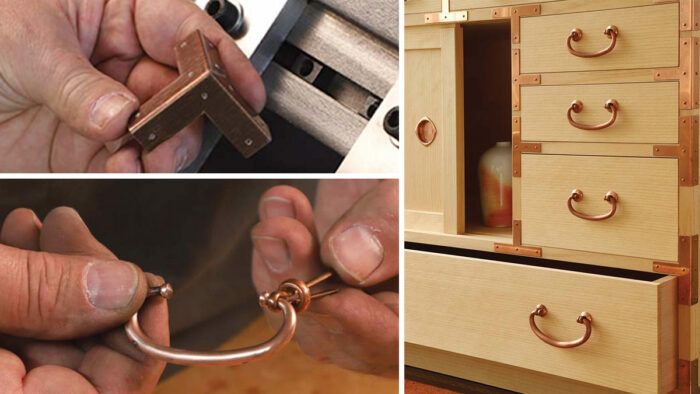
I used a 22-gauge copper sheet to make all the corner braces and strapping. While I originally planned to use snips and cut the blanks out by hand, I struggled to keep the copper from curling, and once it did curl, to get it flat again. My solution was to have the blanks cut with a water jet. It was costly—about $200—but I justified the cost by having four 12-in. by 18-in. sheets stacked and cut at once; this provided me with enough parts for half a dozen similar tansu cabinets.
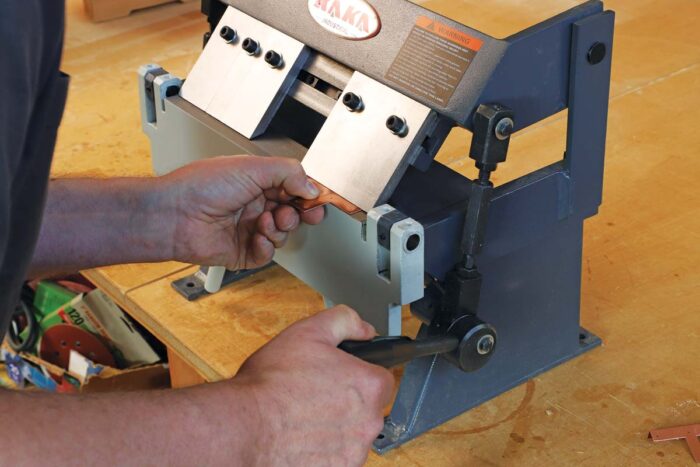
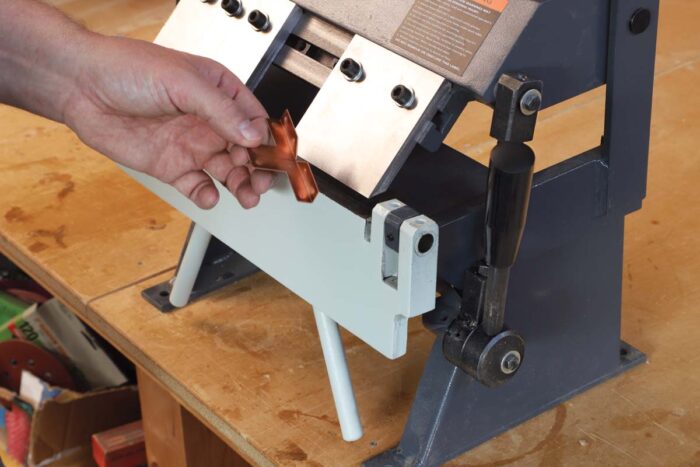
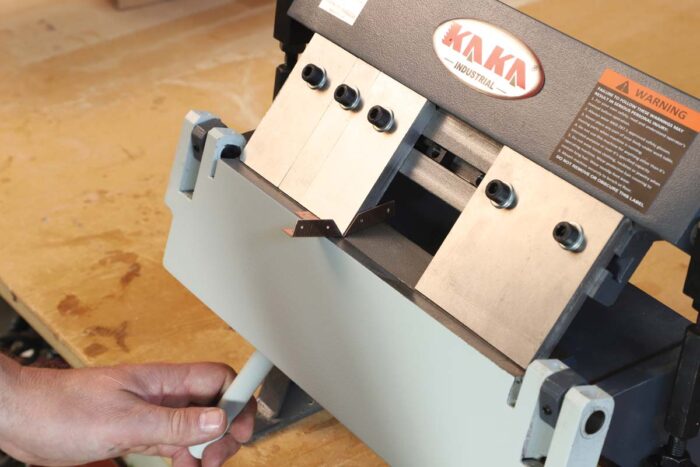
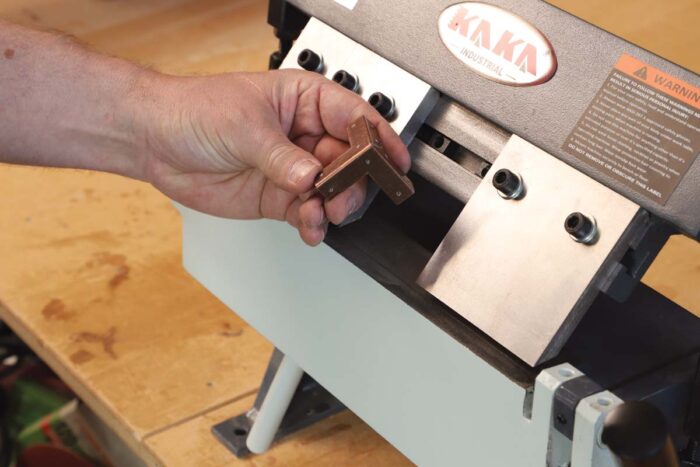
Once the blanks were cut, the processing was pretty simple: Drill the nail holes, form the corner pieces using a small pan brake, then file and sand the edges smoothly. Lastly, polish away the tarnish left by the cutting process.
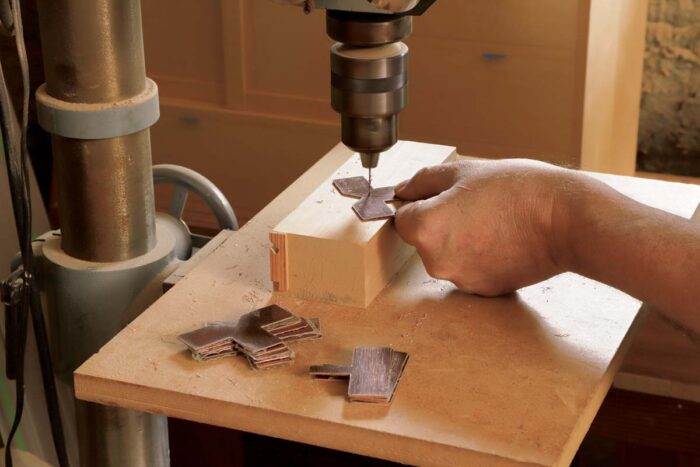
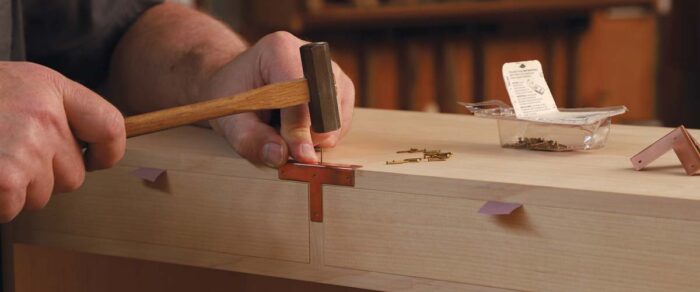
Drill for nails. Plates and braces are affixed with escutcheon nails. With the protective plastic sheet still on the copper blank, lay out the holes and mark each one with a nail punch. Then bore the holes at the drill press with a hardwood block for backup.
 |
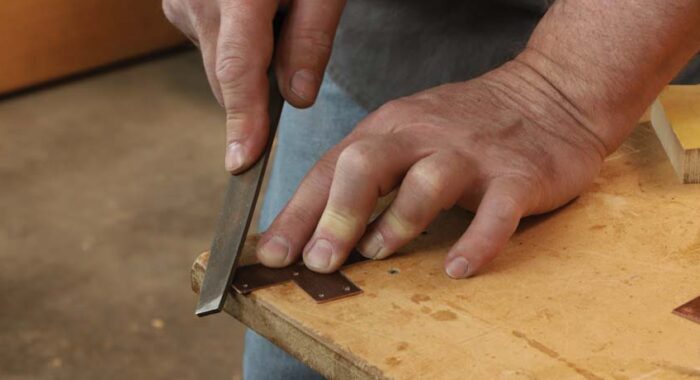 |
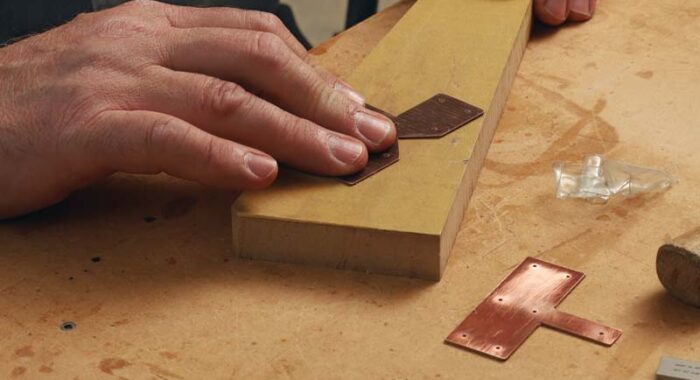
Abrade the bracing. After drilling, remove the plastic and flat-sand the hardware with 400-grit paper on an MDF sanding block. Then file the edges slightly round.
Bending tansu hardware by hand
 |
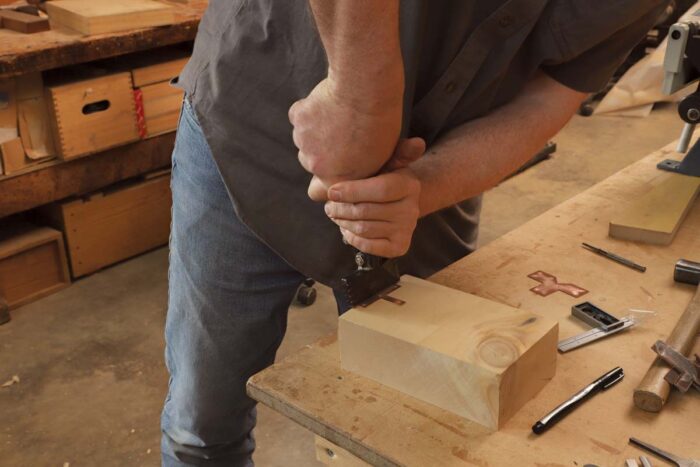 |
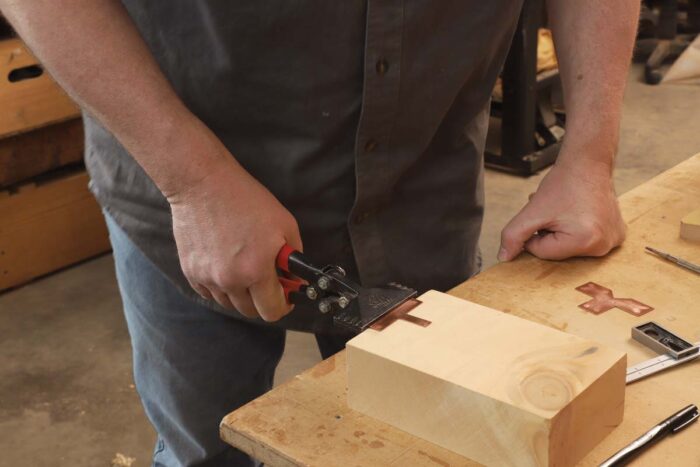
If you’re using a hand seamer to make the bends, place the workpiece so the bend line is just shy of the seamer’s jaw, and bend upward. Try marking and bending test pieces beforehand to get a feel for the process.
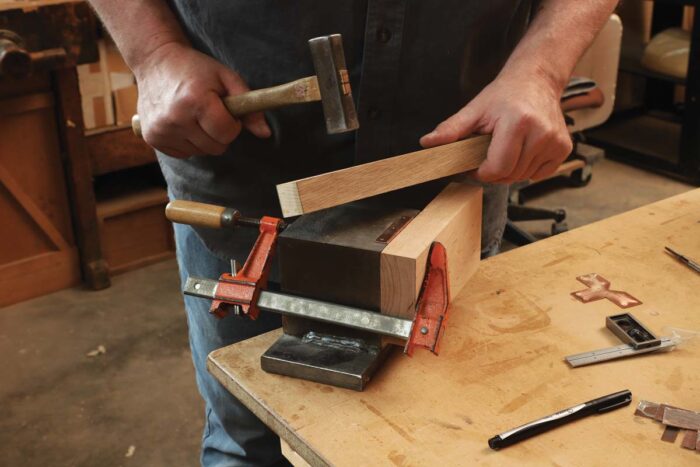
The hand brake creates a rounded corner. To square it off a bit, clamp the workpiece to a square-edged anvil and shape it using a hardwood caul and a hammer.
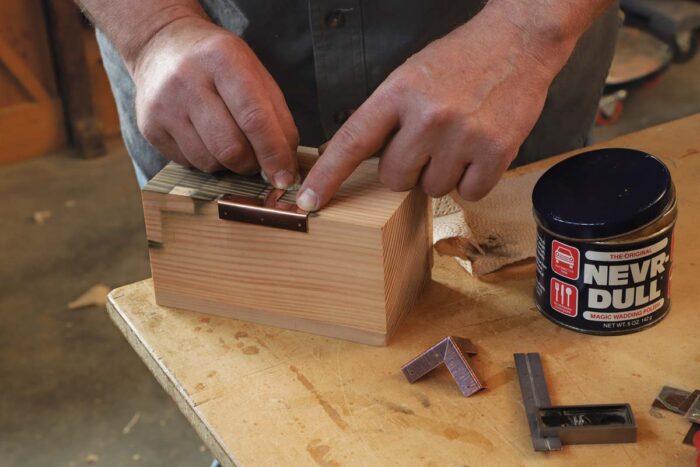
Clean the copper. Before installing the hardware, polish its surfaces.
Nail it. Cullum used 1⁄4-in.-long #18 solid copper escutcheon pins to nail on the copper hardware. Solid copper pins are sold in Japan but are hard to come by in the United States. Brass pins, easier to find, look different initially but match the copper more closely as they patina over time.
Traditional tansu-style warabite drawer pulls
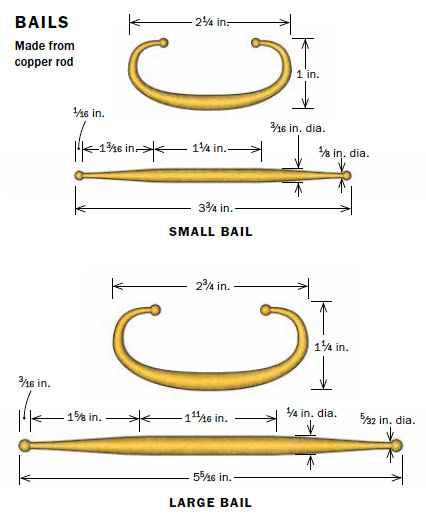
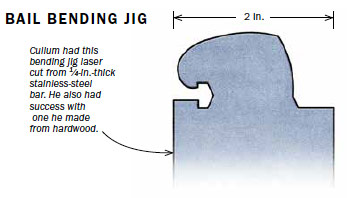
I started by measuring some antique handles and making a wooden bending jig. Because I was thinking about working copper the same way I worked steel, I heated up a copper rod and tried it out. The jig worked well, but the hot copper burned into the wood much more quickly and deeply than I had expected. Unless I wanted to remake the jig repeatedly, I’d need a different solution. So I decided to have a bending form laser cut from a bar of 1⁄4-in.-thick stainless steel. This worked great, but soon after, I realized that the copper worked nicely cold, so I could have used the wood form after all. (On the upside, I now have a bending jig that will outlast me.)
For the smaller drawers, I made bails from lengths of 3⁄16-in.-dia. copper rod; for the large bottom drawer, I used 1⁄4-in.-dia. rod. After cutting the rod to length, I made reference marks for shaping.
Then, using a 1-in.-wide belt on the strip sander, I roughed out the double taper, frequently checking the narrow diameter with calipers and leaving a knob at each end of the rod. Once all the tapers were shaped, I cleaned up the knobs on the strip sander. I hand-sanded the bails to 400-grit and polished them with maroon and gray abrasive pads.
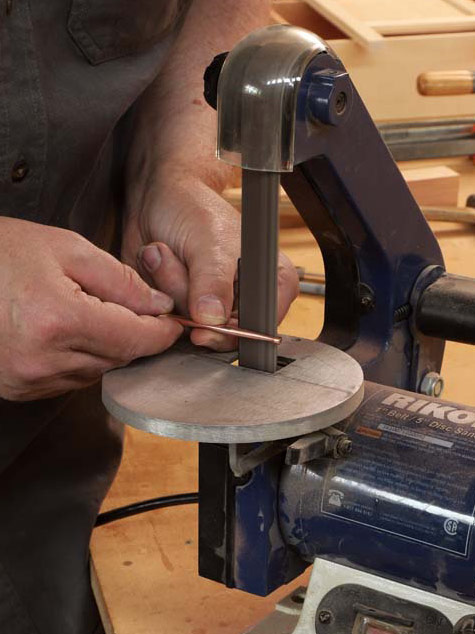
Tapering copper rod. To make the bail, Cullum rotates the length of the copper rod against the strip sander. He creates two tapers with a full-diameter section between them. |
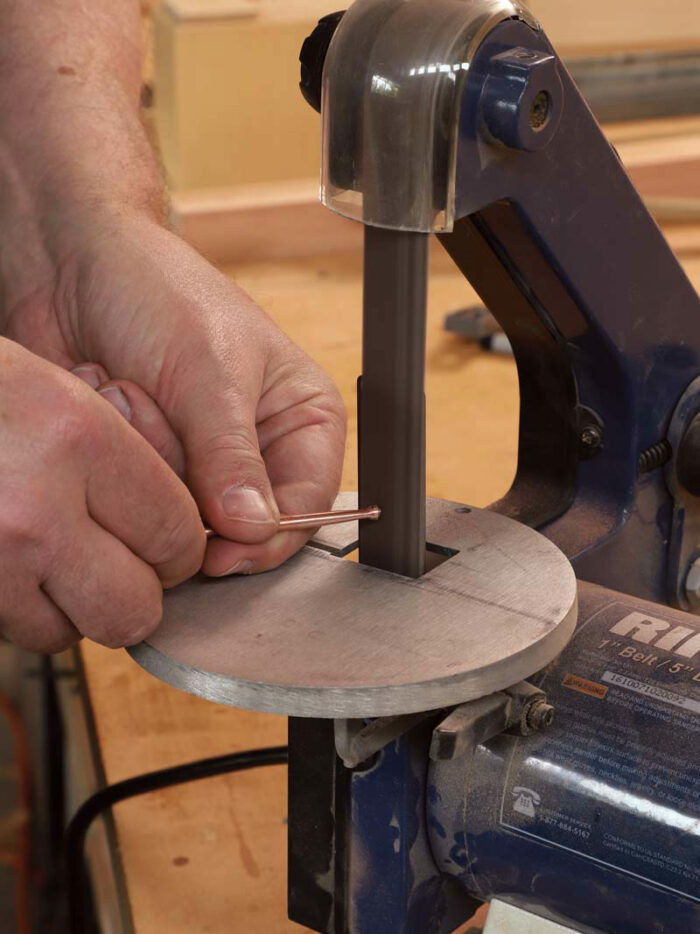
Round the knob. Having left a small section full-size at either end of the tapered bail blank, Cullum twists the rod to round the ends. |
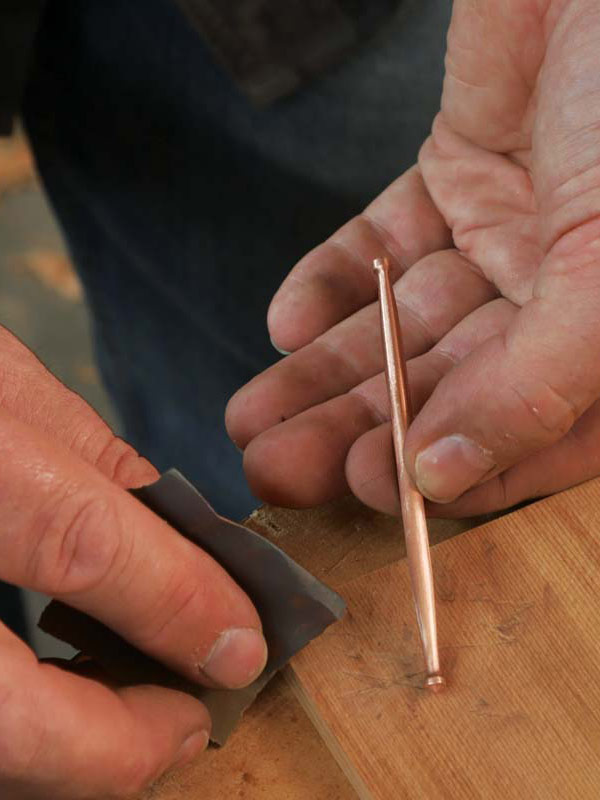
Abrasive cleanup. Smooth the bail’s surfaces by hand sanding with 400-grit paper, and follow that with Scotch-Brite pads. |
Bending and fixing the bail
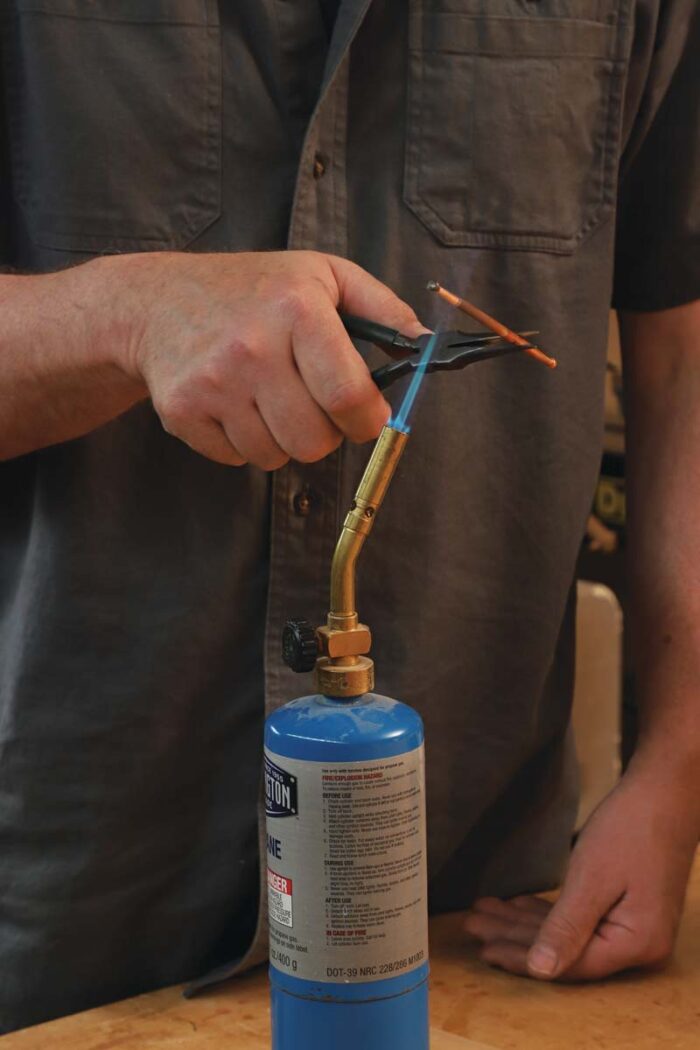
Tansu bails are traditionally attached to the drawer front with a metal strip shaped like a cotter pin. The pins are pushed through holes in the drawer face, opened, and laid flat, and their pointed tips are driven into the back of the drawer face, not unlike a clinch nail. Having access to solid bronze cotter pins (shoutout to Stoneway Hardware in Seattle), I decided to use those instead of making copper ones.
For the small round escutcheons, I again went to the hardware aisle and found solid copper rivet burrs. They needed to be dome-shaped to work as escutcheons, so I used a dapping block and hammered them into shape.
After installing all of the pulls, I hammered a single small nail into the drawer front where the pull would contact the drawer face. This nail, called an atari, protects the wood from being dented by the pull’s dropping.
 |
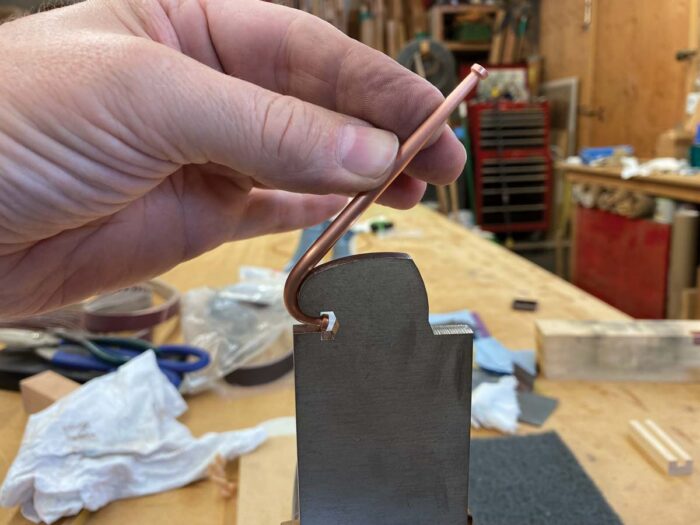 |
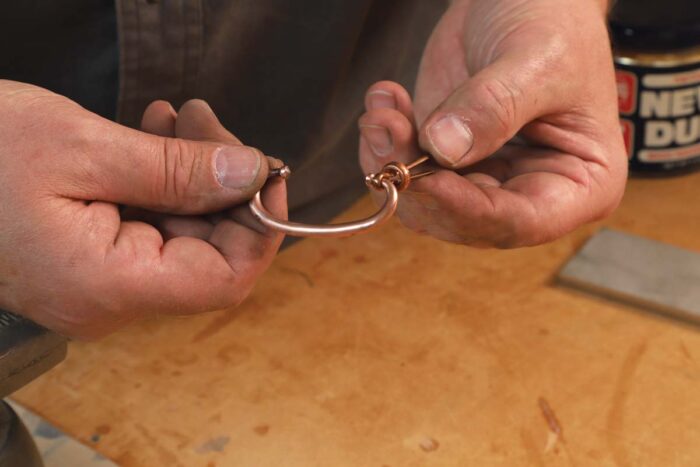
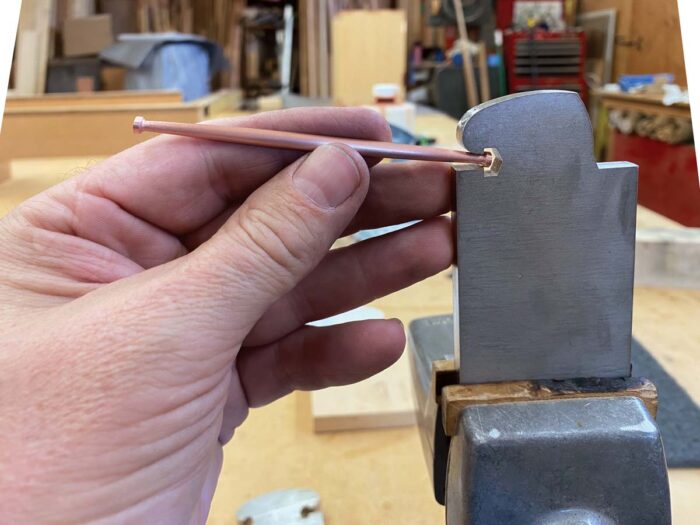
Hand bent bails. The tapered copper bars bend smoothly and easily over the jig, yet are plenty stiff enough to hold their shape. Because of copper’s softness, it’s key to make sure the jig’s surface is smooth so it doesn’t leave texture on the finished bail.
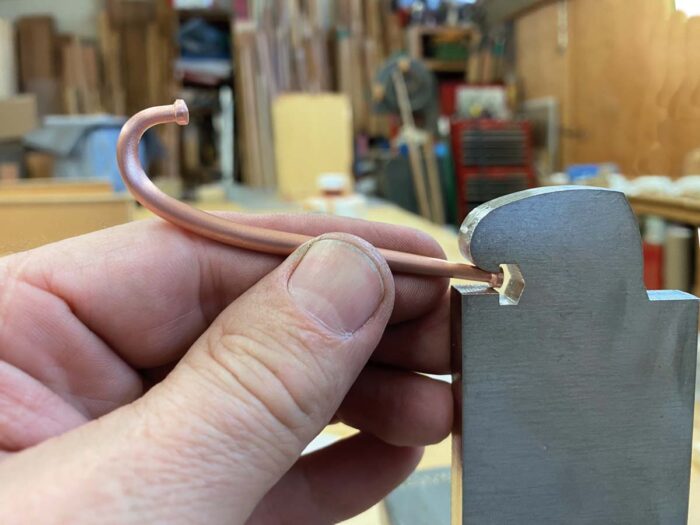 |
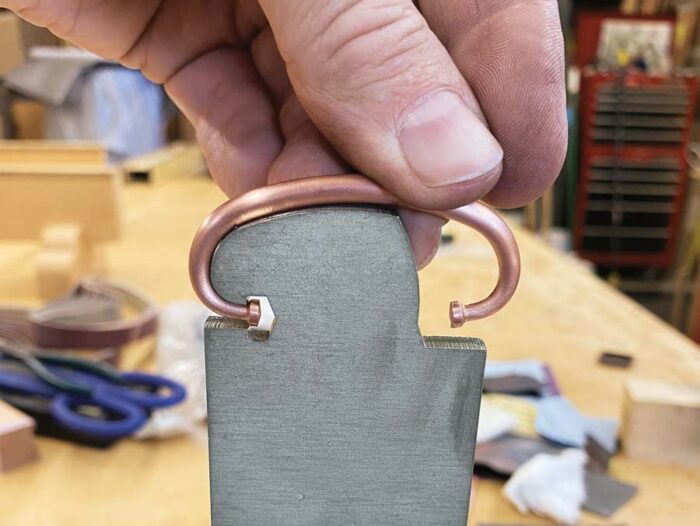 |
The bail gets finished and fixed. After completing the bend, Cullum polishes the bail, then adds at each end a cotter pin with a customized copper washer. He gives the washers their domed shape with a dapping block.
Finger pulls for the doors
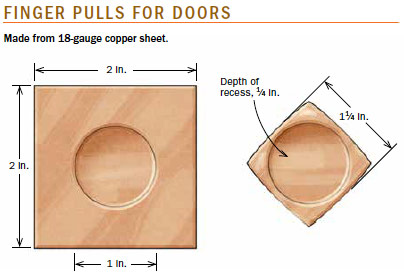
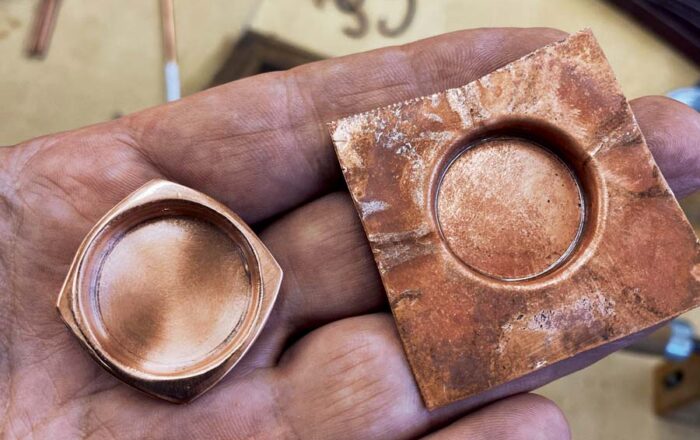
It started with annealing 2-in. squares of copper to get them soft enough to stretch while forming. Without annealing they just crumple and tear. Next, I stacked two 1⁄8-in.-thick, 1-in.-dia. washers on an anvil waxed both sides of the copper, and the end of a 3⁄4-in. socket, and then gave the socket a couple of good whacks. Once the socket reached the anvil, I removed the copper, carefully tapped out the wrinkles on the upper surface, cut it to shape with snips, and sanded over the edges to give it a slightly domed appearance. Lastly, I drilled two nail holes in the walls of the recess and polished the pull with abrasive pads.
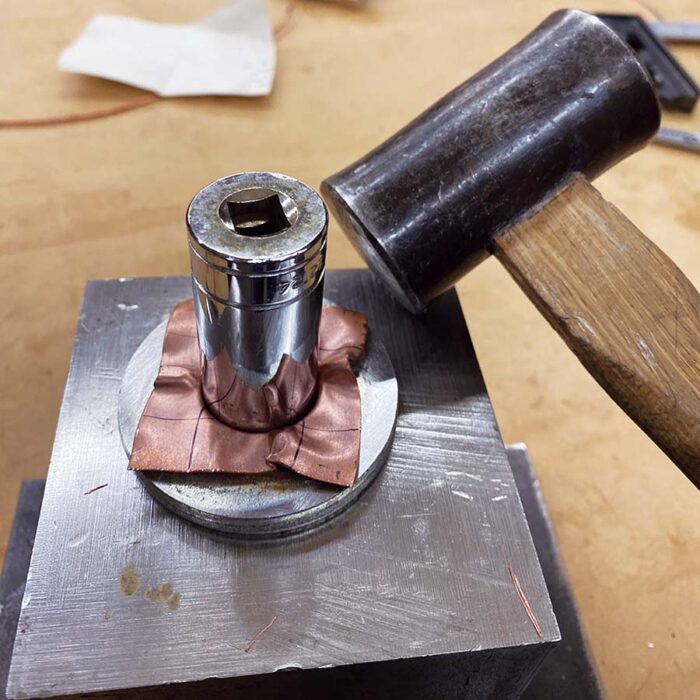 |
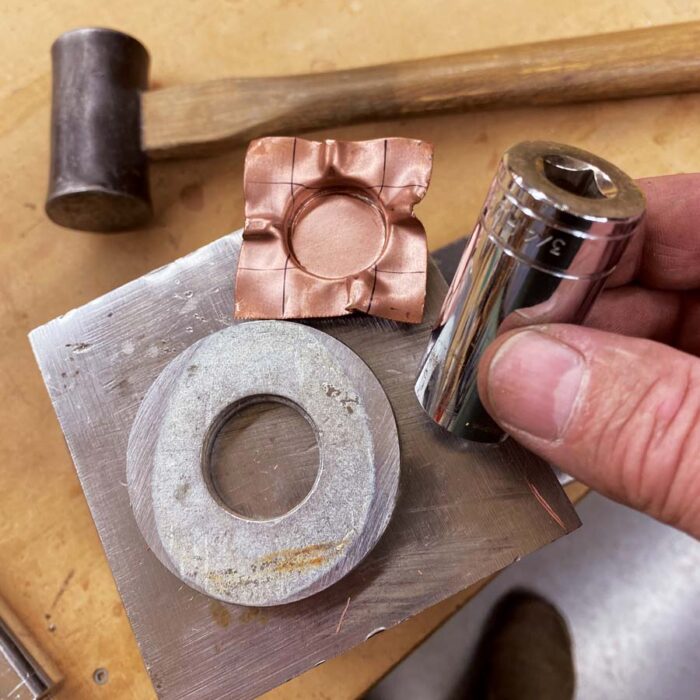 |
Homemade punch press. With a sacrificial socket wrench socket and a couple of big washers, Cullum devised a machine to emboss copper sheets for finger pulls. After pounding, he carefully taps out the wrinkles in the skirt around the recess.
Sweet transition. After tapping out the wrinkles, Cullum trims the skirt with snips, smooths the edges with a file and abrasives, then polishes all surfaces. He also drills two small holes for nails in the side wall of the recess.
Making this hardware was far from cost-effective or efficient, but it was worth it. I got what I wanted, and I learned a lot that will inform future projects.
Len Cullum works wood in Seattle, Wash.
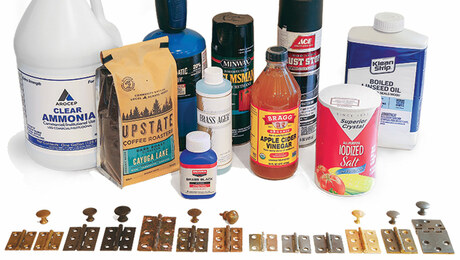
How to customize your hardware
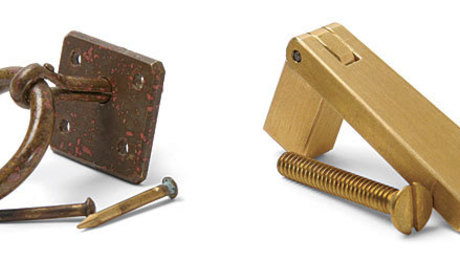
Make Your Hardware
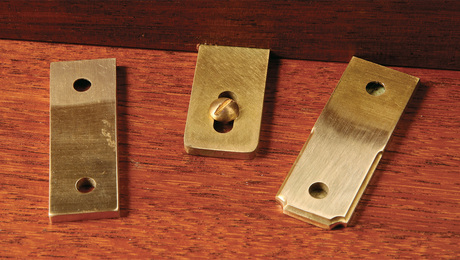
Making custom brass hardware
Sign up for eletters today and get the latest techniques and how-to from Fine Woodworking, plus special offers.
Download FREE PDF
when you enter your email address below.

