Throwback: How to sharpen a handsaw
—This article is from FWW #22–May/June 1980.
A handsaw is a tool with a blade of tempered steel in which teeth have been cut. Different kinds of saws are made to perform different functions. The number of teeth to the inch and their shape vary according to the work the saw has to accomplish. The two basic woodworking saws are the crosscut saw, designed to cut across the grain of the wood, and the ripsaw, designed to cut with the grain. The crosscut-saw tooth cuts like a knife. The ripsaw tooth cuts like a chisel.
The teeth of a saw become blunt from regular use, particularly from sawing hardwood. New saws have been shaped, set, and sharpened by precision machines at the factory, but many saws can be improved, and old saws reconditioned, by following the step-by-step instructions offered in this article. It is not always necessary to go through the complete sequence, but wherever you start, you should follow through the rest of the order.
For regular maintenance, it is a good idea to file the teeth lightly as soon as they have lost their sharpness. One or two filings of this kind will not affect the set of teeth. Generally, it will take three or four filings before resetting is needed. At this stage you can check the shape of the teeth. If the previous filings were done with care and attention, and the saw has not been misused, only setting and filing will be needed.
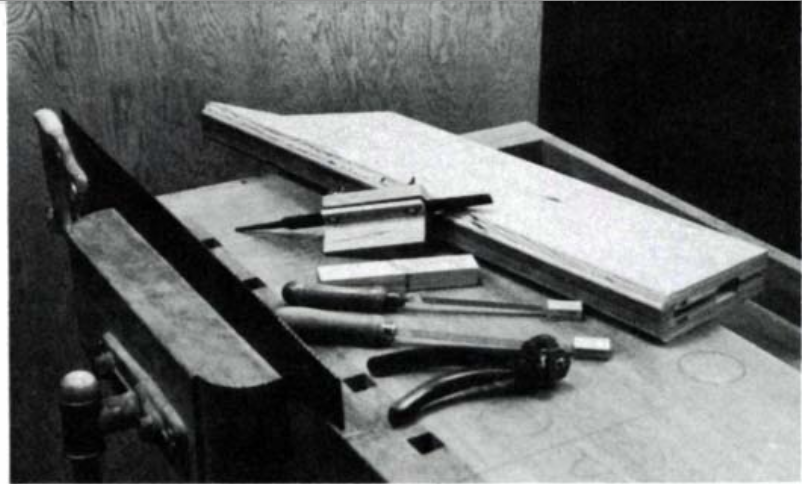
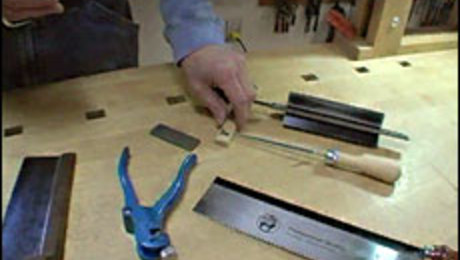
If the teeth have been damaged or made uneven by excessive filing, it will be necessary to go through the five restoring operations: jointing, shaping, setting, filing, and honing. The only equipment you need is a saw set, an 8-in. smooth mill file, and a fine-cut triangular file, slightly tapered and with 60º angles to match the angles between the teeth of most handsaws. The saw sharpening vise and various filing guides shown here you can easily make yourself.
Looking for a more modern take on the subject?
Sharpen Your Backsaw
Jointing
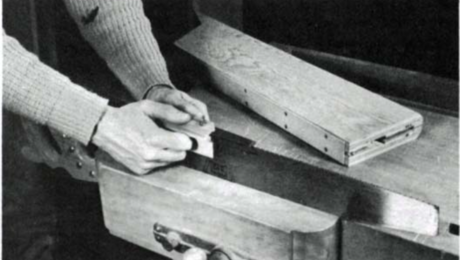
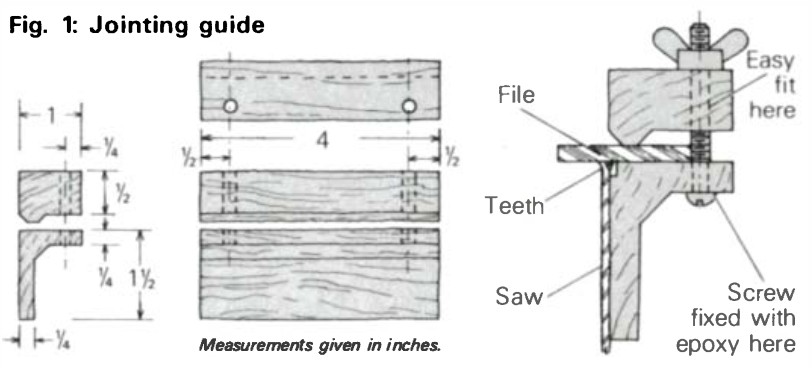
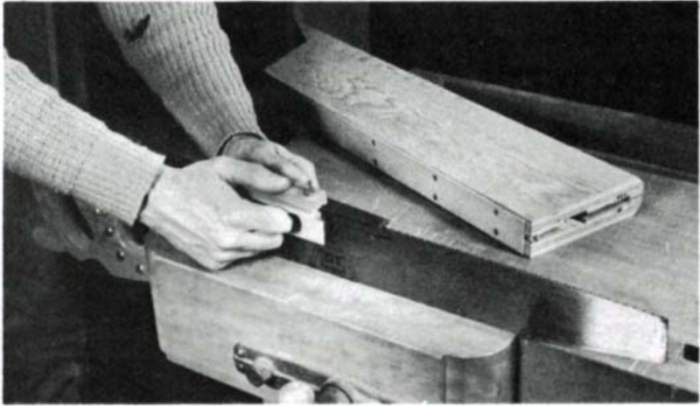
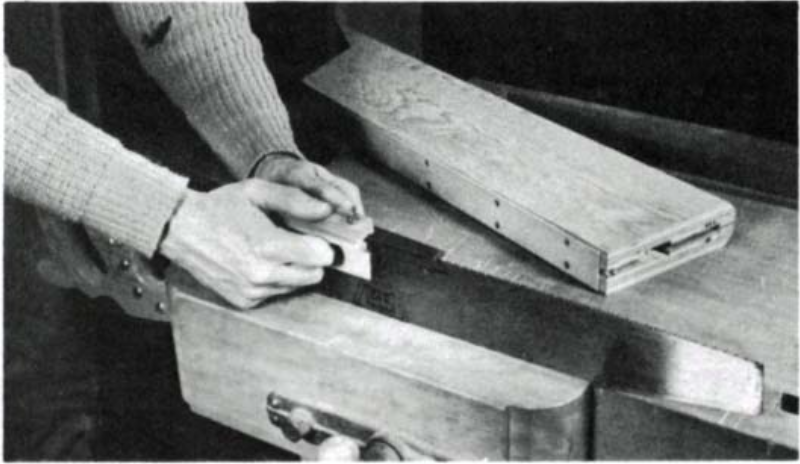
This operation consists of filing the points of the teeth with the mill file to make them even or in line along the saw. The jointing guide (figure 1) will keep the file flat on the tips of the teeth and square with the blade.
Run the file gently along the top of the teeth, holding the guide flat on the side of the blade. This cuts a flat on the tip of the teeth, which varies in width according to how far out of line each tooth was. Jointing must touch all the teeth but cut none down more than is necessary to bring them in line. If the teeth are very uneven and a considerable amount of jointing is necessary, you should alternate jointing with the next operation, shaping, otherwise the shape of the teeth may be lost.
Shaping
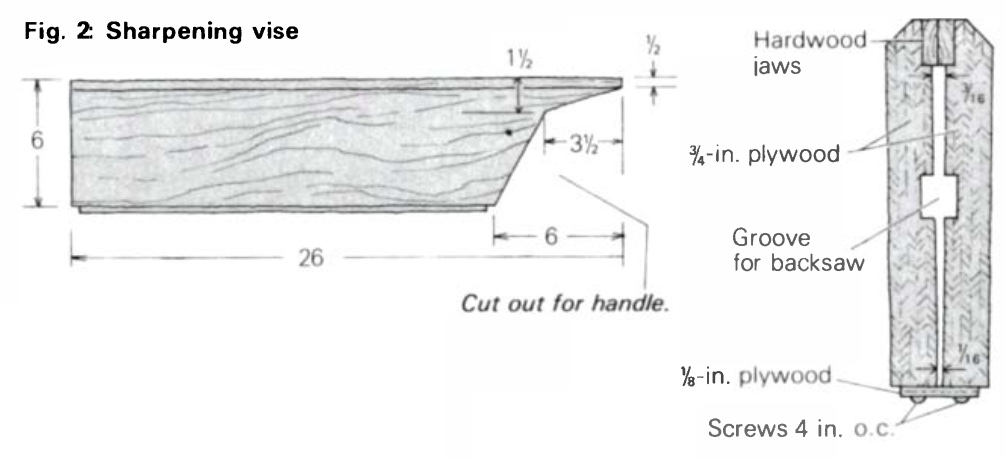
This operation restores the teeth to their regular form. Place the saw in the sharpening vise (figure 2), the teeth close to the top so the thin metal will not vibrate when filed, and clamp the saw vise in the bench vise.
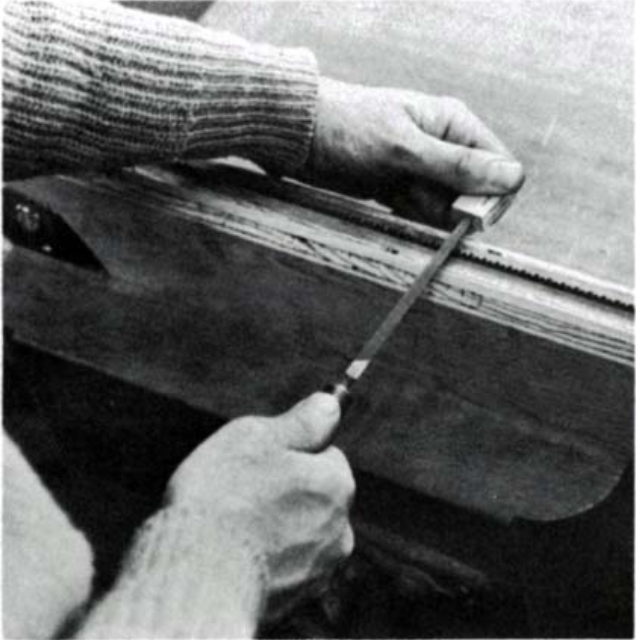
Inserting the tip of a triangular file firmly on a tilting guide (figure 3), file straight across the saw, at right angles to the blade.
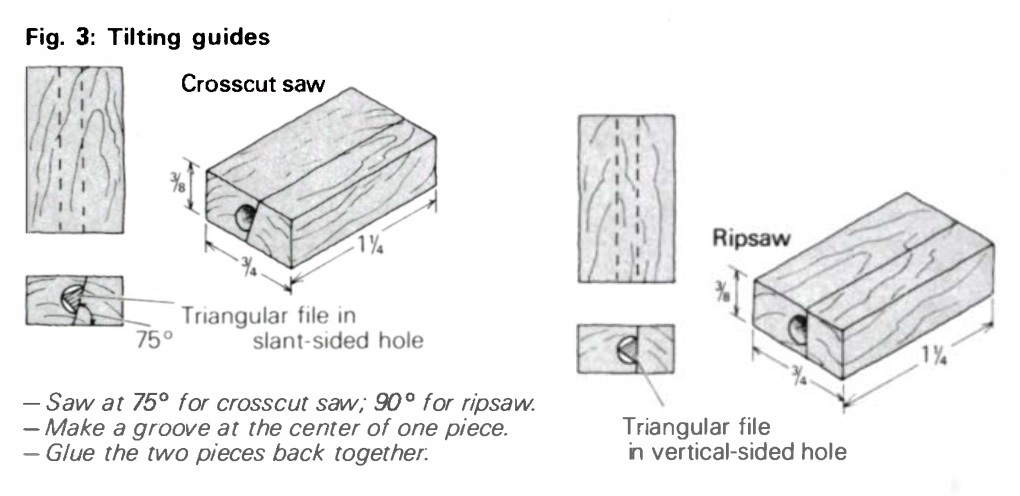
Shape first the teeth that have been leveled most. The jointed flats or brights on the tips of the teeth will be taken off in two stages: The triangular file will wear half the flat on one tooth and half the flat on the next tooth. Take care that the top of the tilting guide remains horizontal while filing and that the stroke of the file is perpendicular to the blade. Don’t fill the gullet too deeply.
To make the teeth equal and regular, often you will need to press more against the front of one tooth than against the back of the next tooth, or vice versa. After shaping, all the gullets should be of equal depth, the front and back of the teeth at the proper angle, and all the teeth the same size. Check by looking at the saw from the side.
All the teeth will have been shaped from the same side of the saw and there will be no bevel toward the front or back of the teeth. Before setting, rub both sides of the saw with an oilstone to remove the burr left by the file, and brush away any oilstone residue left in the gullets.
Setting
The goal of setting is to make the kerf that the saw will cut wide enough so the blade will not bind. This is accomplished by bending outward the upper part of each tooth. To work properly, a saw should have no more set than is necessary.
Only one-third of the height of the tooth should be bent, producing a saw kerf that is a little less than one and a half times the thickness of the blade, thus the set on each side should be one-quarter the thickness of the blade. Trying to bend the teeth too much may break them off or cause a crack at the bottom of the gullets. Work in hardwood requires less set than work in softwood.
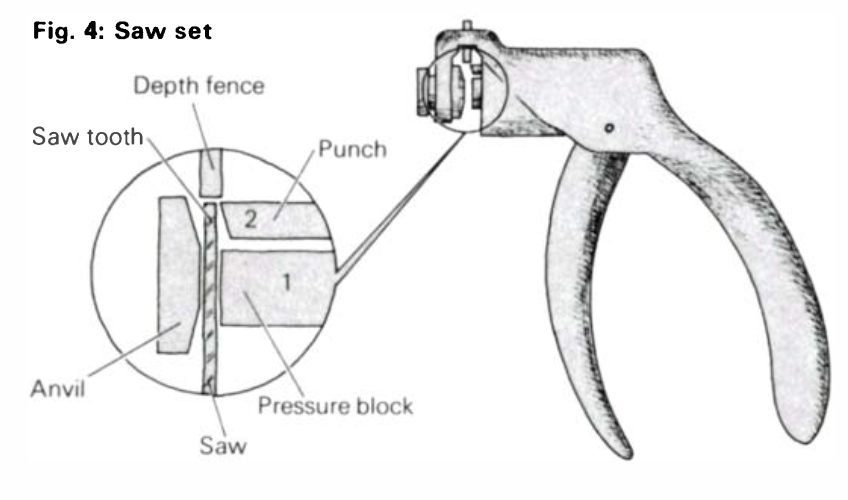
Setting is done with a special tool called a saw set, which operates with handles like those of pliers. The principle is to press the tooth with a beveled punch against a little anvil. There are several styles of saw sets on the market. The most practical one (figure 4) does two operations simultaneously: A block presses and holds the sawblade on the anvil, and a beveled punch pushes the tooth onto the inclined part of the anvil.
The saw-set anvil is usually an adjustable wheel with numbers around it. These numbers correspond approximately to the number of teeth to an inch of the saw. Bring the number to the appropriate index mark, and the anvil is in a position to set all teeth to the same proper inclination.
Set first the teeth that point away from you on one side, then turn the saw around and set the other teeth. Never reverse the set of a tooth. When you are finished check to see that you have not missed a tooth. The set must be the same from end to end of the blade, otherwise, the saw will not cut straight, but snakey.
Filing
Filing sharpens the saw and is the most important operation in reconditioning. Depending on the point size of your saw, select a slim triangular file: for 11–18 points per inch, a 5-in. file; for 7–10 points, a 6-in. file; and 4–6 points, a 7-in. file.
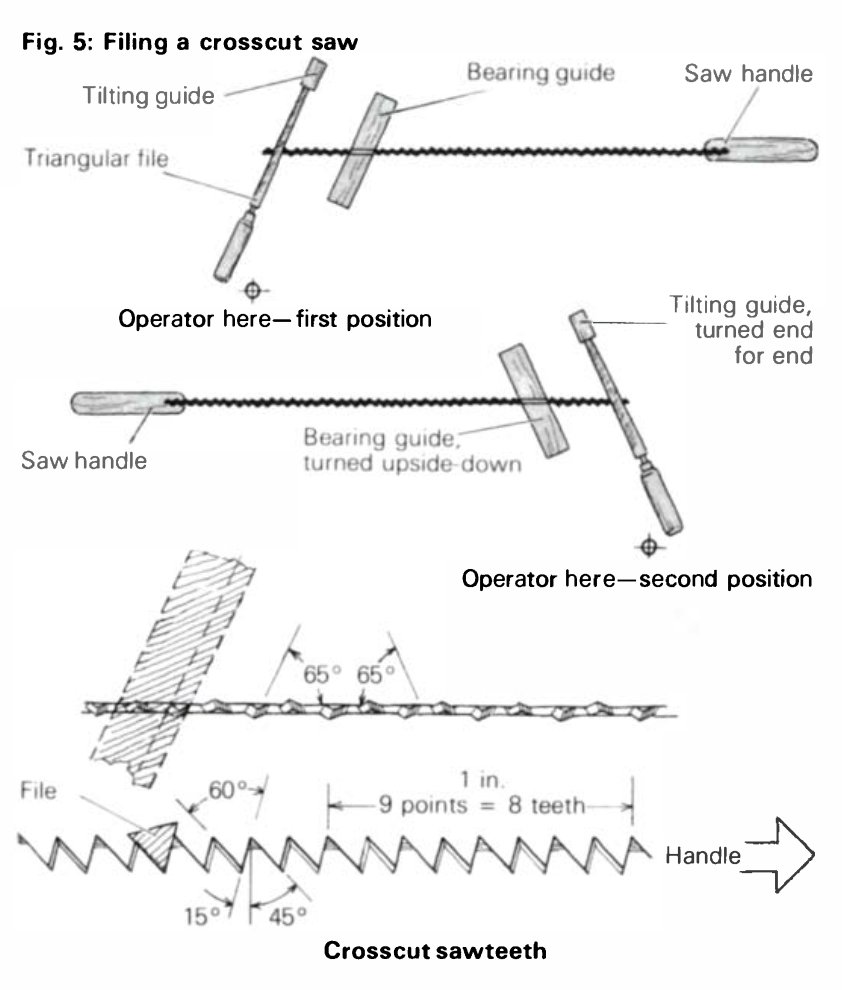
Except for differences in tilting and bearing angles, filing crosscut saws is the same as filing rip saws. Mount the saw in the saw vise with the bottom of the tooth gullets 1/8 in. above the vise jaws and the handle of the saw to your right.
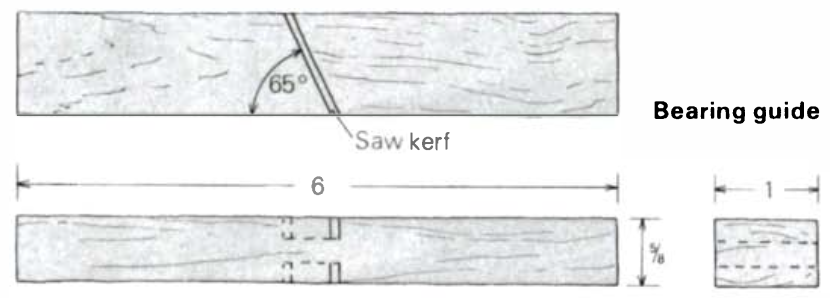
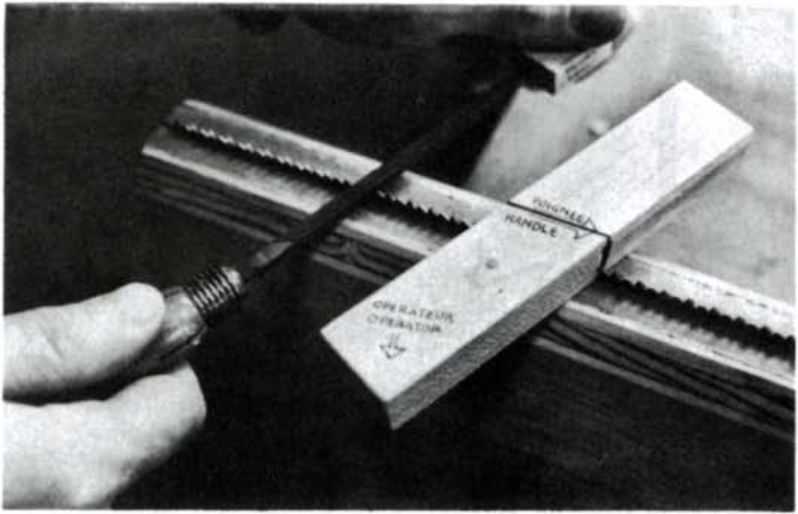
For a crosscut saw, place the bearing guide on the top of the teeth, and the crosscut tilting guide on the tip of the file. The bearing guide may be placed to the right or to the left of the tooth being filed, but as close as possible to it without getting in the way. It is a device with which to line up the file by eye and is moved along the saw as needed.
Start at the toe of the saw and place the file in the gullet to the left of the first tooth set toward you. The file should be parallel to the bearing guide, and the tilting guide should be horizontal. Push the file straight forward, holding it firmly at both ends. Exert slight pressure on the forward movement, but lift the file on the backward movement.
The stroke should be always horizontal. This operation will wear both the front of the tooth set toward you and the back of the preceding tooth set away from you. Count the file strokes and note the pressure you exert because you will have to repeat the same number of strokes and the same pressure all the way along. After the first gullet go to the third gullet, skipping the second; then go to the fifth, skipping the fourth; and so on every second gullet up to the handle.
Turn the saw around so the handle is at your left. Turn the bearing guide upside-down and the tilting guide around, end for end. Work the other side of the saw in the same manner, starting at the toe and in the gullet to the right of the first tooth set toward you. After filing a few teeth on this side, check them.
The filing should have brought the teeth to a fine point with a bevel to the front and the back of each tooth. Do not remove any more metal than is necessary to make the bevels meet at the top of the tooth. Continue filling along the length of the saw.
A crosscut saw is filed well if you can slide a needle between the tips of the teeth without it falling.
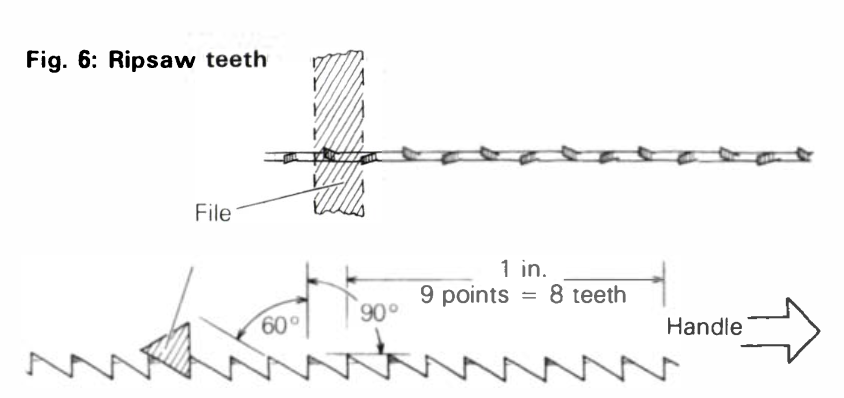
For a ripsaw (figure 6), place the ripsaw tilting guide on your triangular file and file perpendicular to the face of the saw; rip teeth have no bevel. A well-trained eye and hand can easily keep the stroke perpendicular without the aid of a bearing guide. File the first gullet, the third, the fifth, etc.
Turn the saw and file the other gullets so the filing will be uniform on each side; otherwise, the saw will cut on a slant. For rip teeth, the alternation of the direction of the stroke and its evenness are the only differences between filing and the earlier operation of shaping.
Honing
Filing leaves a burr or wire edge at the sides of the teeth. A burr won’t make any difference in rough work, but for fine work, it is best to get rid of it. To do this, put your saw flat on your bench and run a fine oilstone gently against the teeth on both sides. Honing will also correct small irregularities in the setting.
The angles I use are good. I have adopted them with satisfaction. But there are other workable angles and they should not be ignored. For a crosscut saw some prefer a bearing angle of 55º, and others 60°. Some prefer the handle end of the file about 10º below the horizon.
For a ripsaw some prefer a tilting angle of 8° instead of 0°. You can adopt the standards that best fit your needs, but when you have made your choice, be consistent. Remember, though, you will have to alter the guides shown in the figures accordingly.
Those who haven’t tried it think that maintaining a handsaw requires a lot of time, but this is not the case. Here is the time it took me to completely recondition a 24-in. crosscut saw, with 12 teeth per inch. The work, which was performed without haste, took only 47 minutes. Jointing and shaping required 17 minutes; setting, 8 minutes; and filing and honing, 22 minutes. If the same saw were to require only filing to renew the cutting edge, it would take no more than 12–15 minutes.
Take good care of your handsaws. When not in use, keep them in a tool rack that will protect them from damage. Wipe the blade frequently with a lightly oiled cloth.
A Tool Kit for Sharpening Handsaws

Sharpen Your Own Backsaw
How to Sharpen a Veneer Saw
Sign up for eletters today and get the latest techniques and how-to from Fine Woodworking, plus special offers.
Download FREE PDF
when you enter your email address below.

