Build a classic kitchen stool

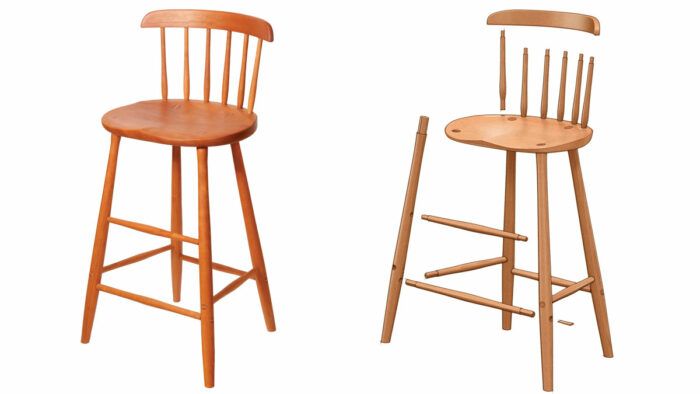
Synopsis: This comfortable, well-proportioned stool is based on a basic Windsor form, with a thick plank seat and attached legs and back pieces. The seat is sculpted for comfort, and a curved low back gives support to the sitter. The legs are attached with wedged through-tenons, as are the lower stretchers. All the turned parts are shaped with a gentle swell and taper. The bent-laminated back is a bonus from classic Windsor construction, and adds a technique well worth learning to this project.
About 20 years ago, a customer asked me to design a stool that was “comfortable, well proportioned, and graceful.” I designed and built a set of them, and the client was very pleased with the results. I had first made a prototype, with mixed woods and a painted finish, and it’s still in constant use in our kitchen and standing up well. Paint finish, a Windsor tradition, makes for a wonderfully uniform design, emphasizing the shapes and curves instead of the wood’s grain and color. But natural wood is more my style, so over the years I’ve built many of these in cherry. They’ve been sized at various heights to work with kitchen counters, bar counters, and other places.
The design’s stayed about the same, but the construction process became more refined in subsequent builds. In fact, while doing another set recently, I realized the piece had remained a work in progress. Structurally, it’s a basic Windsor form: a thick plank seat with the legs and spindles tenoned into it. For comfort, the seat is well sculpted, and a curved low back gives support in just the right place. Using classic Windsor construction, the legs are attached with wedged through-tenons. The lower stretchers are similarly fastened. To avoid the straight dowel look seen on a lot of commercial stools, all the turned parts have a gentle swell and taper. The swell’s location depends on the function of the part.
In addition to the Windsor construction, the stool offers some techniques involved in flat work, namely bent-lamination for the crest rail. While you could forgo the back altogether and just build the seat, legs, and stretchers and call the stool good to go, take the challenge. It’s worth it functionally and aesthetically.
The seat height is set for use with a kitchen counter of 36 in. But that can be easily adapted to other uses by lengthening or shortening the legs below the stretchers. A rule of thumb is to have the seat height about 9 to 10 in. below the corresponding surface height.
Start with the seat
All the other parts flow from the seat. You’ll likely need to glue up a pair of boards to make the blank; I used cherry for mine. Make a seat template and use it to lay out the centerlines, the mortises for the legs and spindles, the sight lines for the spindles, and the deepest point in the seat. Note that you’ll drill the mortises for the legs from the bottom, and the template accounts for their splay. Use the centerlines to index the template accurately, since you’ll be using it on both the top and bottom of the blank.
Bore these mortises on the drill press. I tackle the ones for the legs first. The rake and splay are both 7°. Then flip the blank to drill the stopped mortises for the back spindles. These angle back at 7°, so keep the ramp in place but square the table.
Next up are shaping and saddling the seat. While I cut out its oval profile on the front now, I leave the back section square to ease clamping the seat to the bench. I power-carve the seat, and I don’t want the workpiece moving at all.
Drill a depth hole in the center. You could do more of these at different depths, but I rely on my eyes and fingers to achieve the saddle shape. I also occasionally check the thickness with a bowl turner’s caliper to ensure the shape is symmetrical. In addition to the saddling, there’s a strong roundover at the seat’s front edge. This is for comfort under the sitter’s thighs. Again, use your hands to test the seat as you go.
I’ve used a wide variety of techniques to shape the seat. The challenge has always been how to efficiently rough out the saddle. Scorps and inshaves work well, but are slow and laborious in hardwood. Instead, I rough out the seats using a pair of power-carving disks mounted in an angle grinder. Don’t be put off if you’re limited to hand tools, though. They’ve worked just fine for centuries. Plus, I always finish shaping with spokeshaves, scrapers, and sandpaper.
Drilling the seat

 |
 Add a ramp and tilt the table to drill at the correct rake and splay angles. To tilt the seat blank to the rake angle, Durfee screws a plywood ramp to his drill-press table. |
 |
 He then tilts the table itself for the splay angle. |


To view the entire article, please click the View PDF button below.
Sign up for eletters today and get the latest techniques and how-to from Fine Woodworking, plus special offers.
Download FREE PDF
when you enter your email address below.


 From
From 

