How to refurbish a vintage plane
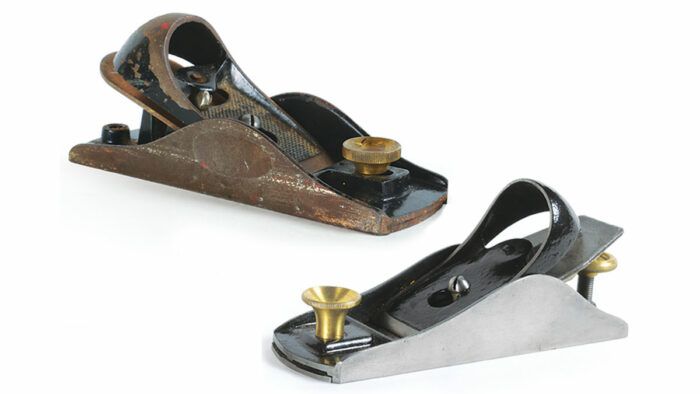
Synopsis: The most accessible way into an often expensive craft can be restoring old tools. When you get an old hand tool back into working order, you not only give it a new life, but you also get yourself a great tool. Toolmaker Eleanor Rose shows how to refurbish a block plane, a good place to start because these tools are plentiful and a shop staple.
I’m a toolmaker, but I fully believe in refurbishing. It is the most accessible way into an often expensive craft. Almost without fail, I opt for old when building my tool collection—and that’s despite being able to make my versions. I prefer to give something a second or maybe even a third life. Take it from someone who spends more time on eBay than she should: There are enough antique tools to go around. It’s just up to us to get them back into working order.
Block planes are a good choice for refurbishment. They’re plentiful, meaning you can find a solid user at an affordable price. Plus, they’re a workshop staple, so even if you already have one, buying another is easy to justify. You can set them up for separate tasks, like one for shooting small parts square and the other for rough shaping. All it takes is $25 to $40, some time, and the tips I’ll share here.
What to buy
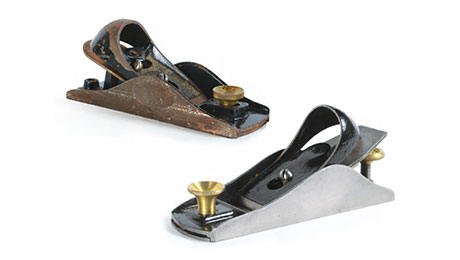
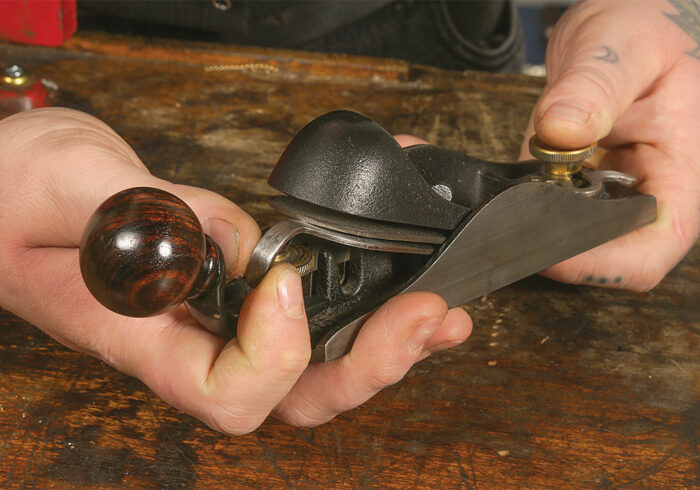
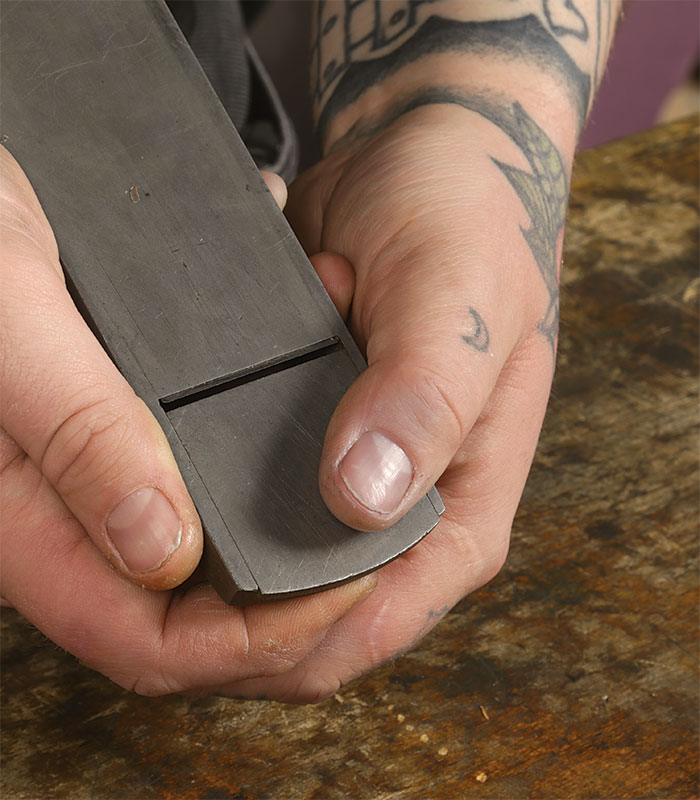
Luckily, because so many vintage models are available, you can be picky. I recommend a Stanley 9-1 ⁄ 2, which has lateral and depth adjusters and an adjustable throat. If you can’t find one, look for another Stanley or a block plane from Ohio Tools, distinguishable by their maroon japanning.
I recommend avoiding vintage planes with a wheel and a threaded post to tighten the cap iron. These are too prone to failure after decades of use, and existing damage can be hard to see. Finally, opt for steel and cast-iron tools. These are always superior to aluminum and plastic.
Buying vintage? Here’s what to look for…
… and what to avoid
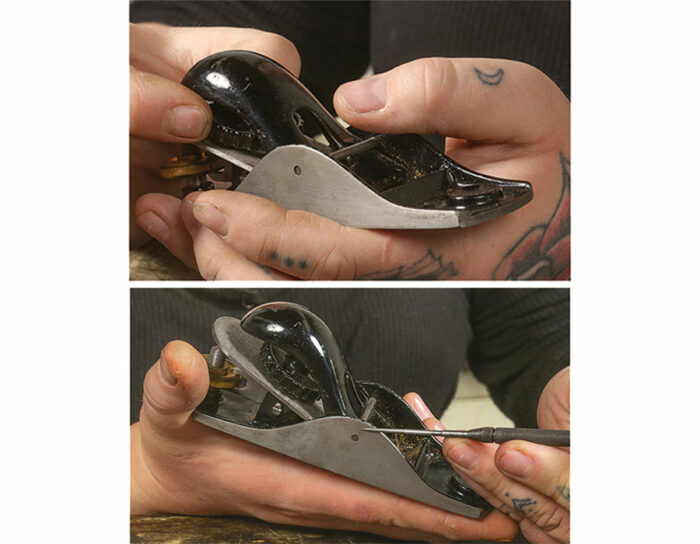
Clean, disassemble, and dust
Now you have your plane in hand. It’s probably rusty, dirty, or even hiding spiders like a recent purchase of mine was.
I start with a good degreaser. My favorite is CMT 2050, which is non-toxic and pretty environmentally friendly. It’s technically a blade and a bit cleaner, but if it can cut through pitch it must be good. It also acts as a rust preventative if you do not rinse it off, helpful if you have to step away for a day or two between refurbishing steps.
However, in place of a dedicated degreaser, dish soap and water with some extra elbow grease also works just fine, as does Simple Green. Typically I scrub, rinse, then repeat at least twice.
Once you scrub the exterior of oils, grime, and eight-legged beasts, you can start disassembly. This step is mostly about patience and discovery. I wish every tool was similar enough to have a perfect how-to list, but sometimes screws are reverse-threaded, sometimes a tool has been altered by a previous owner, and sometimes you find one that’s damaged. Every time I take an antique apart there is a hidden screw, a pin hidden under dirt, or something unexpectedly ground flush.
I have two major points of advice when disassembling: WD-40 won’t solve anything no matter how much you want it to, and if a screw won’t turn, don’t force it. I made both mistakes when I started, and each caused tears.
If your plane is particularly rusted and you cannot get a screw, threaded rod, or knob to budge, then try heat. Use either a quick, light touch with a propane or butane torch or pop the plane in an oven at 350° for 20 minutes. The heat expands the metal ever so slightly.
It will shrink as it cools, breaking the rust bonds to allow for removal. This process can warp the plane, but you’ll address that later. Be sure to take out the blade for either step, as the heat can ruin a blade’s temper. When the heat doesn’t work, I use a lubricant. If that doesn’t do the job, I look for a hidden pin or weld/braze. If those fail, I have another trick up my sleeve: Evaporust.
Evaporust is truly a magic potion. I’m convinced wizards make it. It does exactly what it says it does: It removes rust completely. Plus, it’s reusable. I submerge all the plane parts after disassembly and another degreasing and let them sit for 3 to 24 hours, enough time for the liquid to break up any lingering rust bonds.
Nearly instantaneous flash rust is possible when you remove the parts, so wear gloves and protect the fresh metal with oil or more CMT 2050. If you do get any flash rust, it’s a breeze to remove with a Scotch-Brite pad or give it another soak in Evapo-Rust.
Next, remove any old paint or lacquer with a stripper for marine paint and lacquer, or with acetone. I’ve also heard good things about Citristrip. Be sure to check for lead in any paint, and wear a respirator. Protect the parts from rust after this step, too, and then reassemble the plane.
Stripper will not remove Japanning. That needs to be sandblasted away, which I fully discourage unless you know exactly what you are doing. Fortunately, I rarely find it necessary to remove japanning. Touch-ups, which I perform at the end of a refurb (if at all), do just fine.
—Eleanor Rose is a metalsmith and an artist-in-residence at Tennessee’s Appalachian Center for Craft. She’s @off_artisan on Instagram.
Photos: Barry NM Dima.
For more photos and information, click on the “view PDF” button below:
Sign up for eletters today and get the latest techniques and how-to from Fine Woodworking, plus special offers.
Download the FREE PDF
when you enter your email address below.

