

Marquetry Made Easy – FineWoodworking
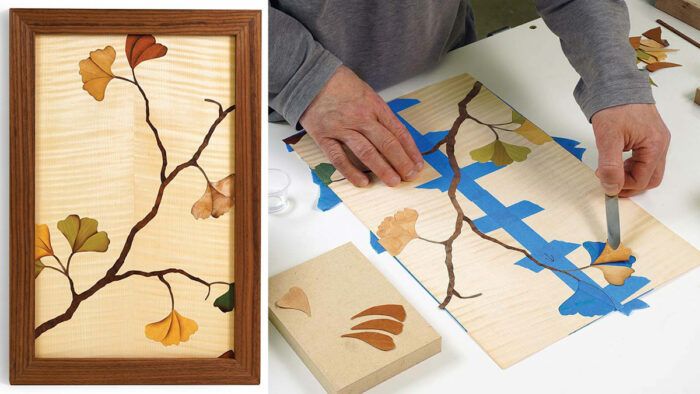
Synopsis: When it comes to marquetry, furniture maker Craig Thibodeau recommends the scrollsaw packet method as the most accessible and efficient approach for both beginners and experienced woodworkers. He outlines how veneer pieces are taped into a “packet,” cut simultaneously, assembled like a puzzle onto a substrate such as MDF or plywood, and then glued using clamps or a vacuum bag. He highlights finishing techniques like sand-shading to add depth, along with careful sanding and rehydration steps to prevent warping and achieve a polished final panel.
I started incorporating marquetry into my boxes and furniture in 2005 after taking classes with FWW contributors Paul Schürch and Patrick Edwards. Like its close cousin parquetry, marquetry is a form of decorative veneering. The difference between them is that parquetry is made up mostly of geometric shapes, while marquetry is generally composed of flowing, organic shapes and curves.
There are many ways to cut marquetry, using a wide variety of tools—from knife cutting with a scalpel to double-bevel cutting on a scrollsaw or even using a French chevalet, a machine made of wood and operated by hand or foot. After using them all, I’ve come to the conclusion that packet cutting on the scrollsaw is the most straightforward approach for beginners and pros alike.

After the pieces are cut from wood veneer and taped together, the pattern is pressed onto a stable substrate; this is usually plywood or MDF, but it can also be a sandwich of the two. That panel is then incorporated into a project. (The back should also be veneered to help the panel remain flat and straight.)
Just as there is a range of cutting techniques, there are many ways to press (glue) the marquetry pattern onto the substrate. I use a vacuum bag almost exclusively, but small to medium-size panels can be assembled using standard woodworking clamps and shopmade cauls made from 3/4-in.-thick MDF. I’ve demonstrated the clamp method in previous articles in this magazine, so I’ll show the bag method here.
Aside from the scrollsaw and the clamping setup, the rest of the tools are simple. While they aren’t mandatory, I recommend a specialized set of tongs called V-Tongs. Available at schurchwoodwork.com for just $10, plus shipping, this tool is perfect for handling the tiny pieces when you shade them in hot sand, and then when you assemble and manipulate the marquetry pattern.
An easy way to incorporate marquetry into your furniture is with a small panel for a frame-and-panel door. That’s what I’ll show here. Another great place for marquetry is a drawer bottom, which offers a handcrafted surprise.
A small panel can be cut and assembled relatively quickly. If it doesn’t turn out as you planned, it won’t take long to try again. In many cases you can simply cut and tape a new marquetry pattern and then glue it right over the last one.
I’ll also cover sand-shading, an invaluable technique for adding depth and character to a marquetry image.
| From Fine Woodworking #324
To view the entire article, please click the View PDF button below. |
 |
Fine Woodworking Recommended Products

Bahco 6-Inch Card Scraper
The size and thickness are what matter here. A consistent performer, this Bahco scraper is found in many shops we visit.
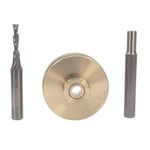
Whiteside 9500 Solid Brass Router Inlay Router Bit Set
Set includes solid carbide down-cut spiral bit (for chip-free cutting), quick-change bushing, template guide and complete instructions. Fits Porter-Cable, Black & Decker and any router with a Porter-Cable bushing adapter.
Sign up for eletters today and get the latest techniques and how-to from Fine Woodworking, plus special offers.
Download FREE PDF
when you enter your email address below.


