

Reach for the Belt Sander
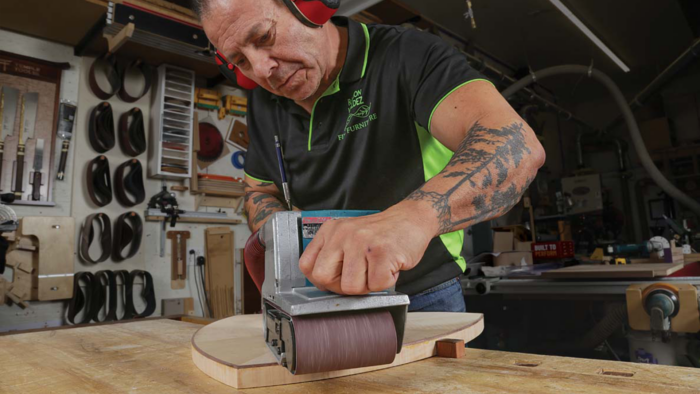
The belt sander is an incredibly useful and extremely versatile machine. It’s a tool that many are all too familiar with, particularly for its uncanny ability to wreak havoc with impressive speed. If you’ve ever witnessed a novice woodworker battling a belt sander, you’ll know exactly what I mean: sawdust flying everywhere, and perhaps even a near masterpiece that’s been quickly transformed into firewood. Don’t let its chaotic reputation dissuade you—this underutilized tool has a wealth of potential. Taming a belt sander comes down to a few simple modifications and proper operating techniques. This is the tool I reach for to transform rough edges and uneven surfaces into beautifully flat and smooth work that would make any artisan proud.
Soup up your sander
No matter the make or model, the heart of a belt sander is its platen, a roughly 4-in. by 6-in. piece of cork-backed sheet metal that’s attached to the bottom of the sander between the two wheels. This area is responsible for quickly making uneven areas flat and flush. The key to great results is a clean and flat platen, but I have found that the stock platens are inferior and can cause problems. The cork is too soft, and the sheet metal dents easily. Once that happens, the distorted metal can transfer lines and swirl marks onto the surface of your work.


To remedy this, I remove the sheet metal and cork and replace them with a graphite pad intended for industrial sanding. The graphite wears evenly and does not dent or chip, so no marks telegraph through the sanding. The graphite also works to reduce friction between the sanding belt and the sander. This prevents overheating, which can cause burn marks and quicker dulling of sanding belts. I prefer the self-adhesive type of graphite pads, but they’re getting harder to find. Other graphite pads work well but require an applied adhesive for attachment. One piece of graphite can last a long time with heavy use before needing to be replaced.

Proper panel sanding
Often in my marquetry work I use thin, commercial veneers. And I routinely use a belt sander to make them flat and flush to one another. At 1/42 in. thick, these veneers require a light touch and constant motion. The sanding direction should be with the grain as much as possible. I use a front-to-back motion when the grain is easily determined, and a circular pattern or figure eight when it isn’t, all the while keeping the weight focused over the platen. Being aware of this balance decreases chances of tilting the sander and gouging a workpiece.

It’s very easy to remove too much material with the belt sander, so I keep track using some simple hashed pencil marks. I draw light lines with a pencil across the workpiece, then sand those lines away. The pencil on the high spots will disappear quickly, and the pencil in the low spots will linger while the rest of the veneer is brought down to match. After the pencil marks are all gone, I use a low raking light to seek out any low spots the pencil may have missed. Another round of sanding may be required, but with well-set marquetry and the belt sander’s effectiveness, it’s a rare occurrence.


When it comes to sanding around the perimeter of a panel, I might surprise people with how far I run the sander off the edge. This isn’t to show off; it’s to keep the flattest part of the sander focused over what I intend to sand. For instance, when I bring solid-wood edging flush to a panel, the belt sander should be off the edge, focusing the platen over the solid wood. This keeps the rear wheel from oversanding through the veneer.
Sand edges with ease

Sanding edges with a belt sander seems like a preposterous thing to do until you find that you are getting smooth, dead-square parts off your bench and into the finishing room in record time. As with other belt sander techniques, letting the tool balance correctly on the piece takes practice. When I have more than one part that’s the same dimension—drawer sides, for example—I clamp the parts together and “gang-sand” them. This not only saves time, but it also creates a wider base to keep the sander flat for consistent results.

Softening, pillowing, or rounding edges also works incredibly well with a belt sander. Using steady concentric motions, I can take off material accurately by sanding close to my line with a coarse grit, then sanding directly to my layout lines with a finer paper.
| From Fine Woodworking #325
To view the entire article, please click the View PDF button below. |
 |

Fine Woodworking Recommended Products
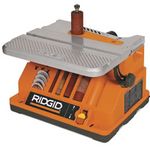
Ridgid EB4424 Oscillating Spindle/Belt Sander
With five spindles sized from 1/2 in. to 2 in. and a 4 X 24-in. belt, this sander has become a staple in many a shop Fine Woodworking visits.

Craftsman Random Orbit Sander
While this sander is among the least expensive models in the test, its performance ranks among the best. The stock removal was excellent, and dust collection was solid when used with a vacuum. It handles really smoothly, too, and has a tall body that fit my hand nicely whether I was holding it from above or around the waist.

Bosch 12V Trim Router
Trim routers are easier to handle when you cut the cord, and the Bosch’s compact, curvy shape and unique base give it unmatched control.
Sign up for eletters today and get the latest techniques and how-to from Fine Woodworking, plus special offers.
Download FREE PDF
when you enter your email address below.


