

The 5/7 Rule – FineWoodworking

During my days at Boston’s North Bennet Street School, I learned the go-to method for achieving precise curves with hand tools: the 5/7 shaping technique. It’s a straightforward yet powerful system of layout lines that simplifies even the most complex shaping process into a clear sequence of achievable actions. By integrating this method into my workflow, I was suddenly able to sculpt complex forms accurately. Now I use the 5/7 method to design, explore, and execute forms any time a shaping challenge defies the capabilities of routers, whether due to complexity, danger, or the exorbitant cost of specialized bits.
The magical nuts and bolts of the 5/7 method
If you have ever rounded a square piece of stock with a hand plane by first creating wide facets and then subdividing those a few times until the facets were tiny and you’d reached the curve you were after, you are familiar with the nucleus of the 5/7 method. The magic of the numbers 5 and 7 is in how they teach you to envision the right amount of stock to remove to achieve a given shape.

To get the gist of the 5/7 method, it’s necessary to learn some specialized vocabulary. Whenever you use this technique, you begin by drawing your target shape—we’ll start with a half round—on both ends of the stock. The points at which your target shape contacts the faces of the blank are shape-to points. You connect the mating points on the two ends of the blank to create shape-to lines. These lines will remain throughout the shaping process, disappearing only with the final smoothing.

The stock you remove is called a waste corner. And once it is shaved away, it leaves a new waste corner closer to the shape-to line. Finally, the mysterious 5/7 itself refers to the way you divide the space between your shape-to lines and your waste corners to locate the lines that will guide your shaping—the 5/7 lines.

If you divide the distance between a shape-to line and a waste corner into 12 equal sections, and then make a mark seven sections from the waste corner, you’ll have your 5/7 line. In practice, you don’t actually need to draw 12 tiny lines and count out seven of them. Instead, judging by eye, make a mark a little more than half of the distance from the waste corner to the shape-to line. Do that on both ends of your stock, and connect those marks end to end. You’ve just created a 5/7 line. Now you can start removing some wood.
Put 5/7 to work on a roundover
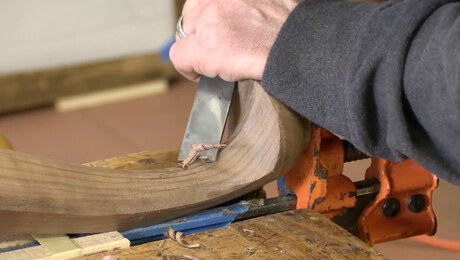
When you have drawn your first 5/7 lines, begin removing the waste corners, flattening all of the material between the adjacent 5/7 lines to create a set of facets. I often do this by sawing in some stop cuts and chiseling out the waste, but if your roundover is small you could skip the chisel entirely and make your first facet with the spokeshave. Once you’ve reached those lines and your facet is fair and smooth, take a look at your target shape and you’ll see that the center of your facet has hit the shape you drew on the end grain. Success!


Now take out your pencil and start drawing new shape-to and 5/7 lines. Draw a new shape-to line at the point where the target shape hits your facet, and extend it the length of the workpiece. On each side of your new shape-to line is a waste corner. Draw a 5/7 line on each side of the waste corner, clearly indicating what needs to be removed, and use your spokeshave to remove it.

Now your newest facets are also touching your target shape, creating the opportunity for another series of shape-to lines. At this point I usually don’t bother to draw a new set of lines; instead, I knock off the (now very manageable) waste corners with a rasp and work to the target shape by eye.


The final steps are more about surface treatment than shaping. A file, if used precisely—with the grain and on the push stroke only—will make quick work of the rough scratches made by the rasp. Once you’ve eliminated rasp marks and equalized the surface with the much finer marks of the file, move to the card scraper and scrape off the file marks. That should leave only 30 seconds or so of sanding with 220-grit paper before the piece is ready for finish.

You might be thinking, “Yes, but this could easily have been achieved with the right router bits.” It’s true! However, the real power of the 5/7 rule is the ease with which it can be applied to situations where using a router is dangerous, inadequate, or inconvenient—for example, large-scale or asymmetrical shaping, shaping on a delicate object, or, most critically, shaping an object that also tapers or curves in multiple directions.
Aspen Golann works wood in Rochester, N.H.
|
From Fine Woodworking #325 To view the entire article, please click the View PDF button below. |
 |

Fine Woodworking Recommended Products
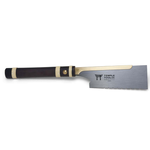
Little Demon Dozuki from Temple Tool Co.
The saw worked as promised. With such a fine tooth count crosscutting was a breeze.
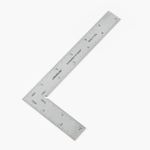
Veritas Precision Square
This precision square is incredibly versatile, from checking squareness to dialing in machine setups.
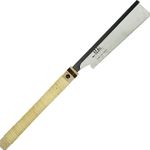
Suizan Japanese Pull Saw
A versatile saw that can be used for anything from kumiko to dovetails. Mike Pekovich recommends them as a woodworker’s first handsaw.
Sign up for eletters today and get the latest techniques and how-to from Fine Woodworking, plus special offers.
Download FREE PDF
when you enter your email address below.


