
Cyanotype on Wood – FineWoodworking

These flowers aren’t paint or pixels—they are a collaboration with the sun. What you see are the shadows of hundreds of real wildflowers as they blocked eight minutes of sunlight from photosensitive iron salts: ferric ammonium oxalate and potassium ferricyanide, to be exact.
The process, cyanotype, was invented in 1842 and is more commonly used on paper or textiles. Before digitization, this was a way to rapidly replicate prints from negatives, including architectural plans, or “blue prints.” In short, you paint a substrate with chemicals, lay down a mask, expose the piece to UV light, then rinse it with water. Any light-activated solution binds to the substrate in a beautiful cyan blue, and the non-activated solution washes away. This two-part cyanotype solution can be purchased at most art stores.
Printing on wood
There are many resources on how to print with cyanotype on paper and textiles, but few on how to approach wood. I found that most of the wood-specific prep has less to do with the print exposure itself and more with the rinsing after. Rarely do we as woodworkers submerge or run water over our finished projects for several minutes.

Addressing wood-movement concerns
Let’s go back to basics: Wood moves when wet. Plan for this with a post-rinse flattening strategy. Mask the end grain and unprinted areas with tape and plastic bags where possible, use water-resistant glue, and generally leave yourself wiggle room for possible warping. Since I glued up my cabinet before the cyanotype, some seams opened and my door warped, so I had to go back and refit it to the case.
Raise the grain before you begin
Another tricky thing is that both water-based solutions and a water bath will raise the grain. You cannot sand heavily after the cyanotype process without scrubbing away your print. To prepare, I lightly wet the surface of the wood and sanded several times over once it had dried. This raised and then smoothed the wood surface before I painted it with the solution. I sanded up to 220 grit.

Wood color
Because the beauty and detail of cyanotype relies on monochromatic contrast, I initially thought to whiten the wood in some way, but most of the whiteners I tried resisted the water-based cyanotype solution. In the end, birch’s natural light color worked just fine. I love how you can see the wood grain through the final print—something to consider when choosing wood and placing your mask. By its nature, the cyanotype process will always turn the base material a vibrant Prussian blue.

Making the mask
The possibilities are truly endless here, from digital print on acetate to holding your hand over the piece as it exposes, a mask can be anything that casts a shadow. Close contact between the mask and the substrate yields the crispest edges, so I flattened my flowers in a simple press for a week beforehand.

If you’re working with an image that’s easy to place in the near dark and on a flat surface, you can simply lay a sheet of glass over your mask to hold it in place. As my surface was curved and my design complex, I worked in the daylight, sticking my flowers to a packing-tape “skin” of my 3D shape, then wrapped my cabinet in the dark.

Applying the solution
For the most part, you can follow the same instructions as for application on paper or fabric:
- Mix the two-part solution according to the product instructions.
- Apply the solution to your substrate using a foam brush.
- Wait for the solution to dry completely in a dark room. You do not want to expose it to UV light yet.
- Once dried, place your mask onto the substrate and bring it outside for UV exposure.

I was generous with the cyanotype solution and didn’t find any benefit to multiple coats. The solution should appear a sickly green when you spread it, darkening very slightly as it dries. If it’s already blue, it has activated, so make sure you’re working in a very low-UV environment. A benefit to doing this technique on wood is that you can sand it back and start over!
Let there be light!
How much light? How much time?
The answer is testing, testing, testing. Because you can’t just pull another piece of paper from the pack or use more identical fabric from your stash, you’ll want to test your process on wood that is sanded and shaped similarly to your final project. For my tests, I used the sun, a strip test for timing, and the UV index feature on my phone’s weather app. Writing the UV index and exposure time on your test pieces will help you dial in the right combination for your finished piece.
Rinse
Any remaining solution on or in the wood will continue to activate and turn blue, so it’s time to remove the mask and rinse (not scrub!) in cold water until it runs clear. It’s a pretty magical moment.

Because wood is darker when wet, you’ll see the contrast improve as it dries.
Optionally, finish your rinse with some water with 3% hydrogen peroxide in it. That speeds up the oxidization process and gives you the instant gratification of a deep cyan blue. It happens naturally over several days, but I preferred to find out sooner whether or not my print had worked.

Finish
After the piece was exposed, rinsed, and dried, I knocked off the remaining wood grain hairiness with a brown paper bag. Lightly buffing in this fashion also kept the solution from soaking in too far, where it might not have rinsed out. That would have caused it to continue to activate (turn blue) after the mask was removed.
I didn’t experiment very much on the finishing front, but I knew I wanted to avoid introducing any yellowing, so oil was out of the question. In the end, I simply buffed the surface with paste wax to give it some glow. As I understand it, the blue color is now lightfast, though UV light will continue to impact wood as it ever does, darkening light woods and lightening dark ones.
If you try cyanotype on wood, I hope you’ll let me know in the comments! With so many variables, I have no doubt you’ll have figured out something new to share about this unique finishing process.


Fine Woodworking Recommended Products
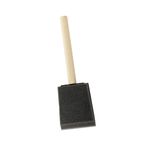
Foam Brushes
Foam brushes are great for applying a variety of stains and finishes, and the 2″ wide brush is the most versatile. Comes in a pack of 48.
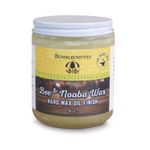
Bumblechutes Bee’Nooba Wax
Ease of Use = Very good
Sheen = Very good
Appearance = Very good
Non-Yellowing = Very good
Water/Stain Resistance = Excellent

Bahco 6-Inch Card Scraper
The size and thickness are what matter here. A consistent performer, this Bahco scraper is found in many shops we visit.
Sign up for eletters today and get the latest techniques and how-to from Fine Woodworking, plus special offers.


